At times, we accidentally delete our notes and other important data, or lost all of the notes stored in the Notes folder on iPhone due to an unsuccessful backup, a failed iOS 13 update or a factory resetting or maybe the phone is lost, stolen, or damaged beyond repair. This is a nightmare most of us have faced sometime or the other and if it hasn’t already happened, you probably lose sleep over the possibility that it might happen and what to do if it does.
Irrespective of whether you erased it by mistake or lost it due to an iPhone update or restore, what is really important is being able to retrieve and restore the lost notes.
1. Recover Deleted Notes from iPhone’s “Recently Deleted” Folder
2. Recover Deleted Notes from iPhone Directly
3. Retrieve Deleted Notes from iCloud or iTunes Backup without Restoring iPhone
4. How to turn on notes sync with iCloud or Gmail
5. How to move previous notes to iCloud
In case you have just deleted your notes or want to restore a note deleted less than 30 days prior, this method works best. Important to remember here is that any note deleted more than 30 days ago, cannot be recovered.
Step 1: Go to the Notes App.
In case you have not created any customized folders, you will see only the Notes and the Recently Deleted Folders.
Select the Recently Deleted folder.
Step 2: Once inside that folder, select the “Edit” button in the right upper corner.
Check mark the notes you want to recover.
Then click on the “Move To” button on the left lower corner. Specify any folder you want the Note to be restored to.
Step 3: Go back to the Notes Folder to view the restored Note.
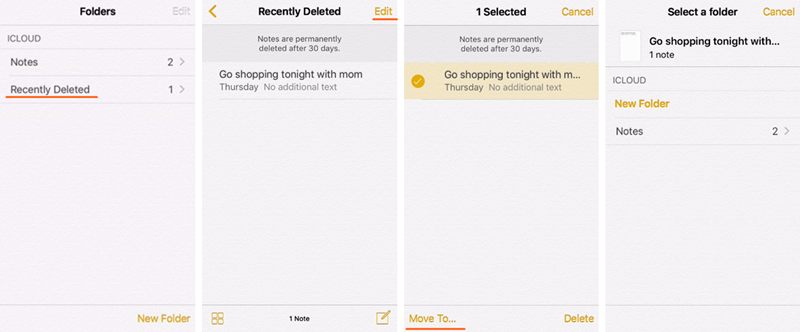
The “Recently Deleted” folder only remain the recently deleted notes for 30 days. If you want to get your less recently deleted notes back, you need the help of some data recovery tool.
This can be done with ease using the iPhone Data Recovery toolkit, which can deep scan the internal storage to recover the deleted data hasn’t been overwritten, including notes, contacts, messages, photos, videos etc. Now the newest iPhone 13, iPhone 12 with iOS 15 was supported as well as iPhone 11, iPhone X/XS/XR, iPhone 8/7/6/5 and earlier iOS version.
Download WinDownload Mac
The process is very easy to understand and work on and takes care of all such data deletion accidents.
Step 1: Launch the iPhone Data Recovery software and select “Recover from iOS Device” feature from the main interface.
Step 2: Connect your iPhone to computer through a USB cable and wait for the phone to be recognized by the software.
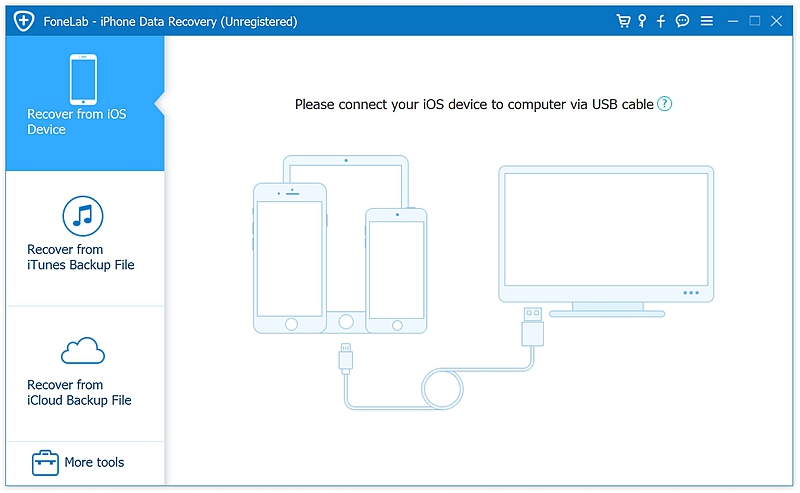
Step 3: Select “Note” directly or other data types you want to recover from either of the categories and click “Start” to scan.
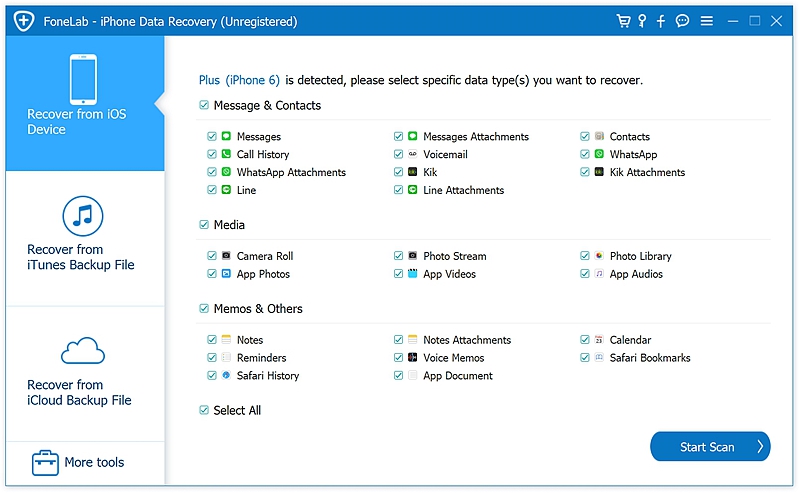
Step 4: The software with analyze the iOS device and then start the scanning process.
Once that is complete, a window with the recovered data with open up. You can check the data before restoring it.
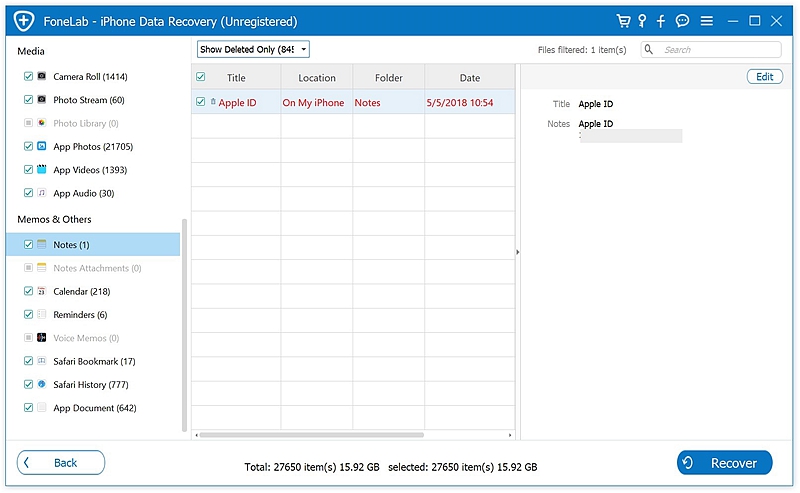
Step 5: Select all the data or just the ones you want to retrieve. Then click on the “Recover to Computer” button on the right bottom corner.
We know that the entire data can be recovered from an earlier time iTunes or iCloud backup if you can accept the headache of restoring your iPhone to an earlier date. However, with iPhone Data Recovery software, it is also possible to retrieve only one specific folder like Notes or a particular App without having to completely restore the whole device. For this kind of retrieval, please ensure that your data is constantly synced with iTunes or iCloud.
Download WinDownload Mac
Step 1: Launch the iPhone Data Recovery software.
Step 2: Choose “Recover from iTunes Backup File” feature from the main interface without connecting your iPhone to computer
Step 3: The software will scan the iTunes backup history you previously taken backup. You can also manually search for the iTunes backup file by clicking the “Select” button. Click on the “Start Scan” button.
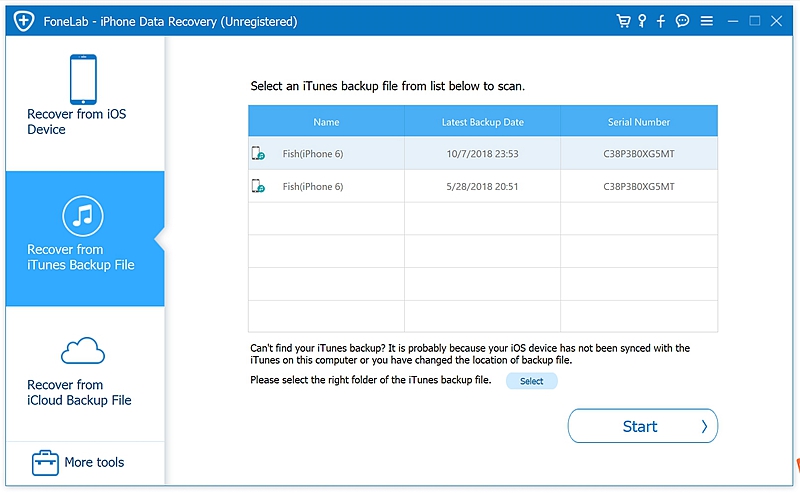
Step 4: It will scan the iTunes backup file for all the files available. Once done, it will show all the data that is available for retrieval.

Step 5: You can select the Notes you want to retrieve. Then click on the “Recover” button on the right bottom corner and it will export to your computer.
You can now either use the files from your computer or copy it to your device.
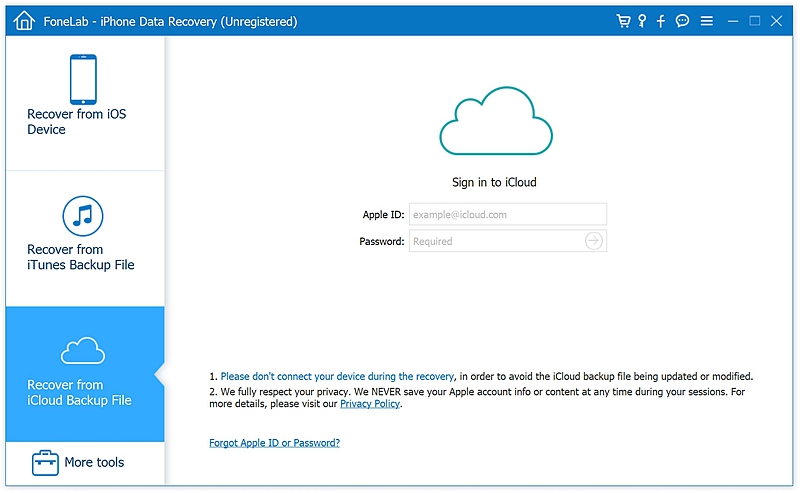
Step 1: Select the third tab “Recover from iCloud Backup File” on the left states. This will ask for your iCloud login id and Password.
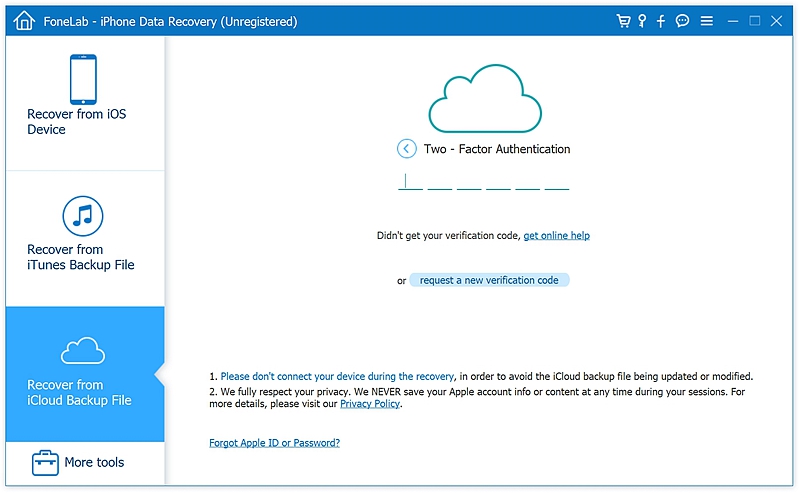
You have to enter the verification code which will show on your iPhone.
Step 2: Next a new window will pop up showing all the iCloud backup files list. Select the one required and choose the type of file to download it.
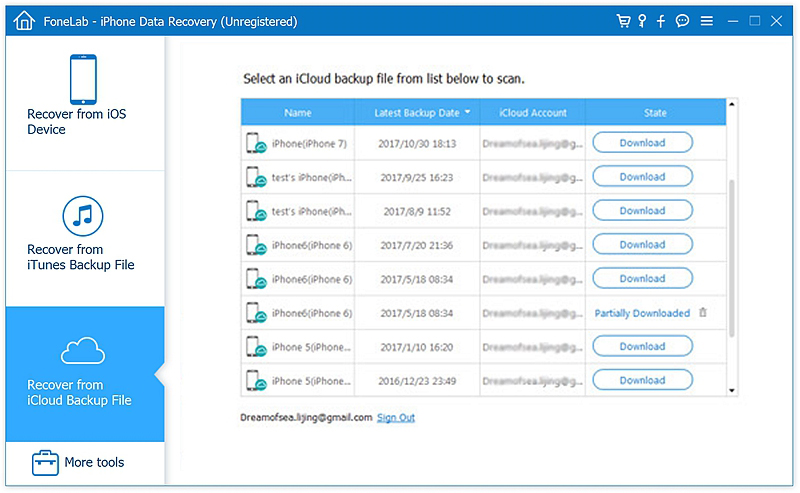
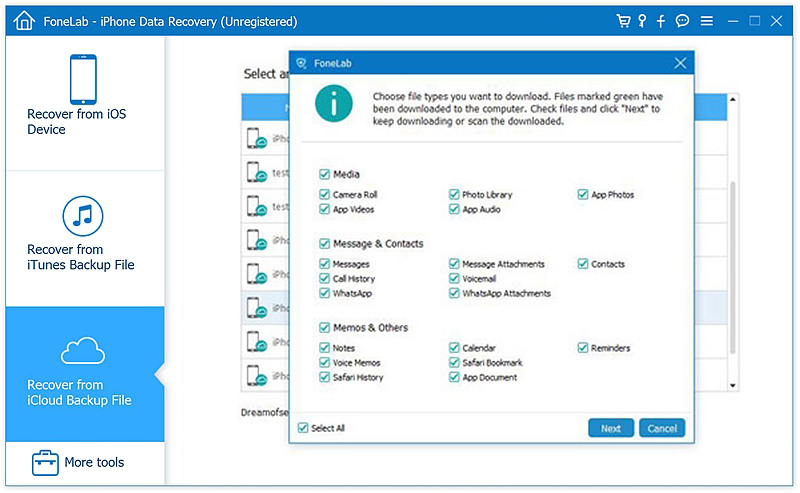
Step 3: Once done, the software will scan the file for all the data on it automatically. This will give you the entire backup.
You can manually sift through the file and select the Notes you want to retrieve.

Step 4: Then click on the “Recover to Computer” button on the right bottom corner.
When you get ready to sync your notes on iCloud, this can actually be done very easily and will not be that complex. The following steps will help you to walk through this process to ensure that all of your notes get synched and do not get lost due to accidental deletion of your notes.
– From your phone, go to settings
– Tap [your name] and choose iCloud.
– Find the ‘Notes’ option and tap on it to make it turn green. This will now mean that your notes all get synched in the event that you accidentally should erase them.
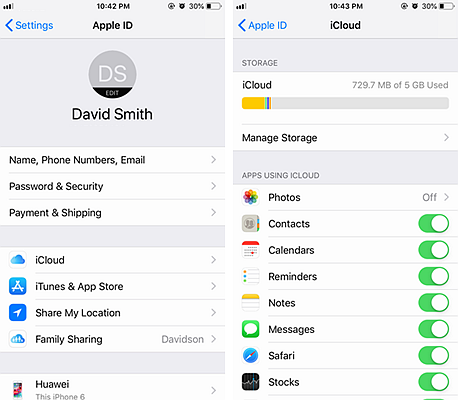
Although you have turn on the iPhone Notes iCloud sync, the previous iPhone notes still remain on the device and will not be synced to the iCloud. This can be a bit more of an involved process to move previous notes to iCloud.
Step 1. open up the notes app.
Step 2. Tap the arrow and find two sections that is called “On My iPhone/iPad” and “iCloud”. Notes under “On my iPhone” are stored on your iPhone while notes under “iCloud” will sync to iCloud.
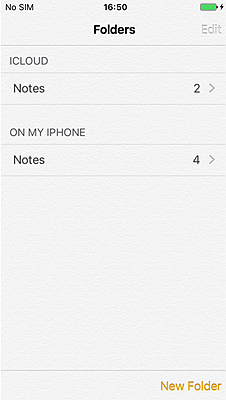
Step 3. Go to the “On My iPhone” Section and tap on the edit button, you will then be able to select the notes that you are wanting to save to iCloud.
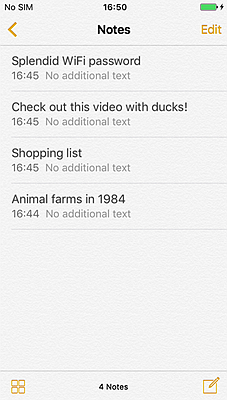
Step 4. After you have done this, then you can select the folder that you want to save to on the iCloud. Once this has been done, your local notes will now be safely stored on the iCloud.
After reading this article, hopefully, you are breathing and a little more relaxed that all of your notes that mean the world to you are still very much safe and sound. It is advised that in order to keep this from happening again, you should make sure that you do routine backups to prevent any serious data loss in-between backups.