Surprisingly, most people rarely make backups of important photos, applications, and other data. Your Android phone may be lost, stolen, bricked, or you may just want to reset your device. Moreover you may delete some data accidently. If these things happen, you won’t be able to retrieve important data once your phone has been cleared. In order to deal with these unexpected situations, some precautions will have to do without harm. While backup all the data on your phone, is the most necessary, in order to retrieve the important data after the loss of your phone. So, let us learn how simple it is to back up Android data with different tools.
Android device should have a Google account created in the initial setup process. A Google account helps a lot in the management of your Android device. For example, the backup feature, is one of the most important tasks Google can carry out. See how to back up your different data using Google account, Google Photos and Google cloud.
Part 1: How to Backup Android Data with Google
Part 2: Backup and Restore Phone Data with Android Backup & Restore Toolkit
1. Google account auto sync feature.
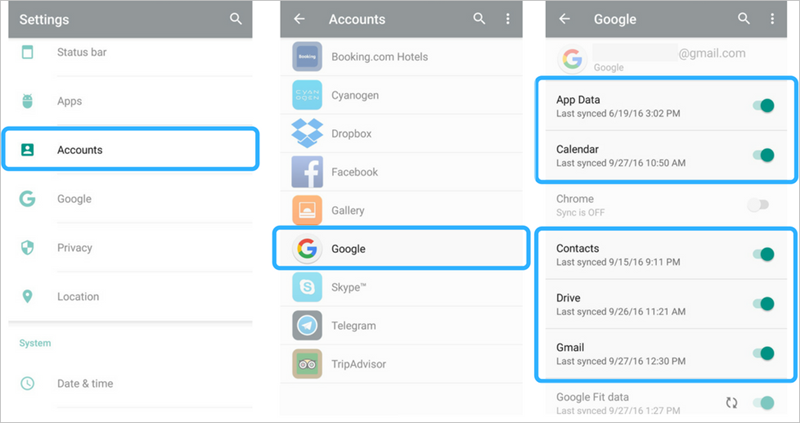
Google account will sync the created contacts, calendar, Gmail etc. if you associated with Google account and turned on the sync feature by default.
Step 1: Go to Settings > Accounts > Google
Step 2: Switch on the sync buttons of the data types you want. Then the several data types will be synced to your Google account.
As for the other data types such as your photos and videos, see the next passage.
2.Sync Photos and Videos with Google Photos
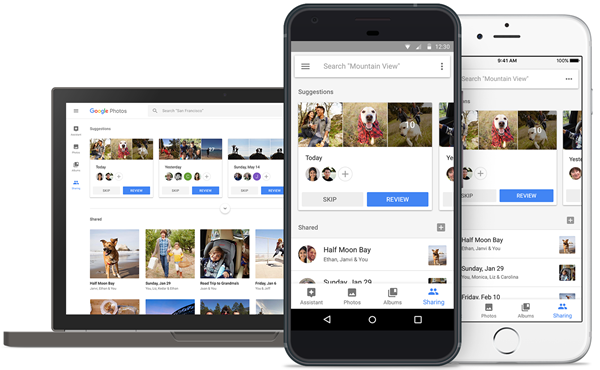
Google Photos is a good way to back up your photos and videos to cloud with your Google account. If you haven’t installed Google photos on your device, download it for free from the Google Play store. After installation, go to setting menu and set up the auto backup and sync. All the photos and videos on your Android phone will be backed up to the Google cloud automatically and you can access the photos on any device conveniently.
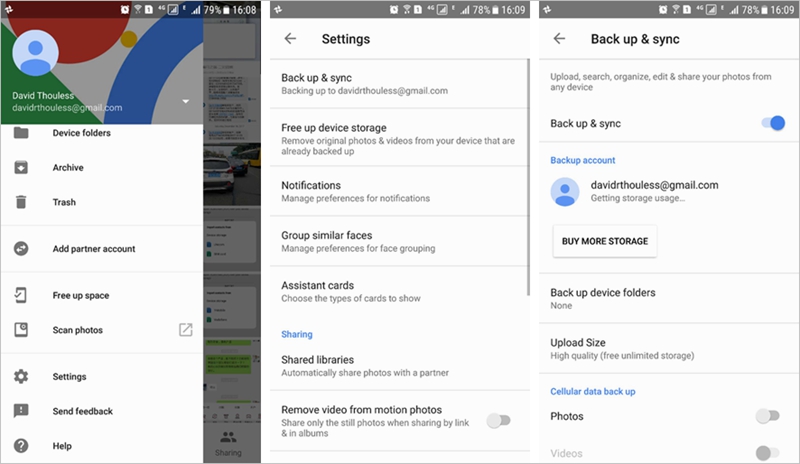
Step 1: Run Google Photos
Step 2: Sign in your Google account by tapping the top-left menu icon.
Step 3: From the menu options, choose “Settings” and then turn on the “Back up & sync”.
3. Backup phone Settings to Google Cloud
You can also back up Android settings and the application data to Google.
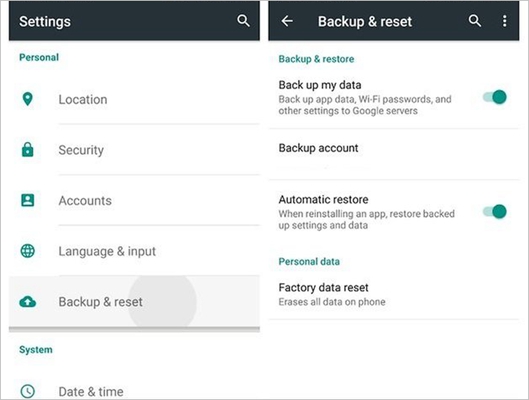
Step 1: Go to Settings and tap Backup & reset from the options.
Step 2: Turn on the switch of “Back up my data”.
Your phone settings synced to your Google cloud of your account automatically.
Note: The difference between Sync and backup
Synchronization helps to keep the file data in the same state between your Android device and Google account. That is, it is a bidirectional transmission process of data to ensure that all the devices associated with the account can display the latest information. If the data on the device is changed, the data in the Google account will change as well, and vice versa.
While the backup is a one-way transmission of data, whose purpose is to copy data from the device to the Google cloud. One of the changes will not automatically change the other side of the storage state.
Not every type of data can be backed up and restored with Google account backup restore method. For instance, you can’t backup SMS, call log and the App data.
If you want to make a full backup of your Android device, including SMS, call logs, App data such as WhatsApp messages, recommend you the Android Data Backup & Restore toolkit, which can back up absolutely most of the phone data as well as application data on your device. With Android Data Backup & Recovery toolkit, backing up your Android data is no longer complicated, you can make a full backup to computer or restore them to any Android device with one click.
Now, let’s see how to backup and restore your phone data with Android Backup & Restore toolkit.
Download WinDownload Mac
Step 1: Launch the toolkit on computer, select feature “Data Backup & Restore” from the dashboard.
Connect your Android device to the computer using USB cable. Then click on “Backup” button.
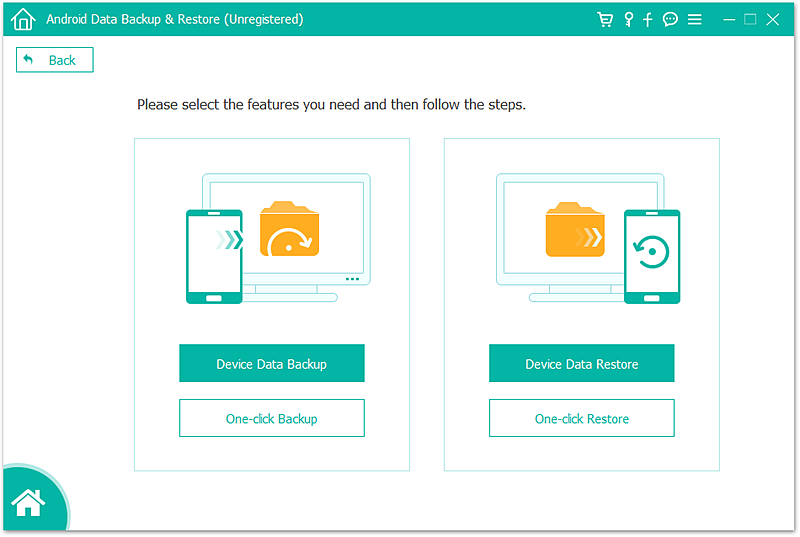
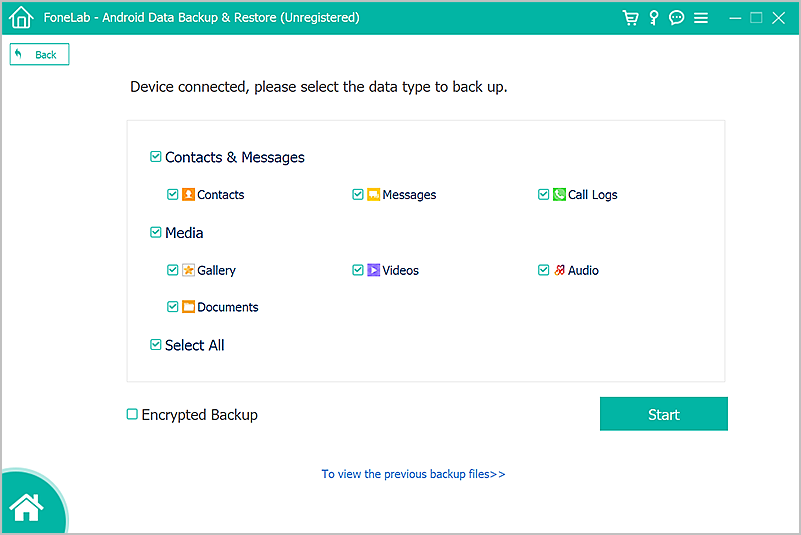
Step 2: Select the data types to back up
By default all is selected and you can manually check the checkbox to select specific ones. For Application data, you can selectively back up the App by clicking the rightward arrow. Then click on “Backup” at the bottom right corner.
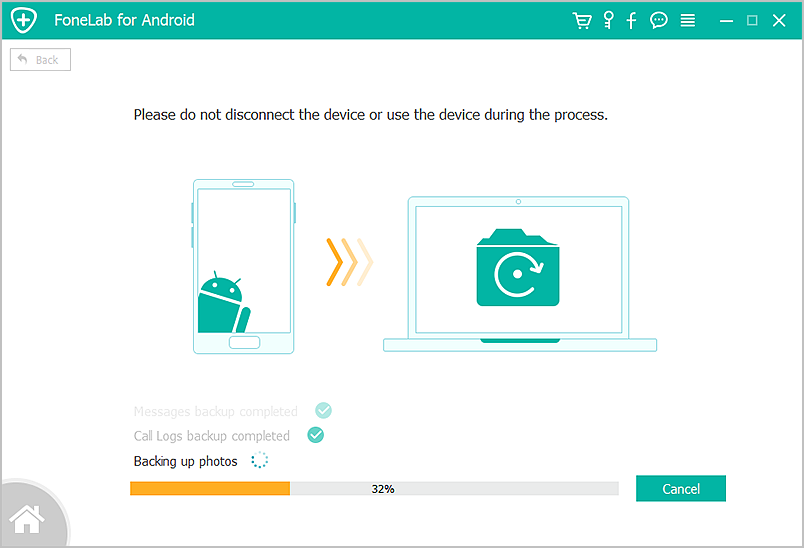
Step 3: It will take a few minutes to finish backup. Please don’t disconnect your Android phone, and don’t use the device or delete any data on the phone during the backup process.
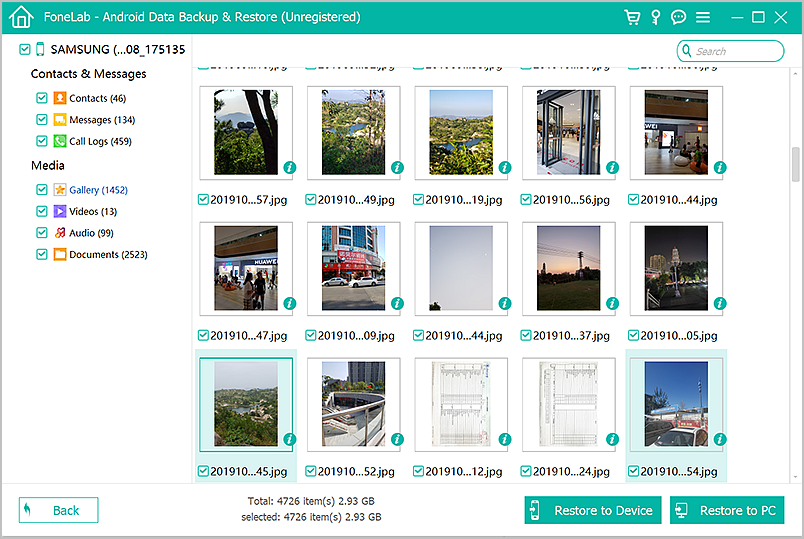
After the backup process completed, you can click on “View the backup” to check what’s in your backup file.
In case you accidently deleted some important data or factory reset your phone because of phone issue, you can easily restore your device data from the backup with the Backup & Restore toolkit. See how to restore your Android phone with the handy tool:
Step 1. Connect your Android phone to computer
Launch the program. From the main menu, choose “Data Backup & Restore”. Plug your phone into computer via USB. The program will automatically detect your device.
Once the software detects your phone, click on “Restore” to restore your backup file.
Note: You can click on”View backup history” to view the backup content without connecting your phone.
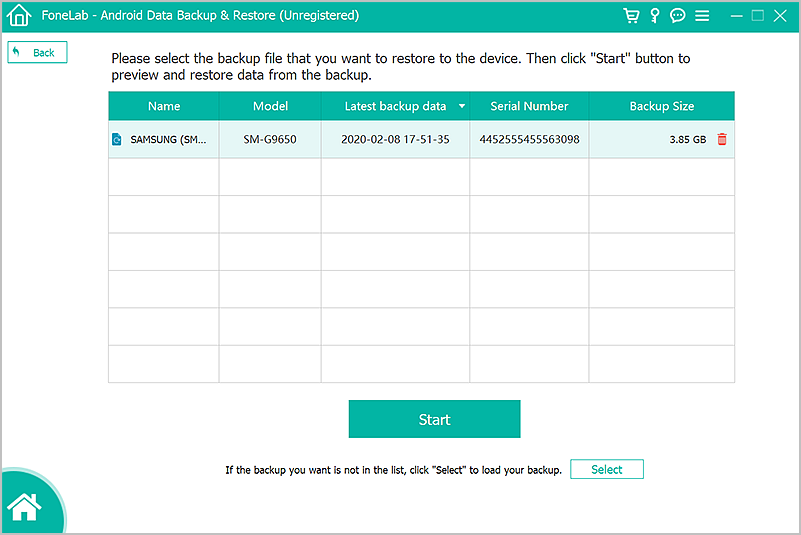
Step 2. Select the backup file to restore
By default, the toolkit will restore from the latest backup file. You can click on the dropdown icon at left top to view the backup files list.
Step 3: Select the data types you want in the left side window to view the content. You can also selectively choose the specific files you want to restore in the main window.
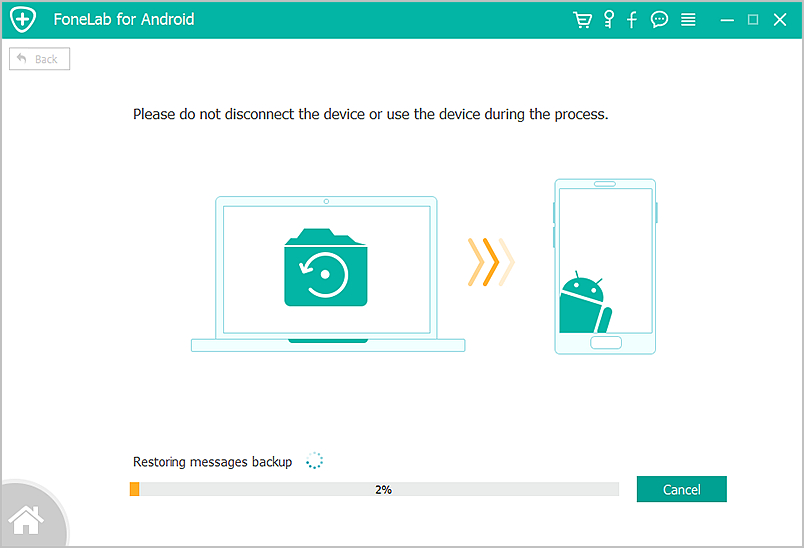
Next click “Restore” to restore the data you selected. Wait a moment for the good news.
Download WinDownload Mac
Compared to Google account, the way with Android Backup & Restore toolkit is more convenient and efficient. Google cloud cannot back up entirely full device data, such as the app data, message, call logs and so on. While the toolkit for Android Data Backup and Restore toolkit is simple to back up almost all the settings and data including photos, music, notes, contacts, messages, app data, documents etc. together with one click, giving you the wider freedom of backup and recovery.