Every time a new Android update drops we all want to be the first ones to get to update our phones and see if the bugs from the previous update got fixed or maybe if any improvements to the performance were made. Well, this does not always turn out to be a great day. Unfortunately though for some, this results in files (contact, SMS, image, video, WhatsApp, Facebook Messenger) getting lost into thin air.
Now apparently there are two ways to update your Android devices (Samsung Galaxy, LG, Motorola, Sony, Google Pixel). One is the OTA (over the air) method, and the other is from the factory image. Necessarily OTA update from your phone’s system settings menu does not result in loss of data but mere exceptional cases which result in it.
And manually factory image update must wipe all your data before the image installing. Creating a backup need to be taken before updating the software of your device. If this step is missed out, then users may have to suffer from data loss especially when updating using the Factory image method.
Fortunately enough no matter what upgrade method you choose there is still a way to recover this data.
1. How to recover lost data from Android phone after Android Update
2. Update Android: OTA or Manual update?
– 2.1 OTA update (without losing data)
– 2.2 Manually install firmware (will wipe all data)
In order to recover data users will need to resort to third-party software for help. Android Data Recovery toolkit is an application that do the entire process of recovering lost data files for you. This toolkit is compatible with almost every Android device from Samsung Galaxy, LG, Moto, Sony, Google Pixel, OnePlus. It has proven to be useful by many users and comes from a trusted source.
If you own a PC, then you can download this toolkit from the official website and install it before we begin the actual process.
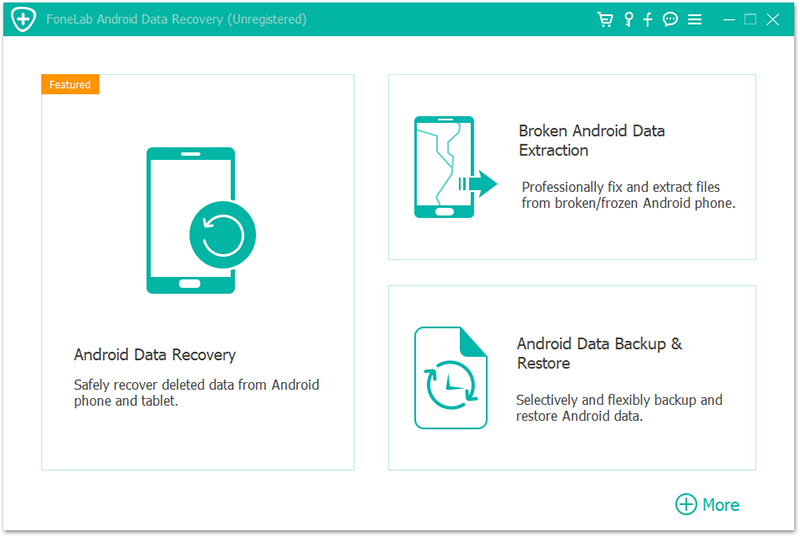
Step 1. Launch the software after the installation process is complete. An options menu will load before you. Choose the one that says “Broken Android Data Extraction” and click on it.
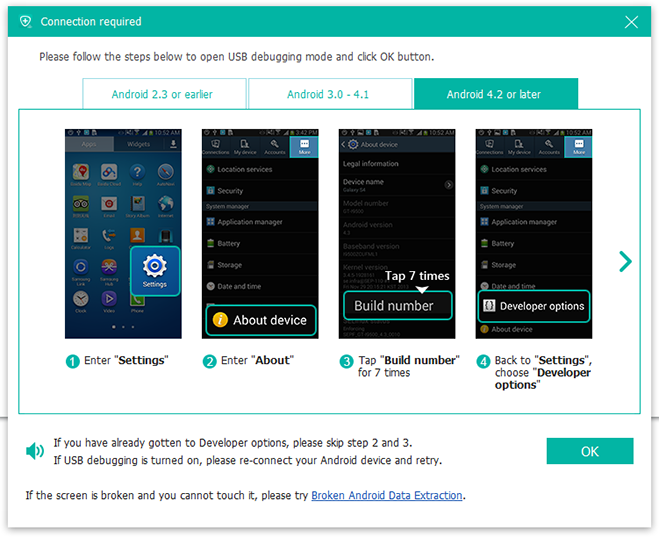
Step 2. Enable USB debugging on your Android device and then connect it to your pc via USB cable.
To enable USB Settings > About Phone > tap “Build Number” a few times before a dialogue box pops in front of you > Return to main settings page > now locate Developer options > switch on the USB debugging.
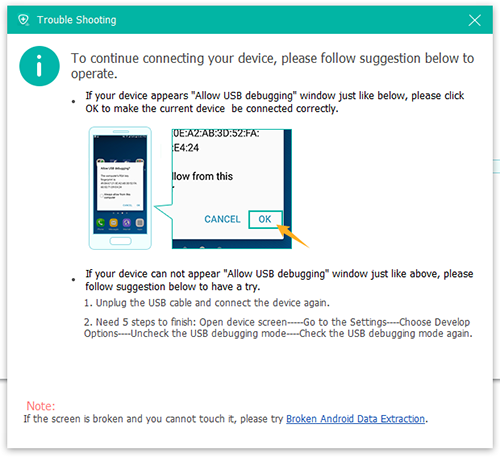
Step 3. The Phone will ask your permission to begin USB debugging press “Ok” to allow it.
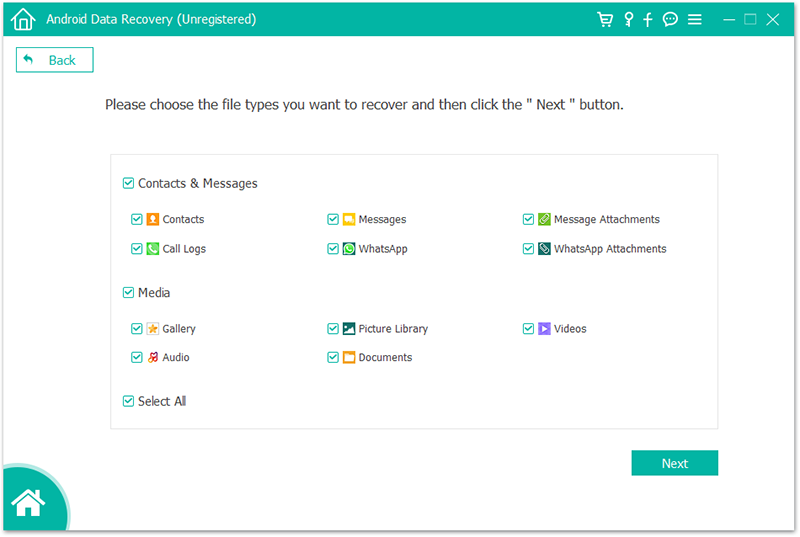
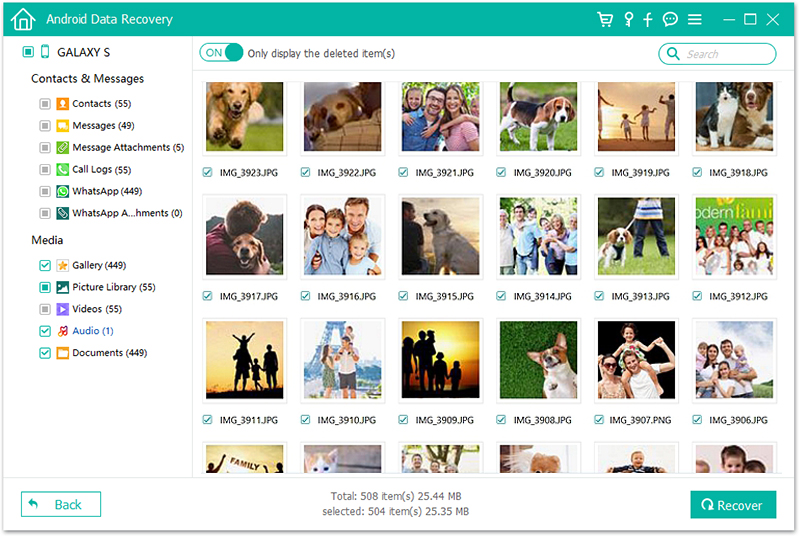
Step 4. The application will identify your device on its own and list down all the categories of your data that you can retrieve. Check the boxes of the ones you want to recover and press “Next.”
Step 5. The software will begin the data recovery by first scanning the internal memory of your device. On completion, all the recovered data is ready for previewing and retrieval. The software also briefs you about all the different processes taking place as you go along.
Step 6. Finally, choose any files that you want to recover and a location to save the files to and press “recover.”
Manual update method makes your device vulnerable to security and other problems. The OTA method is a much more protected and official method in comparison provided that you make a backup of your data before performing one. It is also important to ensure that your device is connected to the internet throughout and is fully charged.
Usually, the new software updates are either downloaded automatically to your device or are downloaded once you request one. Every time new software is dropped a pop-up message in either the notifications tab or settings appears. If for some reason this does not happen you can check the update through the following navigation:
About device >System updates > check for updates
Your phone will check with the developers, and if a new update is available, it will ask your permission to download it. Once you allow it the phone will begin to download the update in the background. When it is done downloading install it. If your phone’s battery is below 50 %, the device will not install it instead of asking you to retry when the phone is charged. Before you install, we strongly recommend you back up your data on a cloud drive or manually to a PC. Press “install,” the device will enter recovery mode that is the Android logo will pop up with a loading bar and the device restarts a couple of time. Do not turn the device off in any case and let the process complete smoothly. Once the device is done installing the new update, it will turn on again normally with your lock screen appears on the screen.
The manual update can be opted for once you have established that your Wi-Fi network is unstable or in the case you have rooted your device and there is no way to receive the OTA updates anymore. In the case of Samsung devices which may not receive the new updates, there is a windows software called “Odin.” This was internally released by Samsung itself to flash new firmware images to Android devices.
The first step is to look for the right version of Odin. Once you have found the right Odin version look for the firmware, you want to flash on to your device. Backup and Reboot your device to download mode and connect it to your PC via USB cable.
1. Launch Odin
2. Choose the firmware image files that need to be flashed
3. Click the box next to each file and click start.
4. When the process completes, press the “Reset” button above the ID: COM section.
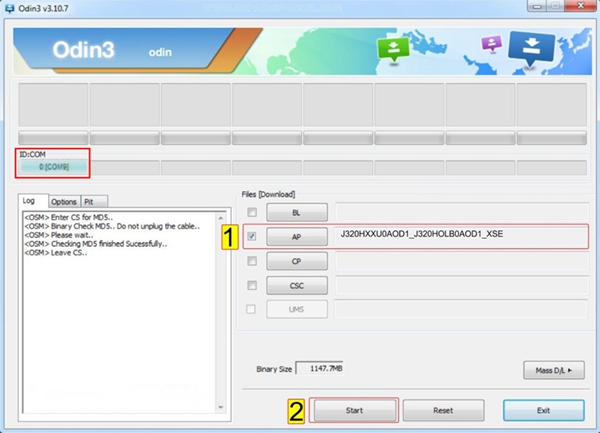
This will reboot the phone and you are done.