Did you know you can transfer your photos, videos or other important files from your phone to a computer?
Think of how long you would like to keep the photos you took at your graduation, birthday party, when travelling to a new destination or any significant event in your life. I know you would like to keep them forever. If you are an Android user, you should not worry anymore for it’s simple to transfer photos from your phone to a computer for backup. What do you need?
Part 1: Use a USB Cable
Part 2: Try Google Photos App
Part 3: Transfer Android Photos to Computer Using Android Transfer
Part 4: Use an SD card
You just need a USB cable and you are good to go. This is how to go about it, start by connecting your Android device to the computer via a USB cable.
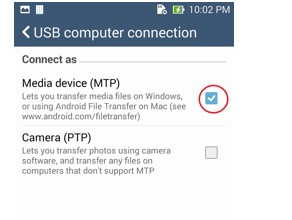
On your Android device, enable USB debugging and choose to connect as Media device (MTP) mode when you see the pop-up window.
How do you find the photos on your Android devices on your computer?
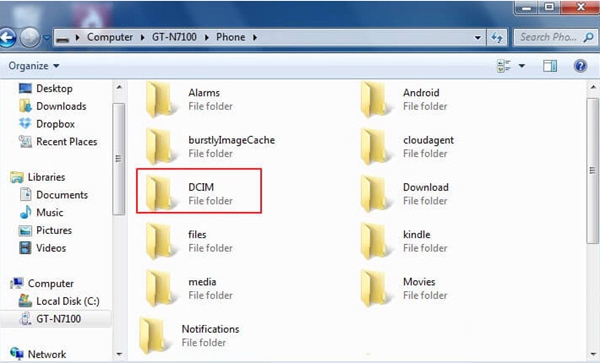
It’s simple; you will see a folder by the name DCIM in the disk that will appear on your computer. But wait, it’s not done yet! You need to select all of your favorite photos that you would like to back up and paste them into your computer.
Many Android devices have slots available for SD cards because the phones have small storage capacity. This storage space might not be enough for storing all your favorite photos and videos. Google Photos, which is highly used by many Android users, can be of great help when it comes to backing up photos. After backing up your photos using Google Photos app you have the right to access and download the pictures via PC anytime. That sounds good.
Download Google Photos app from play store on your Android device. Before installing the application, check first in your app list whether the app exists because, in many Android phones, the app is preinstalled. Then open the app is installed.
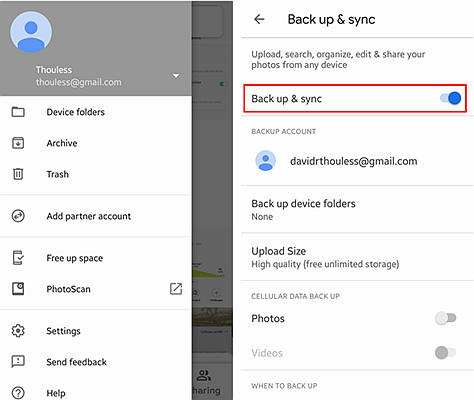
On the top, tap menu icon and sign in with your Google account, it will associate with the same Google account on your phone if you have already signed in.
Go to Settings > Back up & sync, turn on Back up & Sync. Google photos app by default will sync all photos to the cloud when you connect to Wi-Fi.
Now that the photos have been backed up, how do you access them from your computer? All you need to do is go to the Google Photos website on your PC browser and log in using the same Google ID you used when backing up.
Next select the photos you want and click Download.
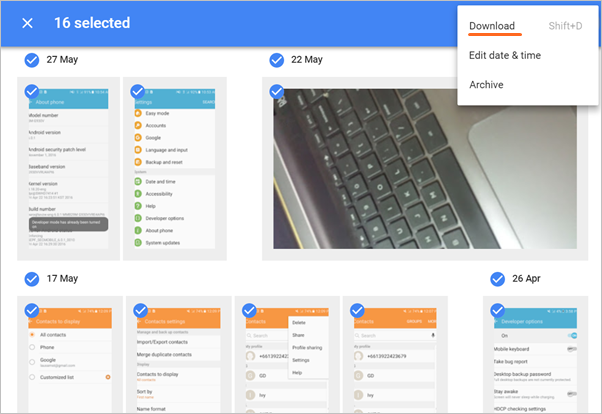
However, it’s advisable to always keep your Google ID safe and to change the password regularly. This ensures that all your photos are secure and it’s only you who can access them. Download the photos manually on your computer for easy access. It’s important to note that the downloaded photos will be stored in the “download” folder in a Windows PC.
With the new technological advancements, it’s not rocket science and it cannot take you 2 hours to back up your photos. Android Transfer, a Mac and Windows software, can get it all back. It is one of the best highly rated Android data management toolkit that can easily backup and restores your phone data and saves you the risk of losing your photos. Now more than 6000 devices are compatible with Android Transfer? Let’s look at some of the options available for you.
Download WinDownload Mac
Step 1. Install Android Transfer toolkit into your computer. Once you’re done with the installation, you should then open the software and Select “Transfer” on the dashboard.
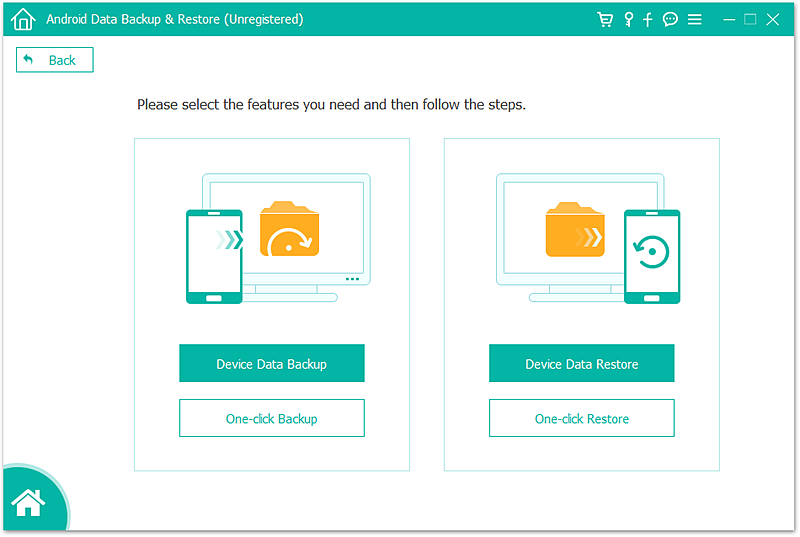
Step 2. Plug your Android device into computer. The software will notify you with a message that you have successfully connected your Android device.
Step 3. Click on the “Photos” tab. This will display all the photo folder available on your phone.
Browse and select the folder or photos you want to back up and then click on the Export icon then select “Export to PC”.
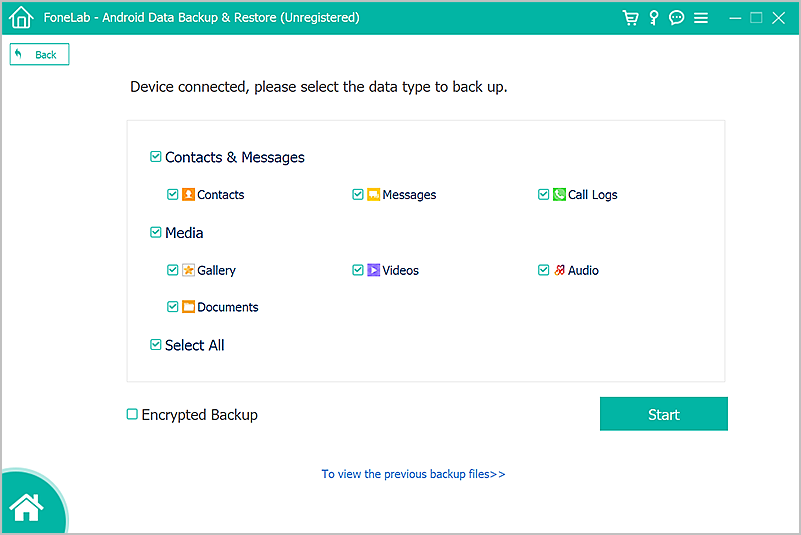
Next you will see a pop-up window, choose a place you want to save the photos on your computer.
Step 4. Then the software will start backing up all the photos. The backup process might take some time depending on the file size.
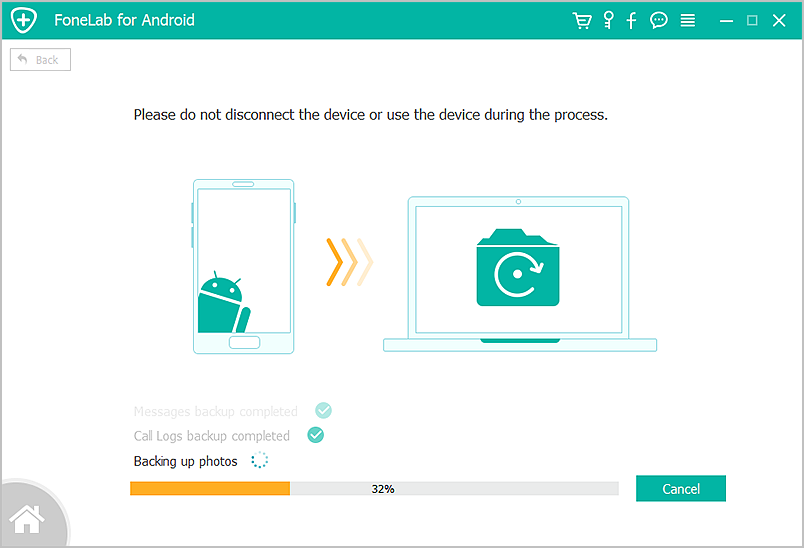
Just sit, relax and wait for the process to complete!
Though the most common way to transfer photos from Android phone to computer is the use of USB cables and Android manager app, some people may choose to save the pictures in SD cards in their phone and use an SD card reader to transfer them to a laptop. It’s still another cool way of doing it but in my own opinion I’d prefer using either Android manager app or using USB cable to back up my photos. You can choose whichever method you’re comfortable with.
By now you should have noticed the methods discussed above are very simple to use. So, if you are an Android user don’t hesitate to try them. For example, with Android Transfer and Google drive, you should not worry about your photos for once deleted from your Android device, they can quickly be restored.