With an Android, making and receiving phone calls is immensely easier. You get connected with the other contact within fractions of a second. But, several users keep complaining about the instances when they can’t make or receive calls on Android phone. At such moments, it is extremely annoying when you see everyone around being busy with their smartphones, and you can’t even make a phone call. Well, today we have tried to give you the steps through which you can quickly fix your Android.

Reasons Why Your Android Cause Trouble
5 Steps About How to Fix Your Android Phone
– Reboot Your Phone
– Check The Signal Indicator
– Clear Cache On Your Phone
– Reset The Network Settings (For Samsung Device)
– Factory Reset Your Phone
Instead of being frustrated with your Android problem, it is better to find out why your smartphone is causing troubles for calls. It may be possible that there is a tiny issue which is causing trouble, and which can be resolved quickly. If you are thinking why you can’t make calls on your new Sony or the latest Moto handset, then there could be one of the following reasons behind it.
· Maybe there is a temporary network outage. Try asking others around you. They might also be facing a similar situation.
· Maybe the network coverage is not proper in your area, or the signal strength is weak.
· You might have changed some settings, and you forgot about it.
· Corrupted cache or data files which may be causing hurdles in making phone calls too.
· A major software/hardware issue. If the below steps.
If the reason is the last of what we mentioned above, and your problem does not get resolved by the steps given in the following section, then it is better to consult a mobile phone expert.
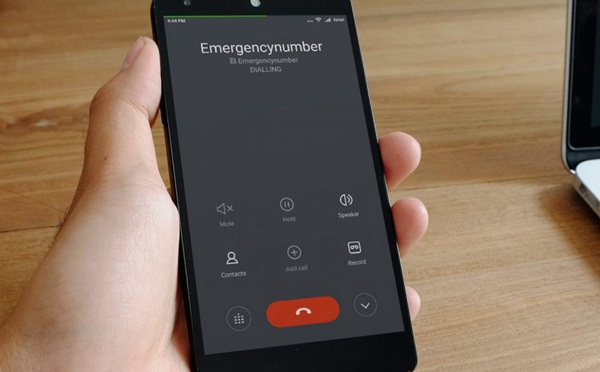
If you are wondering what has happened to your newly purchased Google Pixel, or why your new LG smartphone has stopped making calls, then don’t worry. Here we give five quick steps to fix your Android phone.
The first step towards troubleshooting your phone is to reboot. It’s simply a matter of one click, and you can resolve many things. So, if you notice that you can neither make any calls, nor you can receive if somebody else calls you, reboot your phone.
It is a safe step to do since it neither corrupts your data, nor it affects any running apps. In fact, if there is some minor hardware or software glitch, rebooting your phone will swiftly resolve it.
After your Android phone turns on and is ready to use, make an attempt to call. If everything goes well, then your phone is all okay now. If not, move to the step 2.
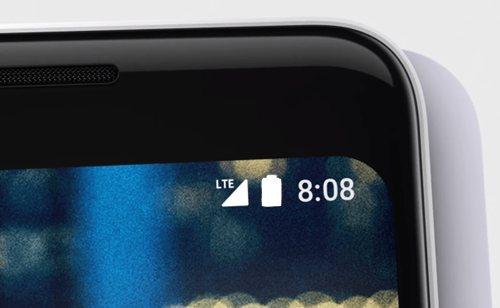
You may wonder why we kept this step at number 2. Well, this is because, at times, when your phone gets hanged, or there is a low signal strength, you will see the indicator pointing to 100%. It may be because the sudden dropping of signals causes your phone to get stuck. So, after you reboot, it is possible that you now notice lost signals. So you get the reason behind your Android calling issue.
If you noticed your signal strength first, before turning off your cell phone, then give it a reboot now. Maybe your phone’s reception is affected which will be restored after you reboot your phone. If no change occurs, then you can be assured that your phone is working fine. The actual issue lies with your service provider.
Sometimes, when an Android smartphone such as Samsung Galaxy goes through a software update, it may cause troubles due to the bulk of cached files. These files may be causing your phone to malfunction.
Deleting cached files one by one may take a lot of time. Usually, cache files are the leftover scraps of all the applications installed on your phone. After you receive a system upgrade, these apps may also be updated to the latest versions to stay compatible with your phone’s software. This procedure results in a lot of cached files and system junk which occupy most or all of your phone’s memory. Hence, you experience troubles while using your Android, which used to work seamlessly well before the update.
To clear cache on your phone, go to Settings > General Management > Storage, tap three vertical dots at the top and choose Storage settings, next tap Cache data and confirm to clear cache data.
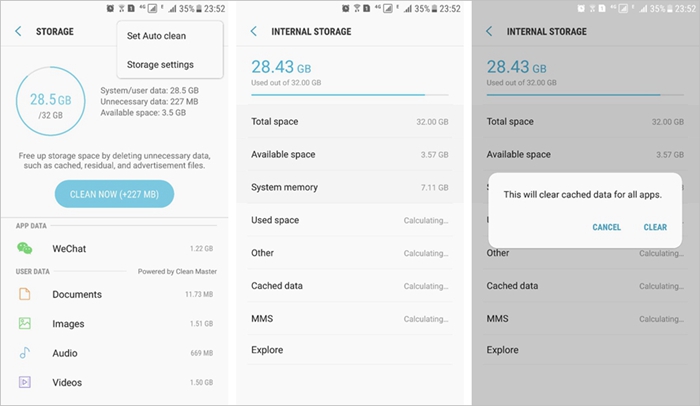
So, try clearing your phone’s cache and give it another reboot. After clearing cache, your phone may take a bit longer to turn on, but, relax. This will at least resolve your issue once turned on.
If you have rebooted your phone, the signal strength is fine, and you have even cleared the cache, but still you face problems, now is the time to move on to.
Resetting the network settings. You can make a safe guess that the problem is not with the network signals, nor with the system cache. So, you can move towards the internal settings of your handset.
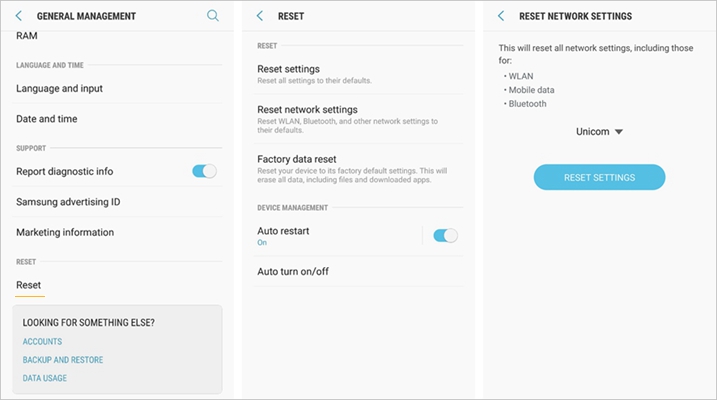
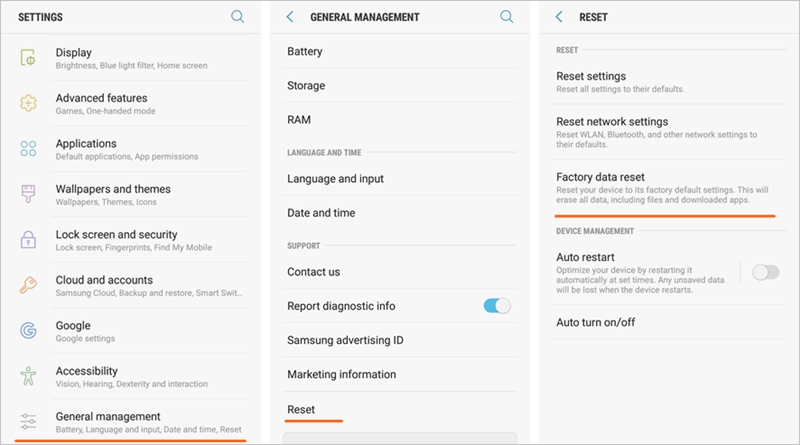
Just go to your phone settings, scroll down to reach “General Management > Reset > Reset network settings” and tap on the “Reset Settings” button. You will be asked to confirm proceeding towards resetting the network settings. Click “Yes” to move on.
Note: Ony Samsung devices have the reset network settings option.
Now, this something you can consider as a last resort. If you have tried all the four stages given above and none of them works for you, it’s time to give your phone a hard reset.
Restoring factory setting means your phone will revert to the same stage as it was when you bought it. Doing a factory reset clears up all third-party data files, any downloaded apps, and files stored within the internal phone memory. However, the data stored within the SD card may remain safe. Still, it’s better if you reset your phone after removing your SD card to be on a safe side.
How to Backup Android Phone to PC Before Factory Reset
Just go to your phone settings. For Samsung phone, go to “General Management > Reset > Factory data reset” and tap “Reset Device”. For other Android devices, go to “Backup & Reset > Factory data reset” and tap “Reset”.
After resetting is completed, reboot your phone. It will now function correctly if it was all about a firmware/hardware issue.
Still, if you face troubles, better consult an Android repair service.
Android phones may at times get hanged after any major minor updates or network problem. At such instances, you experience troubles making and receiving calls. After reading this tutorial, we hope you will remember these steps and will be able to resolve yourself when the next time you face such troubles.