niOS 12 of Apple has incorporated quite a number of other interesting and useful features. Apart from the introduction of the Memoji feature, Screen Time app and improved Apple Books, another impressive feature is the Voice Memos app. The improved Voice Memos app in OS 12 ensures it offers more than just a way for you to be able to record voice clips. The Voice Memos app has been transformed into complete audio recording and editing app.
Because of the capability of the app, it is now even more useful for a musician working on an idea and even for recording interviews. Moreover, you can use the app for creating short remembers for the things that you need to buy or for recording your conversation with a rogue police officer. Consequently, here will take a look at iOS tips: best ways to use voice memos on your iPhone. That includes how to record voice memos, trim voice memos and sync your voice memos to PC.
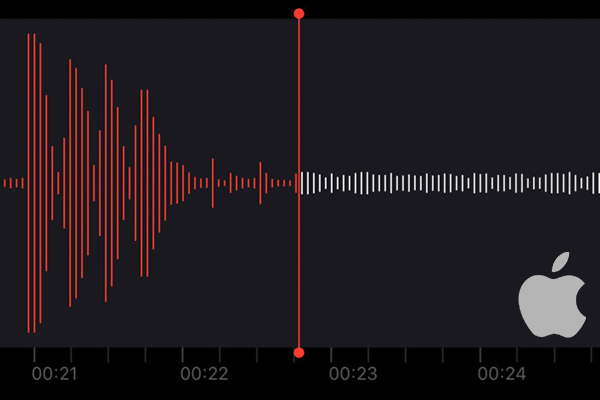
Record voice memos
Trim Voice Memos
Sync Your Voice Memos to PC
One of the best features of the Voice Memos app is the ability to be able to hastily record a thought at any time that inspiration occurs. In actual fact, if you have an iPhone that is 3D Touch-enabled (iPhone 6s and newer), then long-pressing the icon for the Voice Memos results in the summoning up of a shortcut command. This function enables you to immediately as possible to start recording. Alternatively, if you want to get started recording Voice Memos then you simply go to the Voice Memos app.
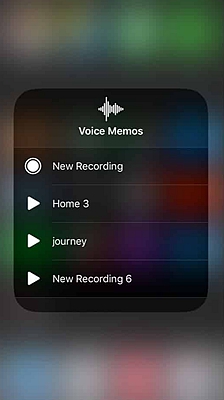
Step 1. Open the app for Voice Memos
Simply tap the app to open or launch it. If you have recorded memos, then you will see them from the scrollable list on the app.
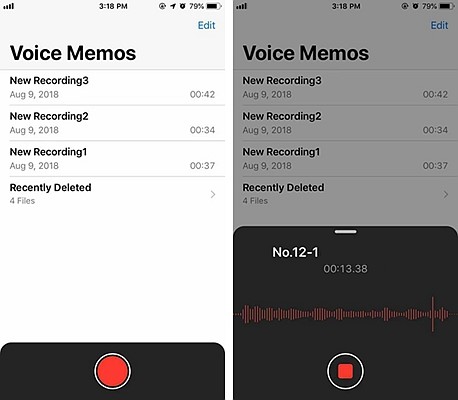
Step 2. Record a memo
At the bottom of the display or screen, there is a red button which you are supposed to press to start recording. If your iOS device is not activated to be in a silent mode then you will hear a sound or a chime after pressing the red button. Once you are done recording your interview or thoughts, simply again press or tap the red button for your recording to stop.
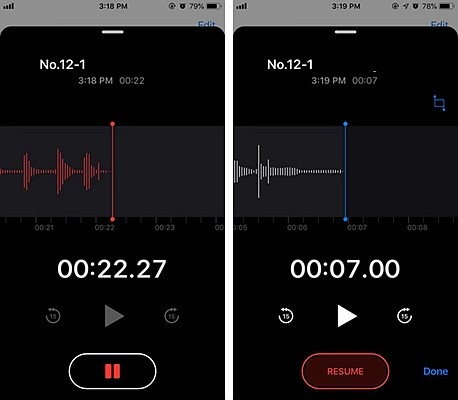
Step 3. Top of the recording list
Once the memo recording has been stopped, the new memo is displayed at the top of your memo recordings list. Your recordings have playback control to let you play, skip ahead (15 seconds), pause or rewind (15 seconds). Jumping ahead of the recording is also possible with the use of the finger to drag or move forward the control to your recording point preferred.
It is important to note that Voice Memos app by default saves a recording with your location name. If you want your recording to have a title that is more descriptive, simply tap on the specific recording name and an on-screen keyboard will be displayed. Write your preferred recording title and when done just hit the return button.
On your new recoding view, you will see that there are two controls provided. On the right, there is a trash can and if you tap it then your recording will be deleted. On the left of the view, there is a three-dot icon which if you click leads to the display of other various options. These options are edit recording, duplicate or share your recorded voice memo.
The ability to be able to trim a recorded voice memo is useful if only a specific recording section is to be saved or for removing information that is sensitive. Trimming a recording enables the sending of a recording to be easier and also to avoid the sharing of sensitive information. To trim your recording, here is the process.
Step 1. Go the recording or file list by opening the app. The list is visible.
Select your recording or file of choice.
Step 2. Click the three-dots section/option, more options menu, in the display’s lower left
Choose Edit recording.
Similar menu as before will be displayed. On the upper right or upper left of the view of the interface, there is a blue trim tool that you are supposed to press. The tool is similar to a crop tool found in most other apps. By pressing the trim tool, a waveform interface is opened.
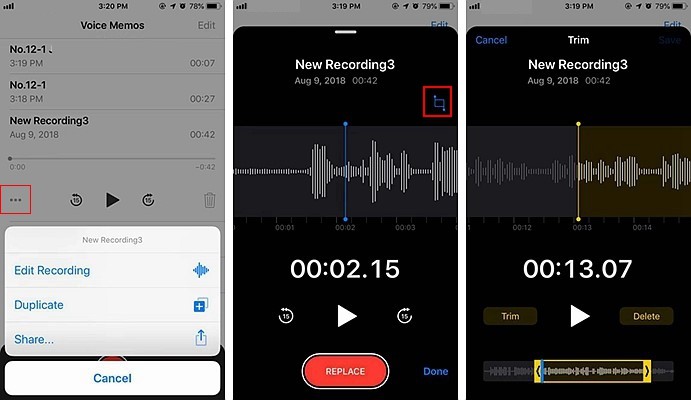
Step 3. At the bottom, a waveform is displayed for the purpose of representing your recording or file full length.
Over the waveform displayed, there is a yellow bracket having arrows pointed outwards.
Step 4. Pull in the audio edges section that you choose to work remember. Two options will appear which are trim or delete.
If you press the trim option, only the section of the audio that you have selected will not be deleted.
If you press the delete option then the selected section itself will be deleted.
Step 5. On the upper right corner of the interface or display, there is the Save option for you to press.
If you want to transfer your recorded voice memos to your computer, that is also possible by synchronizing your iPhone with your computer.
Using iTunes
If you want to send your memos to your primary computer, you can employ the use of iTunes.
Step 1. Connect your iPhone via USB/Wi-Fi sync to your computer.
Then open iTunes. Look for the icon representing your iPhone on the menu bar at the top and click it.
Step 2. From the sidebar, select or click the option for music.
Check the box Sync voice memos, if it happened to be not checked.
Step 3. At the bottom right corner, press the option apply or sync.
Your recorded memos are able to be downloaded to the iTunes library belonging to you. That makes it possible for you now to drag your memo voice recordings to the desktop or store them anywhere else.
Using Share Sheet
Another way you can transfer your voice memos to your Mac computer without the use of your iTunes is through the use of the Share Sheet. First, ensure that both the Wi-Fi and Bluetooth are turned on, on your Mac and iPhone.
Step 1. On your iOS device, open the Voice Memos.
Step 2. Select the track or file that you want to download.
Step 3. Tap the button for share.
Wait for the AirDrop icon of your computer to show and then tap it.
Your voice memo is then able to be downloaded to the download folder of your Mac.
Using iMessage
If the Mac you are using is older, does not enable cross-device AirDrop, at that point, you can employ the use of the older route that is tried and tested. Simply send yourself a message.
Step 1. On the iOS device, open the Voice Memos and select the particular track that you want to download.
Step 2. Tap the button for share and then tap the messages.
Step 3. By using the app for Mac OS X Messages, you are therefore in a position to open the sent message on your computer.