Have you ever deleted your messages unintentionally from your Android phone?
Did you lack a method of recovering it?
If yes then you are in the right place.
Due to certain reason such as accidentally deleted, factory reset or system update failed, rooting, system crash, etc., the saved important messages can be deleted or get lost. This can be a very disastrous situation, especially for an Android user. But the good news is, you can still recover the deleted messages.
In here you will learn everything about deleted text message recovery on Android. Learn how to restore deleted text messages on Android devices using effective data recovery software like Android Data Recovery toolkit.
1. How to recover deleted text messages from Android
2. How to back up your SMS to your Gmail account
When you find that some important text messages have been deleted accidentally. It is advisable to take action sooner rather than later. You should not add or delete the text messages in your Android device. Because the data might get overwritten, which means you can no longer get the lost text messages back.
To prevent lost or deleted text messages from being overwritten, you should adopt an SMS recovery tool such as Android Data Recovery toolkit. This tool kit will enable you to recover the lost and deleted content from your device immediately.
What is the heck is Android Data Recovery toolkit?
Android Data Recovery is a capable recovery solution for Android devices. It allows you to directly recover deleted data from Android devices internal storage. With this software, you can recover SMS/text messages, contacts, retrieve photos, videos, audio and other documents that have been lost due to all manner of situations.
Android Data Recovery toolkit has the highest success rate in the industry. NO! you don’t need any technical knowledge to use this toolkit. It has an easy to use interface that can be navigated by users of all expertise. Additionally, it is lightweight and does not use large amounts of system resources.
Generally, this toolkit can get you out of a few tricky situations when it comes to data recovery for your Android device.
How Does Android Data Recovery Toolkit Recover Text Messages
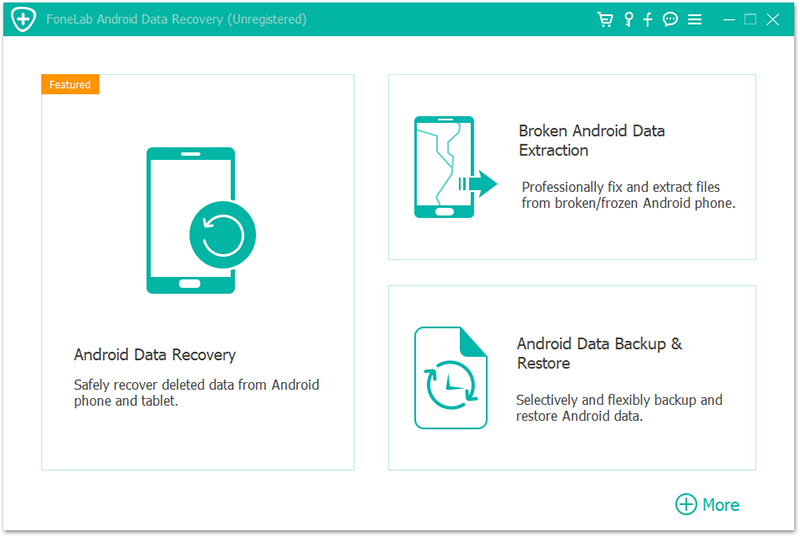
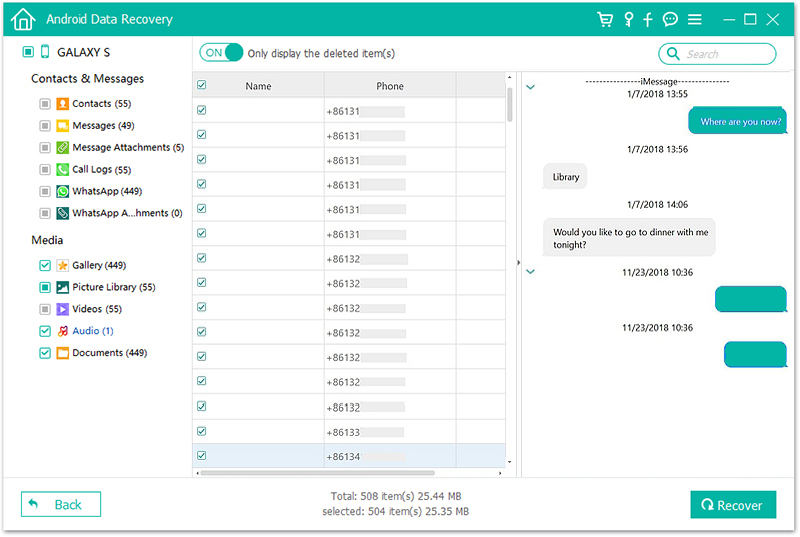
1. Download and launch the software on your computer and then connect your Android device using a USB cable. Once the toolkit is launched, go to its ‘Android Data Recovery’ module.
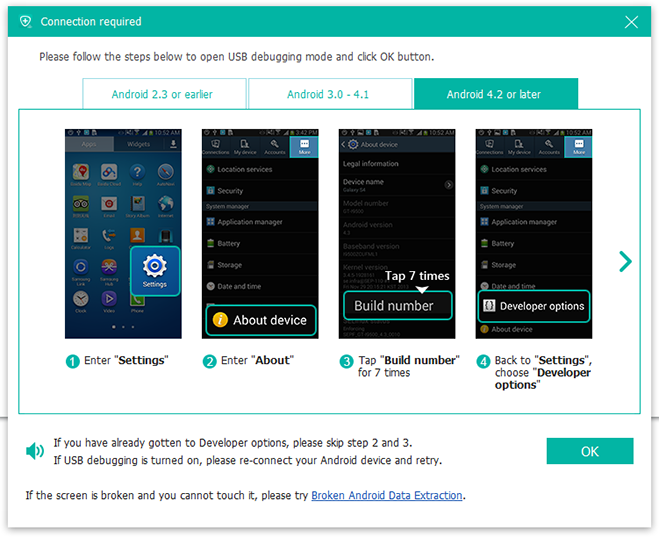
2. Allow USB debugging to be activated on your Android device. If it hasn’t then, visit phone’s Settings> About Phone tap the “Build Number” seven consecutive times. After that, go to the Developer options on your device and turn on the USB Debugging feature.
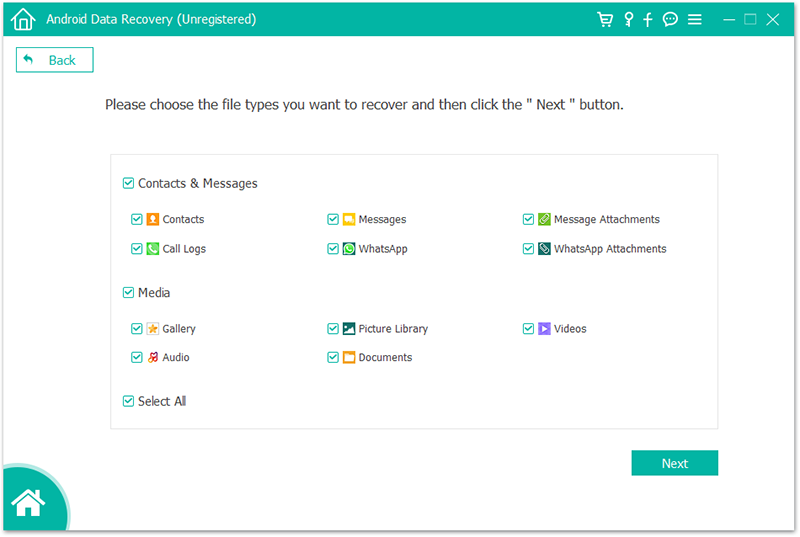
3. After connecting, your phone to the system. Select the type of file you want to scan and click ‘Next’ for the subsequent step in the data- recovery process.
4. Preview and recover deleted files. Before, getting the results you may get a Superuser authorization window appearing on your device. If you do, click “Allow”.
5. The final step is to select the files you wish to undelete and click ‘Recover’.
This tool kit allows you to preview files before recovery. Furthermore, recovery is guaranteed without overwriting any existing data.
You can back up anything to the cloud, but text messages usually go bye-bye when you switch handsets, delete them accidentally or factory reset phone. We want to make sure are you are backing your SMS messages.
Many messaging apps and services have the ability to backup or otherwise prevent the loss of your text messages should you lose your phone, but that’s not always the case. That’s why we are pointing you towards SMS Backup+, a free app in Google Play Store, that synchronizes your messages to your Gmail account for safe storage.
SMS Backup+
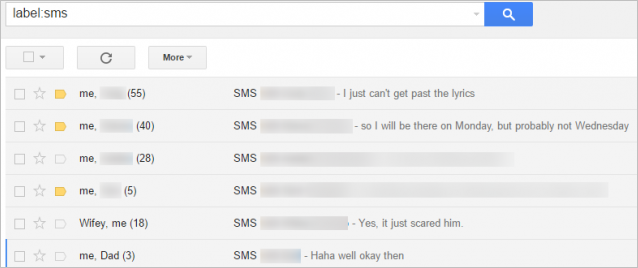
SMS Backup+ is super easy to use. Not only does the app backup your SMS messages but also your MMS one, as well as the call log. The idea behind it is to dump these items into your Gmail account with a custom Gmail Label to keep them around forever.
Let’s get started.
Step 1. Configuration of Gmail Account for IMAP Access
SMS Backup+ will require IMAP access to your Gmail account to function. For this to be possible you need to:
• Login to your Gmail account and Navigate to settings.
• Check Enable IMAP
• Scroll down and click “Save Changes”
Step 2. Install and Configure SMS Backup+
Go to the Google Play Store and download the app. After installing the application, start the configuration process and then launch the application.
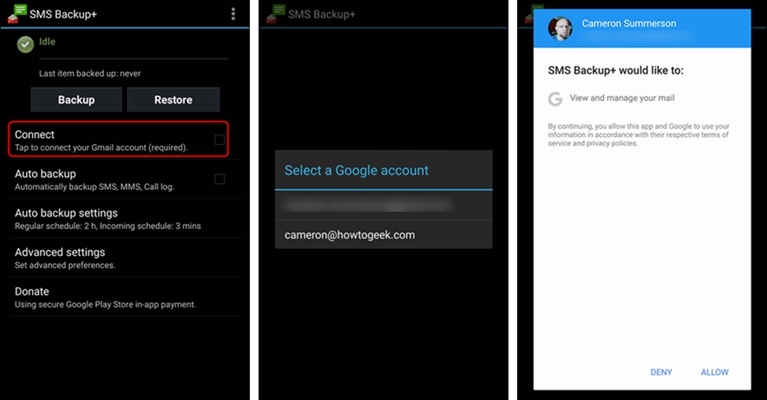
You first need to set up a connection to your Gmail account by tapping ‘Connect’. The account picker on your Android phone will launch and you will be prompted to choose the Gmail account you plan to use for backing up your SMS.
After choosing your account and granting the requested permissions.
You will have to begin backing up your SMS or skip the initial backup. You should definitely start backing up by clicking “Backup”. If you decide to skip the initial backup the SMS messages on your phone will be flagged as already backed up and will be ignored.
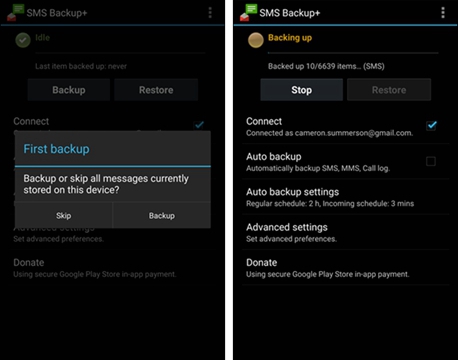
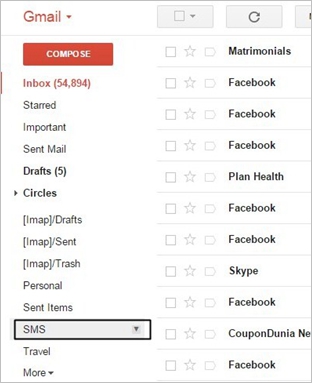
The backing process will start immediately. You don’t have to wait till the backup process is over to login to your Gmail account and check the process.
Step 3. Turn on Automatic Backups
This process is completely optional. Leaving things to manual backup is a sure way of forgetting. So, how do you turn it on?
• On the main Screen, tap “Auto Backup” to turn it on.
• Then tap on “Auto Backup settings” to configure the frequency.
The default configuration is a bit aggressive, and you may wish to decrease the frequency of the backup. You might set it to only backup when you are on Wi-Fi, if you’re a backing up a lot of SMS or MMS that will eat through your mobile data quota.
There you go! All you SMS are safely backed up on Gmail where you can easily retrieve them when needs arise.
