Samsung Galaxy S/Note attracts many users because of its portability and its ability to take snapshots. Many users use these phones to take moving pictures at different events so that they can share them with their social circle.
Sounds familiar? Are you one of them?
If you are then I know you sometimes feel worried about losing your photos, maybe it’s because of a system upgrade failure, system crash, virus attack or even accidental deletion. But don’t worry anymore, you can actually recover the deleted photos.
Although, you must keep one thing in mind. Once you have deleted the photos or files, you’d better not use your device until the data is recovered. The photo or picture is not deleted permanently, but space will be free for more data. Operations like taking photos will create new data which will overwrite the space, causing the lost data to be unrecoverable.
In here, we will share with you some of the ways, you can retrieve your deleted photos or videos from your Samsung Galaxy S/Note.
How to recover deleted Photos from Samsung without backup
Recover deleted photos via Google Photos
How to backup Samsung Galaxy photos
If you haven’t created a backup for your photos on your PC, then you can try Android Data Recovery software to find deleted photos from your Samsung Galaxy and recover them.
Android Data Recovery toolkit is a reputable Android recovery tool, that recovers deleted photos, contacts, messages, and more data directly from your Samsung device
Advantages of this Android Data Recovery software
How to recover deleted photos from Samsung Galaxy S/Note Step by Step
Step 1: Launch the program and connect your Samsung Galaxy S/Note
First, you need to download, install and launch the Samsung Data Recovery program, and then click “Android Data Recovery”.
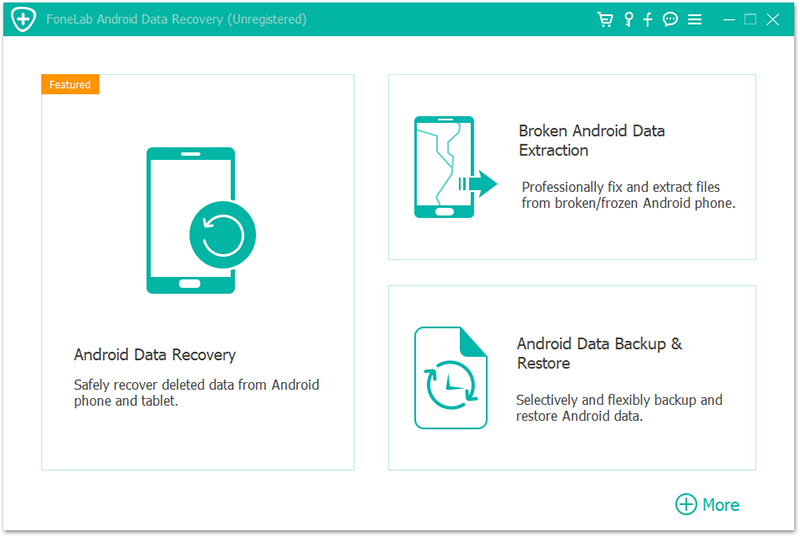
After that, you need to connect your Samsung Galaxy to the computer via a USB cable. Wait a few seconds and the program will detect your Samsung phone automatically.
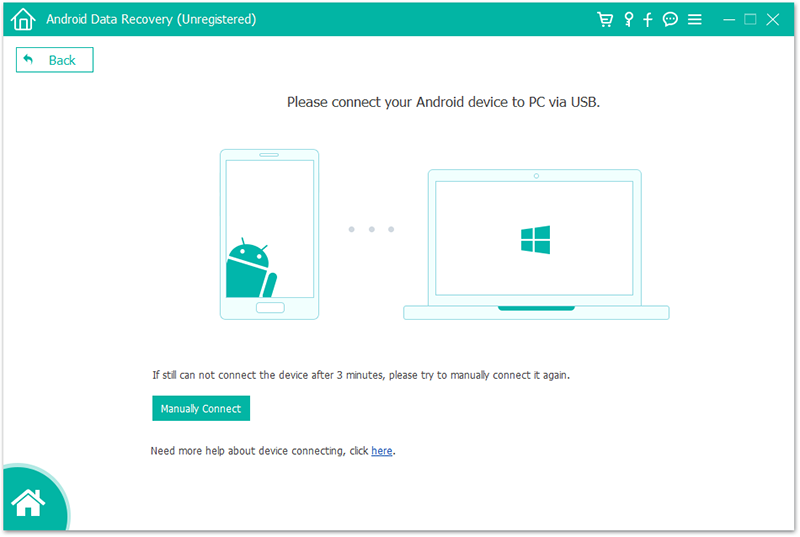
If after connecting your Samsung phone, the program fails to detect it, then you will have to check your phone to enable USB debugging.
Step 2: Select the photos to scan
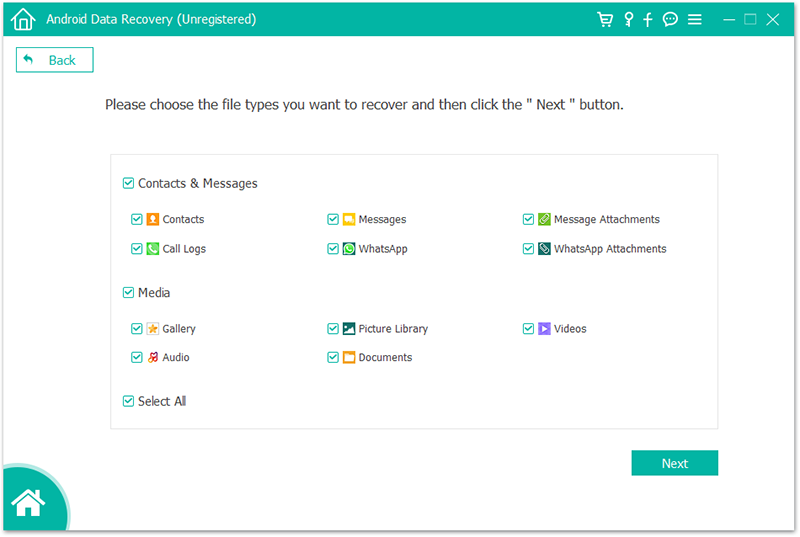
After successfully connecting your phone, select the file type you want to recover. Here our main concern is to recover photos, so tick the “Gallery” and “Picture Library” to scan. FoneLab is able to recover the deleted gallery photos from your internal storage and SD card. Also, you can recover other files types that contain photos by selecting them.
At this point, you will have to root your Samsung Galaxy to allow this program to scan your phone data. After successful rooting, this software will require your permission to scan the deleted data. Activate the setting for “granting permission” on your phone, then click “Retry” to proceed to the next step.
Step 3: Preview recovered photos
Once the scanning of photos is done. Click “Gallery” or “Picture Library” on the left side and you will be able to view all the photos on your Samsung Galaxy phone, including deleted and existing photos.
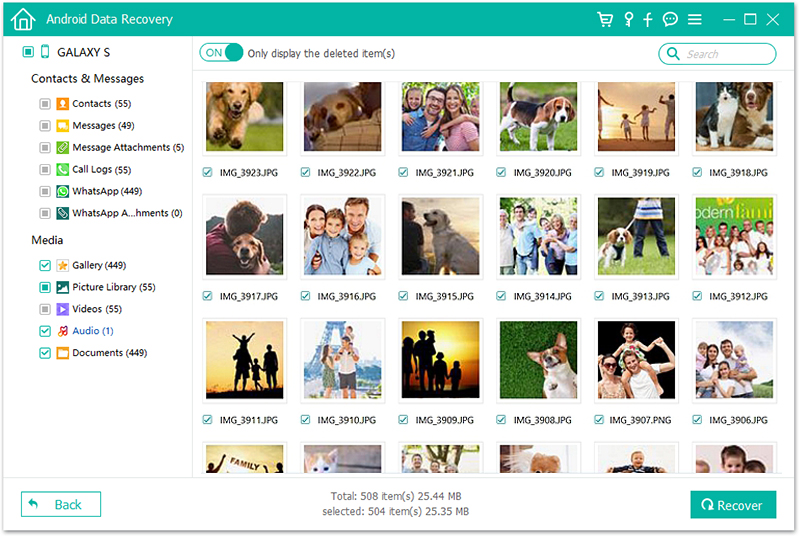
Step 4: Recover deleted photos from Samsung Galaxy S/Note without backup
Select the deleted photos you want to recover, and click “Recover “button, to start the downloading process of recovering deleted photos to your PC. You can then keep the downloaded photos on your computer for backup.
In this section, we are going to learn how to recover deleted photos from Samsung Galaxy S/Note via Google Photos.
You may be able to recover deleted photos from Samsung Galaxy phones using the Google app until 6o days of deletion. However, this will be only possible if you linked your mobile with Google account. When your phone is linked to a Google account, every data in your phone is saved on the cloud.
Additionally, you can retrieve the deleted photos on Samsung Galaxy S/Note from Google photos as they were before deletion. All you need to do is to synchronize your camera roll with the Google photos app. The best part of the Google app is that you can have access to all your pictures from anywhere and on any device as long as you can log in to your Google account.
However, all of this is possible only if you synchronize your camera with the Google photos app.
Steps on how to recover deleted photos on Samsung Galaxy S/Note with Google Photos
Step 1: Open and Synchronize Google photos app
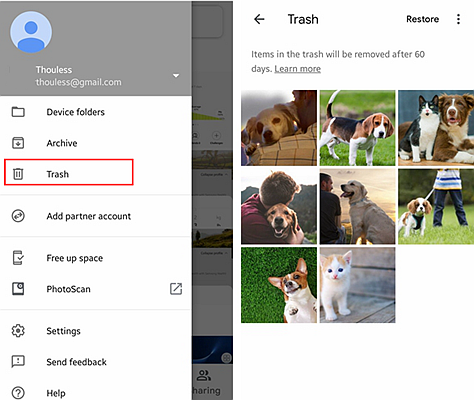
First, you need to open and synchronize the pre-installed Google photos app on your phone. When the app opens, you will see three horizontal dots which will take you to the “Menu” option, when you click it.
Step 2: Click “Menu” with separate options
Among the separate options, there is a Trash folder which saves deleted photos for 60 days after the initial deletion of the photos. Check the folder to confirm if your deleted photos are stored in or not.
Step 3: Restore
Once you have found the deleted pictures you were searching for, choose the photo and click the “Restore” button. After a few seconds, you would have successfully restored deleted photos.
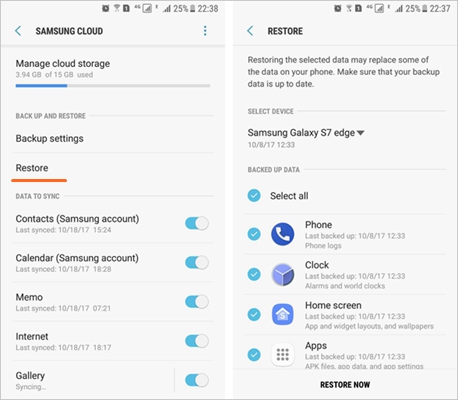
When backing up your Samsung Galaxy S/Note to Samsung Cloud, all your data will be copied and a restore point created. You can use this restore point to restore your data or set up a new device.
Step 1: On your Samsung Galaxy S/Note home screen, swipe up apps or find apps.
Step 2: Choose Settings. Open settings and selects Clouds and accounts or Samsung Cloud.
Step 3: Chose Back up my data or Backup and Restore. elect Back up data.
Step 4: Choose the data you would like to, in our case is the photos and then choose “Back up”.
Step 1: Connect your Samsung Galaxy to your PC via a USB, and then allow access on your device’s screen.
Step 2: You can connect your phone in a different number of ways, from transferring media files to connecting MIDI devices. Make sure your phone is well connected, then swipe down from the top of the screen and tap on the connection that has appeared. Tap on the option that allows an MTP connection.
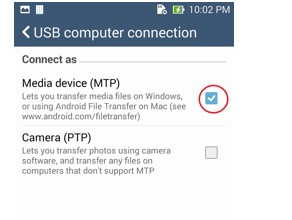
Step 3: Once your Samsung Galaxy S/Note has been connected to your PC via an MTP connection. It will now appear on your PC as one of the available drives. Now your device is available for view on your computer. You view the device by clicking on My computer or going to Start> My Computer.
Step 4: Click on your device to see your phone details. If you have an SD card, it will also appear among the devices.
Step 5: Now you’re able to view all the files on your phone. Your photos will be found under the folder DCIM. Furthermore, if you save your photos to your SD card, they will be under DCIM in the SD folder and not the phone one.
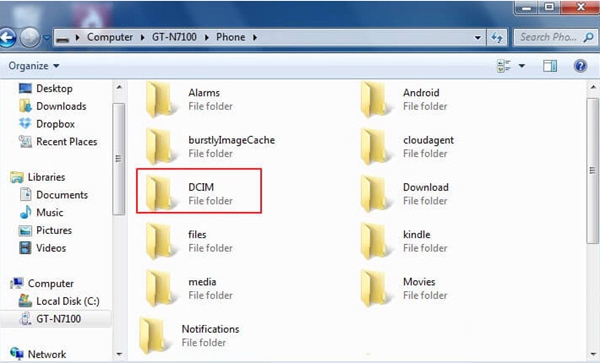
Step 6: You can drag and drop your photos form your phone, to any location you want to save them on your PC.