You can’t lose important text messages stored on your Android phone, whether it’s of work or daily life. Unexpectedly in fact, the Android messages were accidentally lost for a variety of reasons, such as factory reset, water damage or being stolen, or accidental deletion. But you may never thought of backing up your SMS / MMS regularly, by which once the text messages get lost, the backup can easily previewed and restored to your Android phone. So, in the following sections of this article, we’ll show you how to back up Android text messages.
Part 1: Backup Android Text Messages to Computer with One Click
Part 2: Preview and Selectively Restore Backup Text Messages
Part 3:Backup and Restore Android Text Messages with SMS Backup+ App
The way we are showing is to use a professional Android Data Backup & Restore Toolkit to take a complete backup and you can preview the content or restore to any Android device in case accidentally delete or your device is lost.
The advantage of this toolkit is that it is able to take a full backup of all the data, certainly including the text messages on your Android device as easy as a cake. The toolkit applies to most Android device, assuring you the impossible risk of losing data if you follow the guide. Of course you don’t need to worry about the operation because it’s so understandable and easy for everyone.
Download WinDownload Mac
Step 1. Download and install the Android Data Backup & Restore Toolkit to your computer. Launch it and select the feature “Data Backup & Restore.”
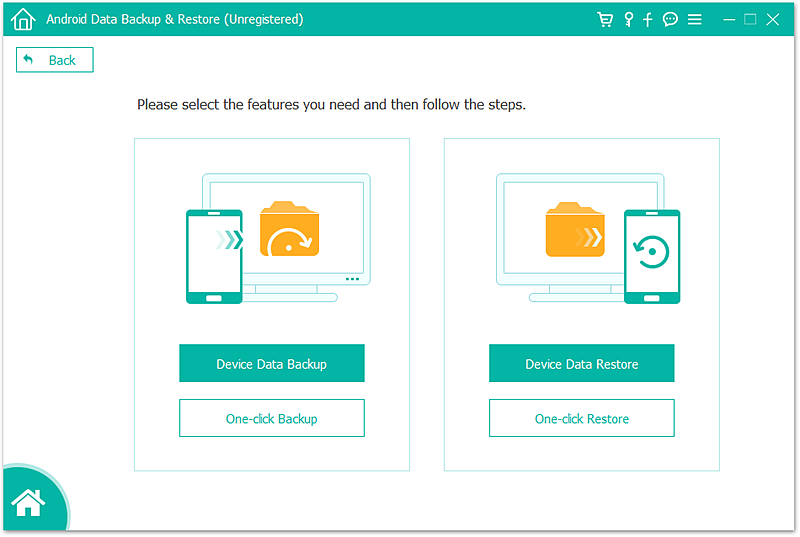
Step 2. Connect your phone with computer using USB cable. Click on “Backup”.
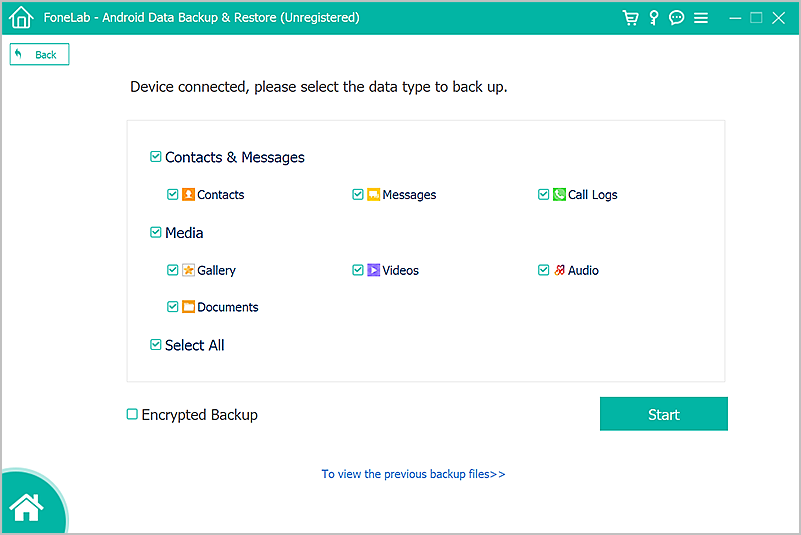
Step 3. Once you get the window of data type selection, check the checkbox under “Messages” to go on. If you have another data to back up, just tick on the checkbox.
After that, click on “Backup” at the bottom corner.
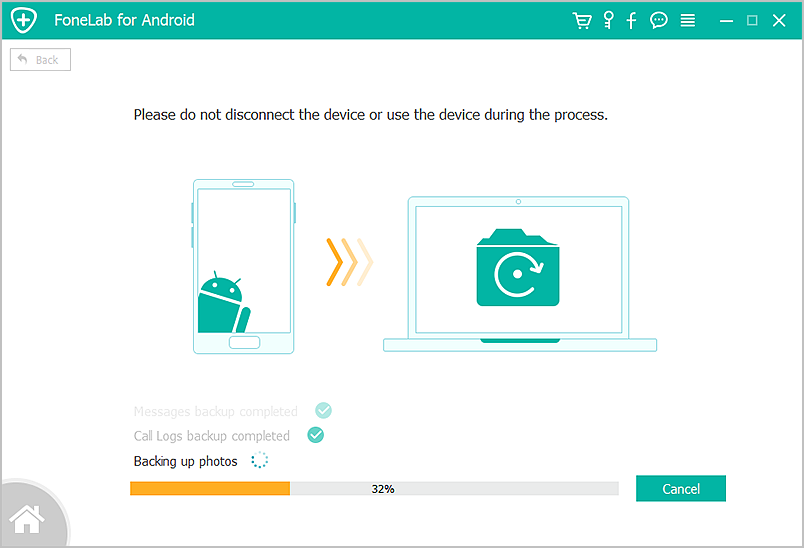
Step 4. Now the program is backing up your chosen data, please wait for the process patiently until it ends. For the duration you cannot use your device or disconnect your device from computer.
Step 5. Soon, you will get the prompt that the backup has been completed. Check if there are what you want in the backup files by clicking “View the backup.” Till now the backup of messages is done.
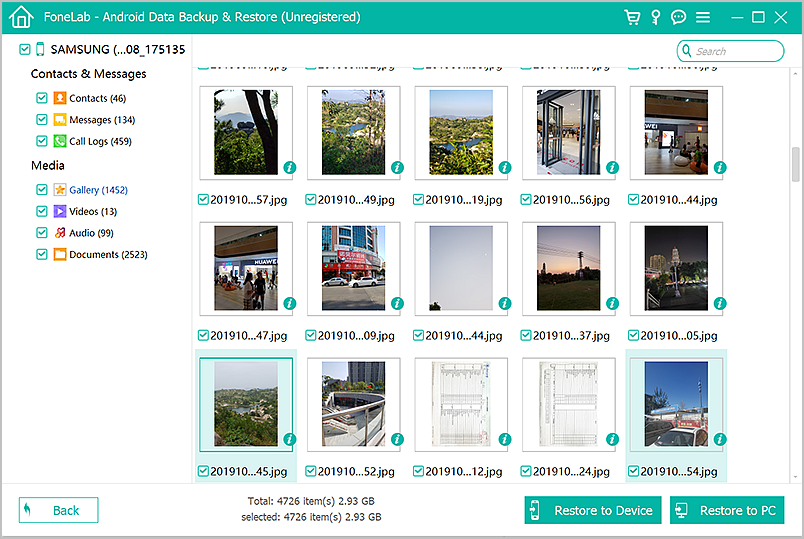
As for how to restore the text messages you backed up after you lose them on your device, come back to this powerful toolkit that assists you to restore what you want from backup in one click.
Turn to restore feature, it is much easier since you took a backup before by this toolkit. The most important is that you can preview your backed-up messages on this program. Even you don’t need to restore them to a phone, you are able to access them. You can also selectively restore the text messages using its Restore feature. See how as followed.
Step 1. Run the toolkit and similarly select “Device Data Restore” feature on the main menu.

Then click the “View backup history”.
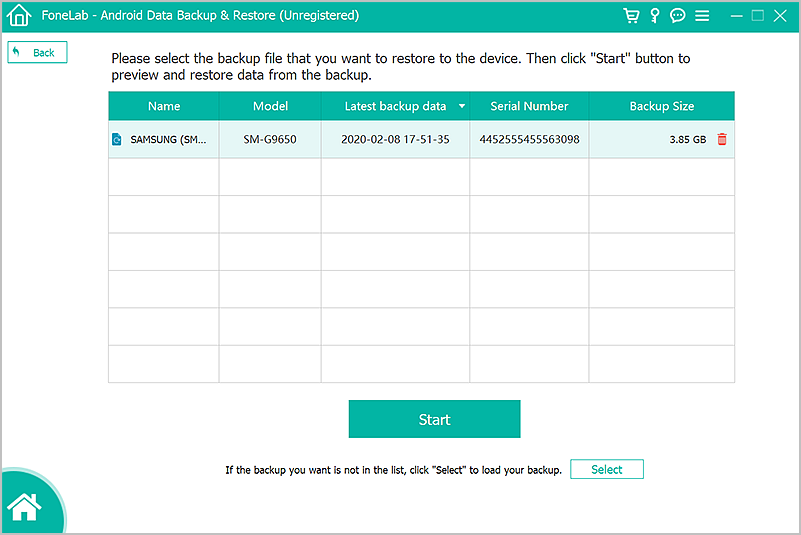
Step 2. You can choose a backup history to view the content.
Next click on the “Messages” from the left window to view the backup messages.
Step 3. If you want to restore them to your device, connect your device with computer. Click on the button “Restore” to begin restore process.
Tips:
1. By default, the toolkit will restore from the latest backup file. You can click on the dropdown icon at the left top to select a backup from the backup history list.
2. You can selectively choose the specific messages in the main window and restore to your device.
Download WinDownload Mac
Except the Android Data Backup & Restore Toolkit, there is another backup app for backup and restore of Android text messages, the SMS Backup+, a software applying exclusively to Android SMS.
SMS Backup+ requires IMAP access to your Gmail account to function. With Gmail account IMAP features toggled on, you can turn to install SMS Backup+ from Google Play Store and download the app. Then configure it.
Then refer the below steps.
Step 1. Launch the SMS Backup+. Tap “Connect” to associate your Gmail account. You will be prompted to associate a Gmail account to back up your text messages.
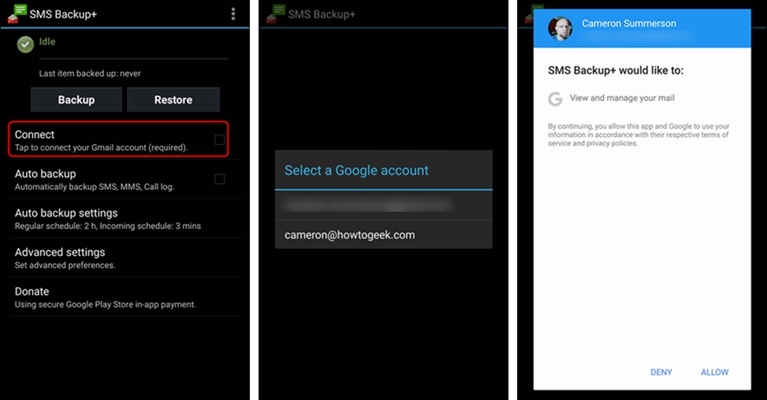
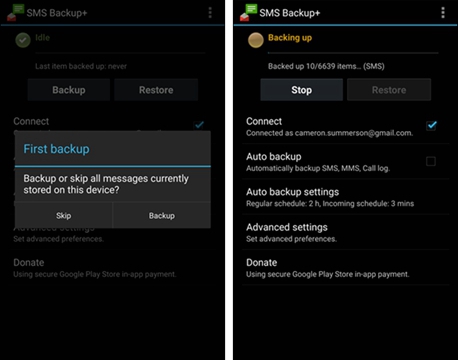
Step 2. Next you will be prompted to your first backup, tap on “Backup” to back up your current text messages or Skip to marked current text messages as backed up and ignored.
Step 3. The backup process starts immediately once you tapped “Backup”, and the wait time depends on how many messages you have. Don’t tap Stop during the SMS being backed up.
Step 4. Log in to your Gmail account on your browser. Click on a new tab “SMS” in the sidebar, here store all your backed up SMS/MMS messages. Simply click on this label to see your message in the main window.
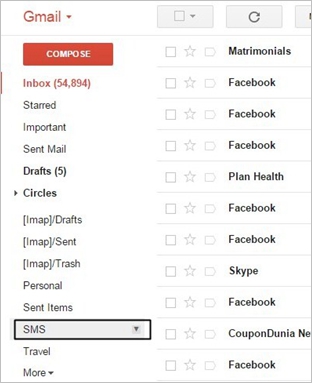
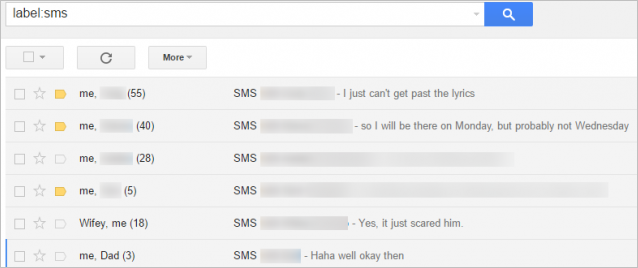
At this point, SMS Backup+ has successfully automatically backed up your SMS and your MMS.
To set up some advanced options. Go to “Advanced settings” > “Backup settings”, you can choose which types of messages you would like to back up to Gmail.