Backing up text messages seems trivial, but those who have once lost important text messages know that it is the real thing. Perhaps you have some important and memorable text messages from your loved ones or business messages that you cannot afford to lose, you will act wisely by backing them up and keep losing them at bay. Apart from the fact that the text messages might occupy your limited phone memory, you should at least consider human fallibility. For instance, if you wanted to delete a particular text message, your fumbling finger might delete the whole text messages on your mobile phone, and you would lose the whole thing forever. Apart from this, your phone might develop an irremediable fault and you may even lose your phone. Therefore, it is imperative that you back up your text messages. Here, we want to teach you how to backup Android text messages to PC.
Method 1. Backup Android Text Message to Gmail Using SMS Backup+
Method 2. Backup Android Text Message to PC Using Android Backup & Restore Toolkit
Method 3. Full Backup Samsung Galaxy Using Samsung Smart Switch
For you to do this, you will need 3 things:
– Your Android phone
– SMS Backup+
– Your Gmail account
Once you have these, follow these steps:
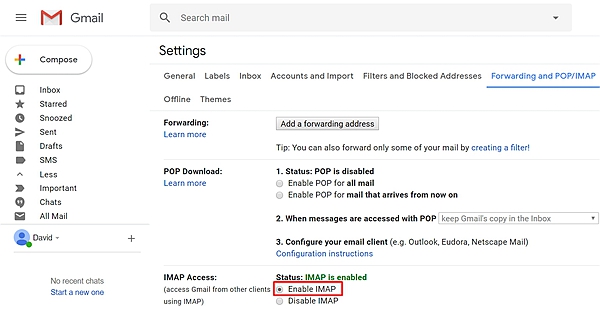
Step 1: Make Your Gmail Fit for IMAP Access
– Login to your Gmail account
– Navigate to Settings, there you will see “Forwarding and POP/IMAP”
– Click on it and select the “Enable IMAP” radio button
Step 2: Go to the Google Play Store, search for SMS Backup+ and install it.
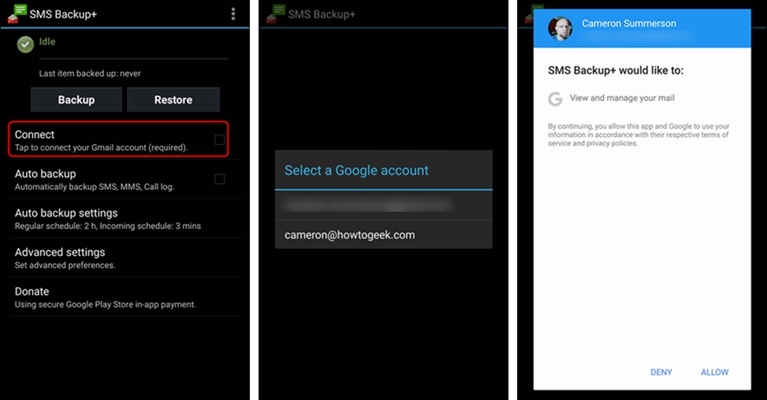
Step 3: Open the application;
Tap “Connect” screen in order to connect to your Gmail account;
Via the Android AccountPicker, select the Gmail account you intend to use for the backup;
Grant the required permissions;
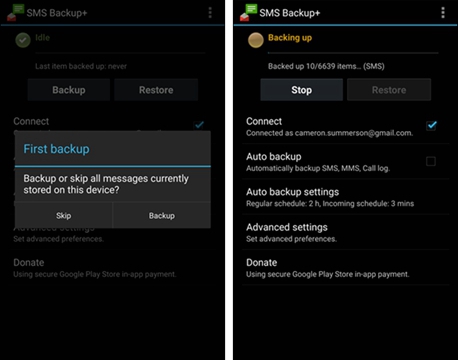
Step 4: You will be prompted to start the backup or skip. If you click skip, all the messages will be flagged as being backed and they will be ignored;
Click “BACKUP,” and the backup process will start.
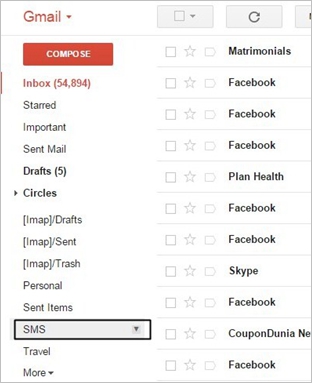
Step 5: Open your Gmail account and view the process.
There you will see “SMS” in the sidebar, click on it to see the backup messages.
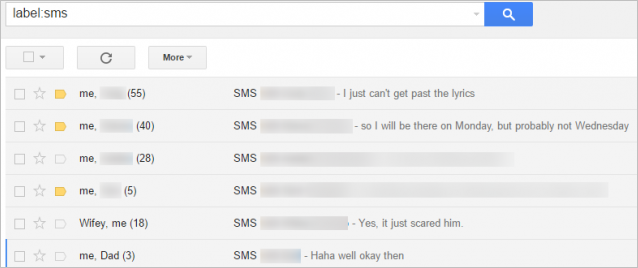
Step 6: On completion of the backup process, the SMS Backup+ will prompt you with the “Sucess!” message.
This will not only back up your SMS messages but also your MMS messages with the attached files. Moreover, you may move to advanced settings.
Advanced Settings (optional)
If you are to busy for regular backup, you may need to turn on the automatic backup process:
– From the SMS Backup+ main screen, click on the “Auto Backup.”
– Then click on the “Auto Backup Settings.”
– There you can schedule the back up to run within 30 mins up to 24 hours.
Perhaps you want to save your mobile data quota:
– On the main screen, click “Advanced Settings.”
– There you may choose to:
> turn off MMS backup;
> create a whitelist of selected contacts messages to backup;
> back up with WiFi connections only.
Furthermore, you can tell SMS Backup+ to restore your messages via the Gmail star functionality, where you can choose to restore important messages from contacts with starred threads to your Android devices.
The second solution is to back up messages using the Android Data Backup & Restore Toolkit.
Lots of people are benefiting from this useful toolkit with a feature of backup all kinds of Android phone data. Text message on your Samsung could be easily backed up to PC, and you can access them whenever you want and restore them to your Galaxy or any other Android device. Even you don’t restore the backed-up messages to a device, you can still preview them by this toolkit.
Download WinDownload Mac
Step 1: Run Android Data Backup & Restore Toolkit on computer. Click on the feature “Data Backup & Restore”.
Step 2: Establish the connection between your Samsung Galaxy and your computer by USB cable. Then click on the Backup button on the program.
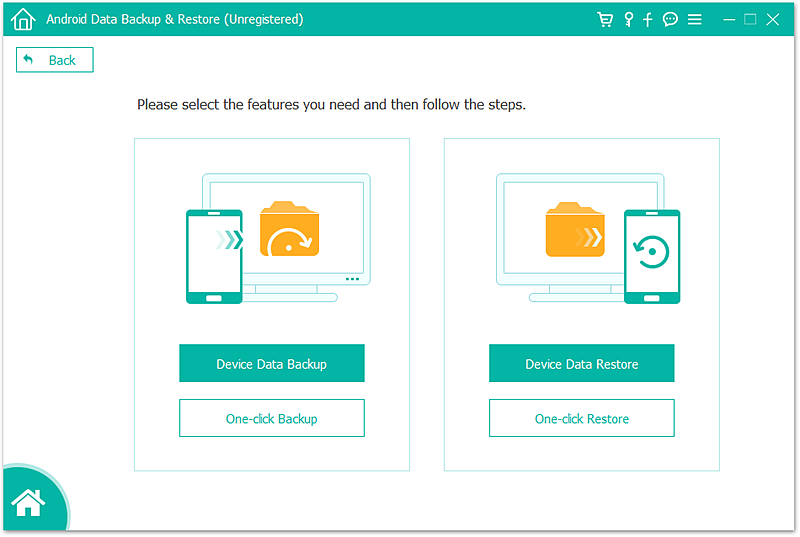
Note that you should have enabled the USB debugging first. Follow the instructions if you haven’t turned it on.
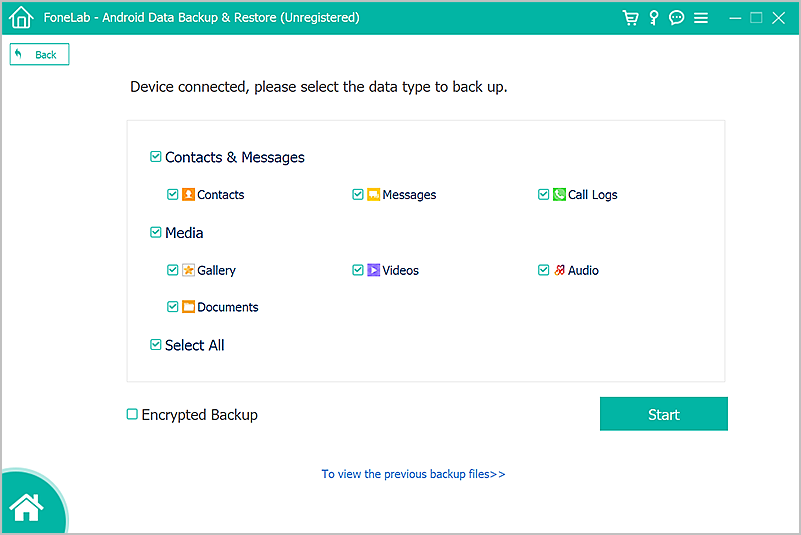
Step 3: Choose the file type, here you should tick “Messaging” from the list. Then click “Backup” at the bottom corner.
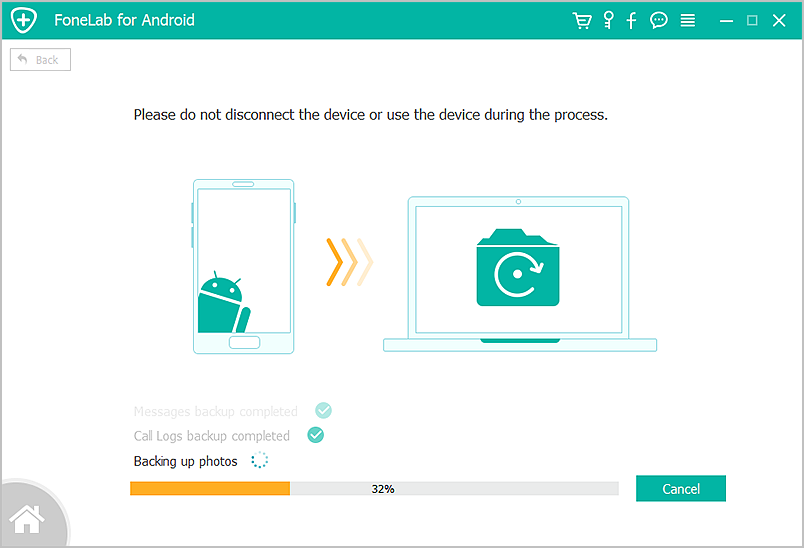
Step 4: Message backup will start and last for a few minutes. Please stay your Samsung Galaxy, do not use it during waiting for the process. Not a moment, you will gain the message that backup is completed. What you should do is to check the backup by clicking “View backup” button. The messages should be there.
You can view your backup text messages in the software at any time, just click “Data Backup & Restore” from dashboard and click on “view the backup history” in the buttom.
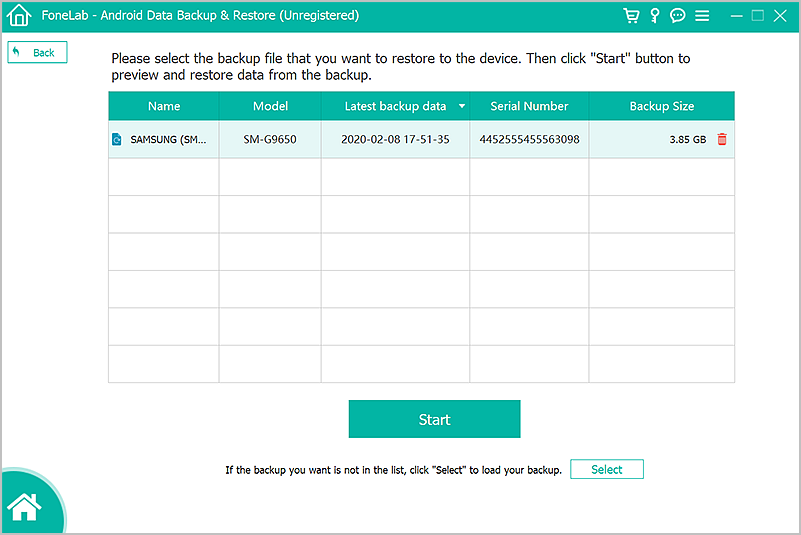
Then choose a backup file to view the content.
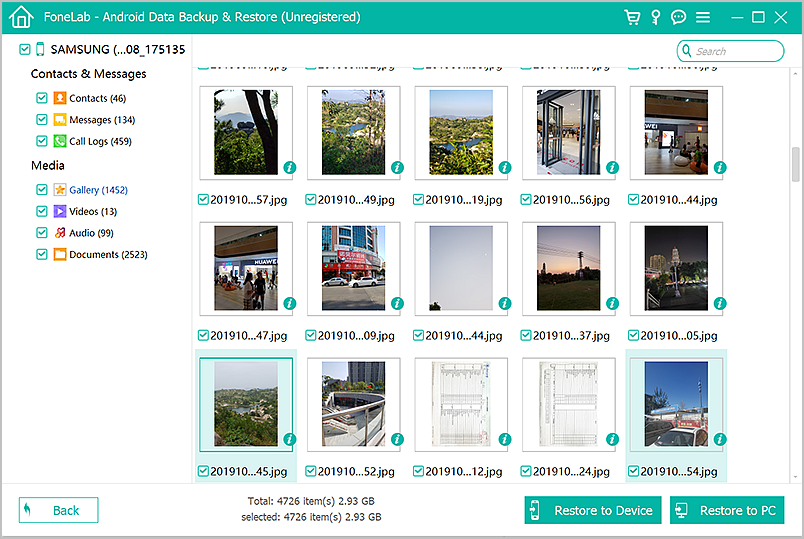
Now you can view the content of your backup file by ticking on specific file type in the left window.
With Smart Switch, you can back up your Samsung Galaxy phone data, and you can restore the backup files:
Step 1: Download and Install Smart Switch
– With your PC, go to the Samsung Smart Switch support center.
Depending on your computer OS, click on Mac or Windows download link and download the app.
Then Install the downloaded software.
Step 2: Configure Samsung Smart Switch
Open the app.
Connect your Samsung Galaxy phone via the USB cable.
The program will instantly recognize your phone and connect to it or you may be asked to allow USB transfer on your phone:
– Slide down your phone notification bar.
– Click the “USB Options.”
– Select the “Transfer files” option.
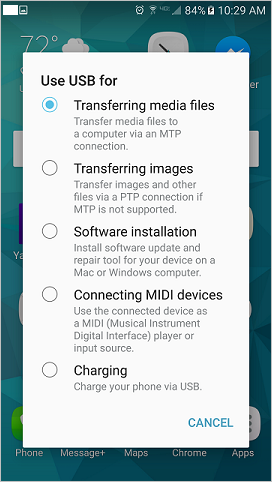
Step 3: Back up your phone data
On the Smart Switch home screen, click “Backup.”
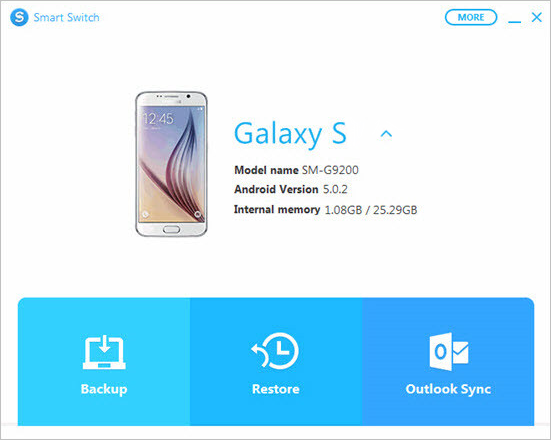
Allow the required permissions, and the backup process will start.
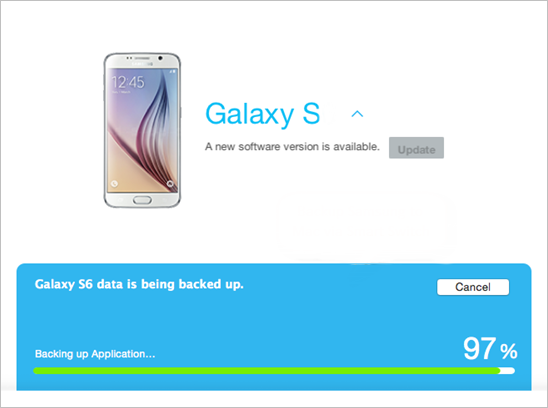
Once the backup is successful, click “OK” to finish it.
View your backup text messages on your computer
Peradventure your phone developed a fault or you bought a new phone, follow these steps to restore the backup data to the new phone or the original phone:
Step 1: Launch the Samsung Smart Switch
Connect your phone via the USB cable as described above.
Step 2: Once your phone is connected, click “Restore”, then click “Restore now.”
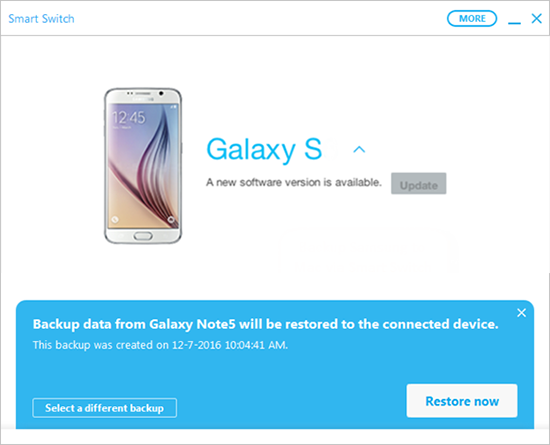
Step 3: Allow the required access permissions.
Once the restore process is complete, click “OK.”
We have saved you a headache by providing you with the methods you can use to back up your Android text messages to your PC. You will act wisely by leveraging this opportunity to secure your important and memorable mobile text messages now before you lose them due to unforeseen circumstances. You couldn’t imagine how embittered you would be if your important messages sunk into oblivion.