Taking pictures has been made easier with the rise of smartphones. Gone are the days when we need bulky cameras to capture even the simplest yet still memorable moments. The more we use our smartphone cameras, the more we realize how important storage capacities are. More often than not, we find ourselves deleting old photos so we can take new ones. However, to many of us, that’s not an option because all of them are simply valuable. That’s why we take the time and effort to transfer them to our computer or laptops. There is also a danger of losing them if our smartphones incur damages. In that sense, storing or backing them up on other devices also provides them safety.
There are so many ways for us to transfer files, not just photos. Here we are going to guide you on how to backup your Android photos using three methods. These step by step procedures will enable you to transfer your files safely and efficiently.

Backup Android Photos to Windows PC
Backup Android Photos to Mac
Using Android Data Backup & Restore Toolkit
Step 1. Using a USB cable, connect your smartphone to your PC.
To prepare your phone for the transfer, select “Transfer images” from the drop-down notification panel. It could go by different names such as “file transfer”, “PTP”, or “MTP”. Make sure you select any of these before proceeding.
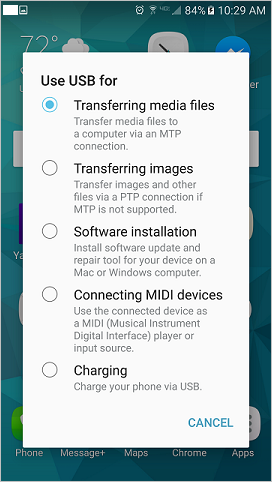
Step 2. Go to “This PC” through Windows Explorer
You can see there the name of your phone. It could come in as a camera icon, or others. Click to open.
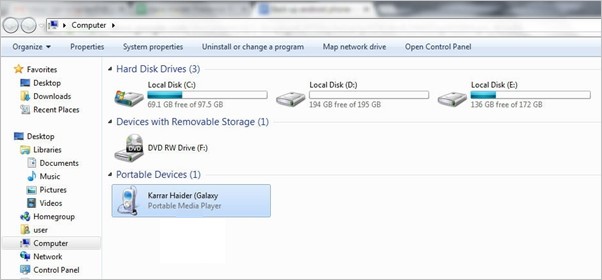
Step 3. Click “Phone”
As you are looking for your photos, you’ll want to click the folder called “DCIM”, then open “Camera”
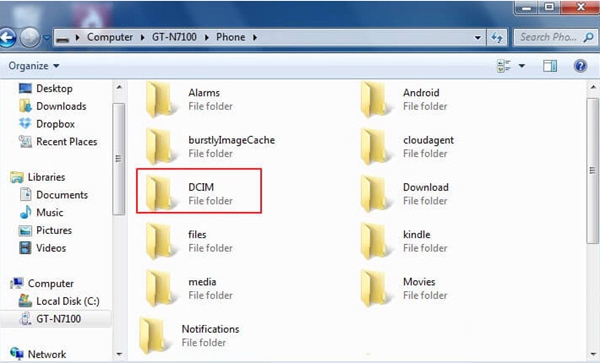
Step 4. This method is great in letting you control what images to transfer.
Select the files or images you need. You can select multiple photos by clicking on the first photo, holding “Shift” and then clicking the last photo. You will be able to select the photos you clicked as well as everything between them. You can also hold “Ctrl” and then individually clicking the photos.
Once you’re done selecting the images you need, right click on them and click “Copy”, the shortcut for copying would be “Ctrl+C”. If you are aiming to delete the photos on your smartphone, you can select “Cut” instead of copy. Don’t worry because you still have the ability to paste them later on.
Step 5. Go to the folder you’d want to put the pictures in. Right click inside the folder and then click “Paste” or “Ctrl+V”
Wait for several seconds or minutes, depending on the amount of files you’ve transferred.
Alternative to Steps 7 – 9 If you want to save a lot of time, you can simply select the images, drag them to your new folder, and simply drop them there.
Transferring from Android to Mac has proven to be a difficult process to many before a few years back. A lot of people still even think it’s impossible to do such operation. Today it is made easy with different tools that is free to access for anyone. The following methods are safe, easy, and hassle-free.
Backing up through Android File Transfer is another way to transfer photos and other files using a wired connection.
Step 1. Install Android File Transfer on your Mac.
Step 2. Using a USB cable, connect your smartphone to your mac.
Step 3. On your Mac, open “Finder”, there you have several drive options, select “Android File Transfer”
Step 4. Simply click it and select to import your selected images to iPhoto
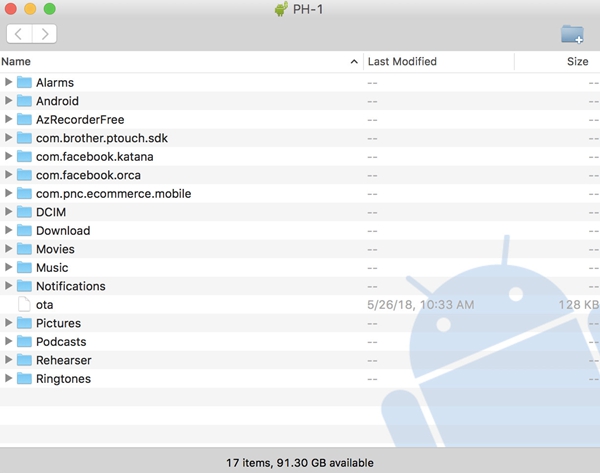
If you need a wireless alternative in transferring your photos to your Mac, you can make use of AirDroid. No need to download any software on your computer. With just a few clicks, you would be able to view and save your photos on your Mac.
Step 1. Download and install AirDroid on your Android smartphone.
Step 2. On your Mac’s browser, type in “AirdDroid.com”
Step 3. Create your account to access the tool. Then sign in.
Step 4. You now have access to everything on your phone. Simply start moving your images to your selected Mac folder.
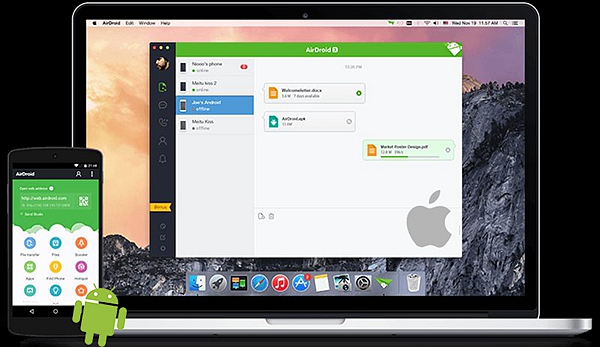
Another great thing with this app is that if you subscribe to its premium services, you would be able to perform more functions on your smartphone using your Mac such as calling your phone contacts.
Using Google photos is another wireless transfer that is available for anyone. This method is great because Google Drive allows individual users to store photos and files at a limited size.
Step 1. On your Android device, sync your photos using Google Photos.
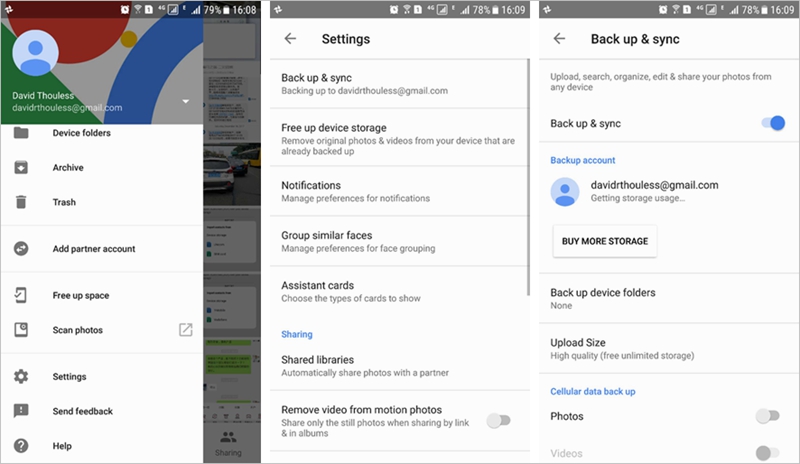
Step 2. On your Mac, download Google Photos Uploader and install
Download the Google Drive Sync application and install it as well.
Step 3. Go to Google Drive on your Mac. Look for the options under Google Photos
Go to “Settings” under Google Photos. Enable “Google Photos” folder.
Step 4. Start syncing by going to the Google Drive settings on your Mac. There, select the “Google Photos” folder.
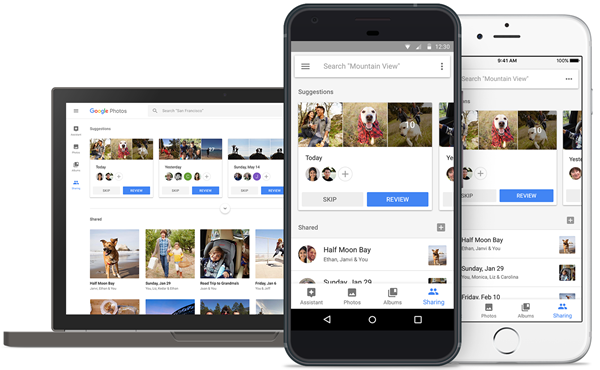
Android Data Backup & Restore toolkit is an incredible tool in not just backing up files but also in restoring them. Here we are going to focus how you can transfer your images to your PC with its easy process.
Download WinDownload Mac
Step 1. Download and install Android Data Backup & Restore on your PC
Step 2. Launch the software, you’ll find a few options and click “Backup & Restore”
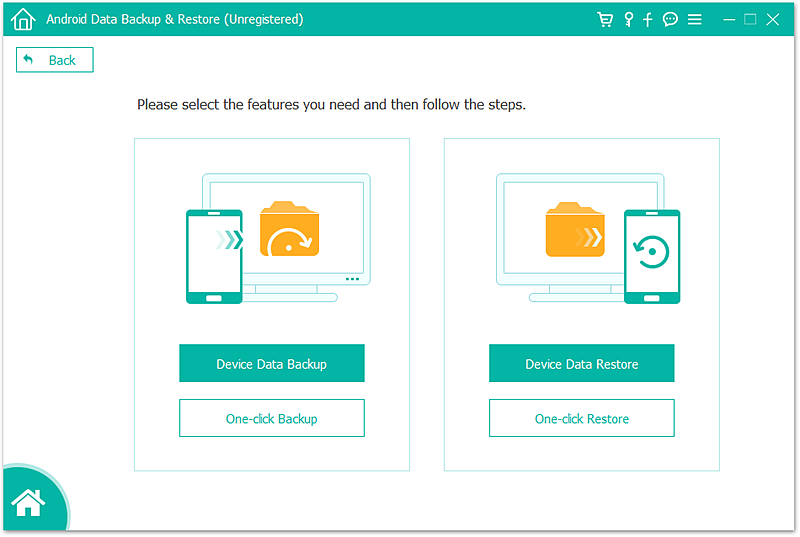
Step 3. Connect your smartphone to your PC.
Make sure that USB debugging mode is enabled on your smartphone.
Next click on Backup button.
Step 4. From the file type list, choose Photos and click Backup to move on.
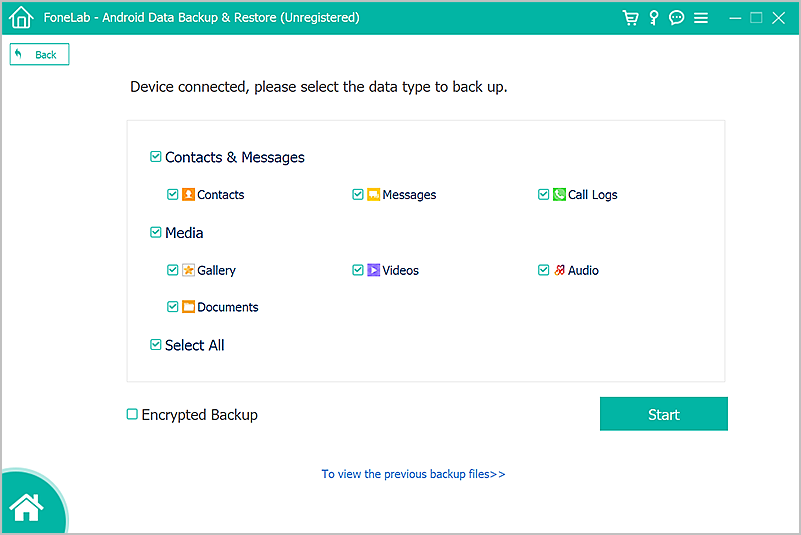
Select the images or files you need and simply click “Backup” to start the process
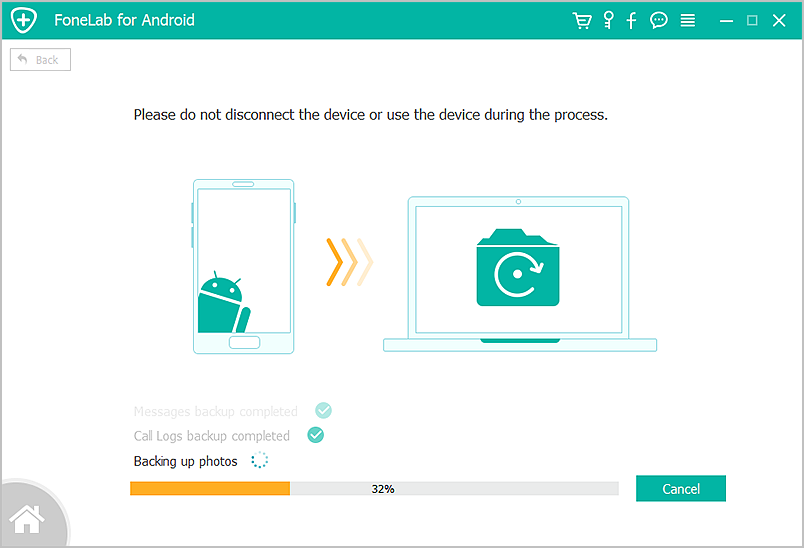
According to the size of your file transfer, the process may take a few seconds or minutes. Make sure that your phone stays connected to the PC. It’s not recommended to use the phone while the backup is ongoing.
With these methods and tools, you can now transfer images easily to any kind of PC or device. Selecting the best method given what you have is the key. Some of these tools are worth exploring because they don’t only offer excellent transfer capabilities.