The way we document our lives and communicate with each other has changed a great deal in the last decade because of the evolution of smartphone technology. Not only do we use our smartphones to call each other, send each other messages, chat with each other in real-time and even share videos. There are probably billions of new images that are taken on a daily basis by cellphone users across the globe. We don’t only keep pictures we take with out own phones, but pictures we download online or receive from friends and family.
These days the smartphones we have are equipped with high-performance cameras that take excellent pictures. Of course we have apps that we can download on out phones to edit and manipulate the images we capture of ourselves, the things we love, the places we visit, moments we want to cherish and anything we find beautiful, funny or inspiring. Samsung is known to be one of the best Android device manufactures with the best camera technology.
There are some problems with using your phone to document and store all those photos: the phone memory is very limited. At some point you will need to back up your photos or to move them from your phone to free up some of the device’s memory. Besides running out of space, you have to consider how vulnerable your device is. Think about all the things you get up to and how these things could introduce viruses into your device that could wipe out all that life, captured and curated in images. Losing your photos can be devastating. You might be able to reconstruct your contact list if you accidentally lost it, you cannot recreate those moments captured in photographs if you should for some reason have all of them deleted from your phone.
You can protect your Samsung Galaxy photographs from getting lost by conducting regular backups. We will look at how you can do this easily and efficiently.
Method 1: Backing up and Syncing Samsung Galaxy photos with your Google account.
Method 2: Backing up Samsung Galaxy Photos to PC with Android Data Backup & Restore Toolkit
Google allows Android users to backup a lot of data, including photographs remotely. You can back up your images to Google Photos with just a few clicks.
The first and most important thing to do is to download the Googles Photos App from the Google Play Store and configure it to your Galaxy phone. This app will help you sync and backup photos from your Galaxy device.
Here is a short guide on how you can go about backing up and Syncing Samsung Galaxy photos with your Google account.
Step 1: After downloading and installing the Google Photos app, launch it on your Samsung Galaxy device. Sign into your Google account.
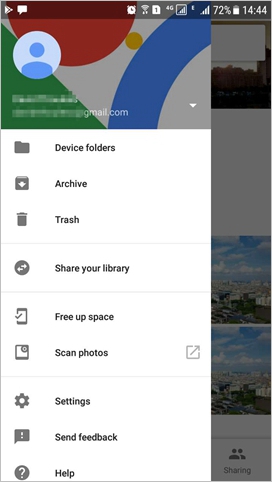
Step 2: Click on the menu icon that appears on the top left corner of your screen.
Select Settings- > Back up & sync and switch the toggle key for Back up & sync on.
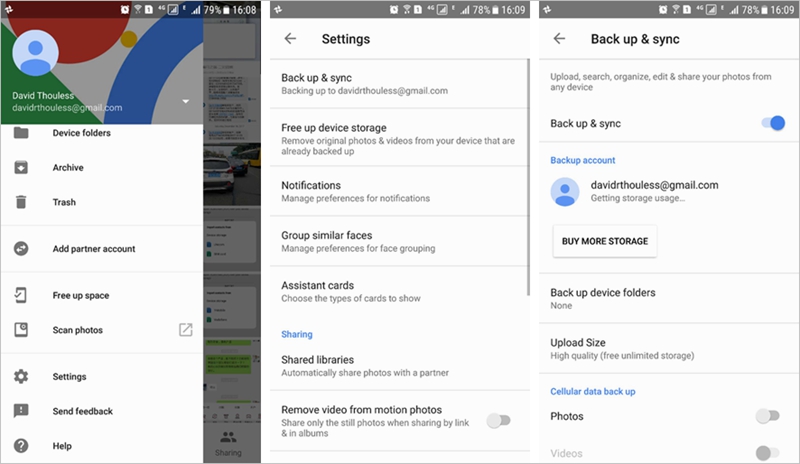
Step 3: Connect to your Wi-Fi to begin syncing your photographs to the Google cloud.
Some Notes:
#1. Things don’t necessarily stay on the Google Cloud for all eternity. If you delete a photo on your phone it will be deleted from that phone and every other synced devices. The deleted photo will go to Google Photos Trash folder where it will be permanently deleted after a 60-day period.
#2. Google Photos is set up to backup photos with a resolution of up to 16 megapixels. This is a default setting if you want unlimited storage space.
#3. You can upload Samsung Galaxy photographs with a higher resolution, however this will affect the 15GB free storage you get for Google Drive.
You can set the upload size limits by going to: App settings -> Back up & Sync -> Upload Size.
Obviously the fact that your photos will not stay on Google drive indefinitely, especially if you decide to delete them from your phone is a big issue. You could lose them if you don’t restore them from the Google Photos trash folder within 60 days. You could lose your photographs and never be able to retrieve them from anywhere.
You can avoid completely losing your photographs from the Cloud and other devices by using the Android-Data-Backup & Restore Toolkit to store your photos on your PC to ensure that you have locally backed-up files that will not be affected even if you accidentally delete your photos from your device and all other synced devices. This toolkit is free to download, safe and easy to use. It also gives you unlimited space to store your images.
The Android Data Backup & Restore Toolkit makes backing up photos on Samsung devices easy. It is important to avoid redundancy when backing up or restoring data and this toolkit is extremely efficient at doing that. This toolkit allows you to backup Samsung Photos to your PC and supports the viewing and restoring of photos from your device without using too much data.
Download WinDownload Mac
Let’s look at how you should go about doing this:
Step 1: When you run the software on your PC a dashboard with various features will appear. Choose the “Backup & Restore” feature on the dashboard. Use a USB cable to connect you Samsung Galaxy device to your PC.
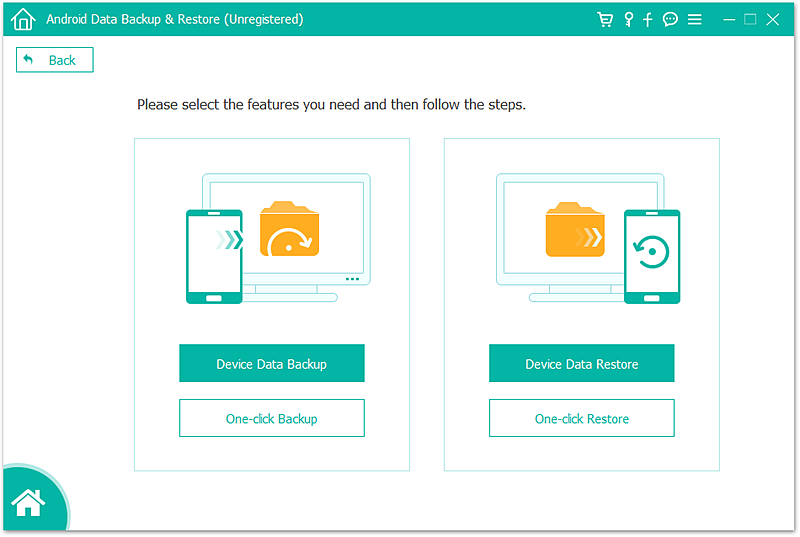
You will need to turn on USB debugging. If you have never done this before, no need to worry, you will get onscreen instructions on what you will need to do.
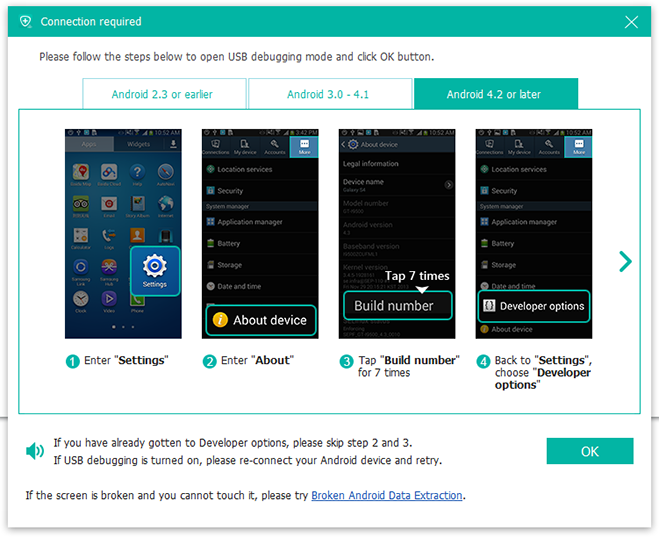
Step 2: Select the Backup option that will come up on the screen once your Samsung has been connected to your computer.
Step 3: Choose the file types you want your device to back up. The file type is selected for you by default but you can change this by ticking the “Option” box to make Gallery selections.
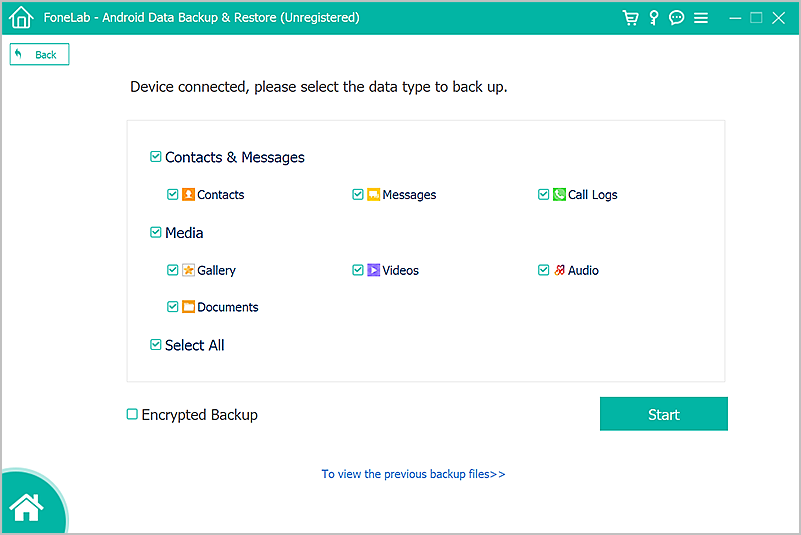
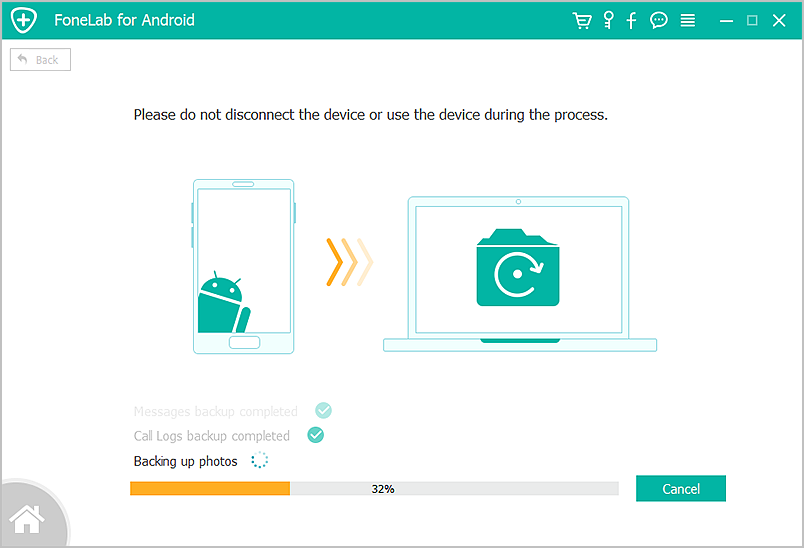
Once you click the Backup option, the process will begin immediately. Now you simply have to wait for the entire process to be over. Do not disconnect the device before the backup process is completed. Do not use or delete any files while the backup process is in progress.
You will get a message to alert you when the Backup process is complete.
Select “View backup photos” to see which files have been backed up.
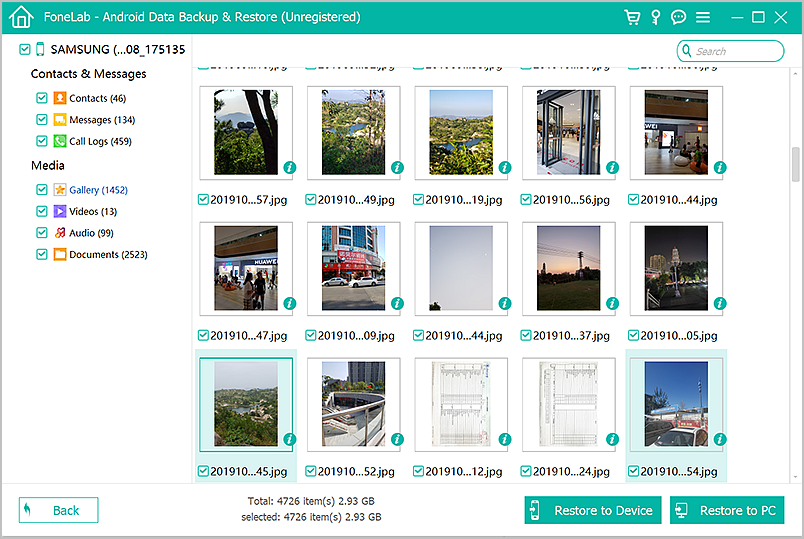
You need to keep going back to the dashboard to view files. Just select “Backup & Restore”, tap “View backup history” and select the backed-up file you want to see.
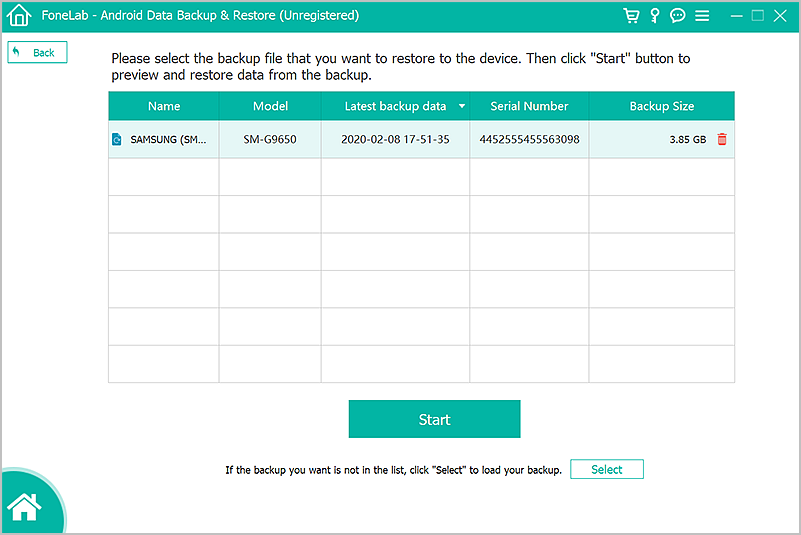
Android Data Backup & Restore Toolkit will help you restore any file you choose to any device you want to restore it to.
Just choose “Backup history” on the dashboard and tap on the “Restore” option. The pre-selected photos you wanted to restore will be transferred to your phone.
Download WinDownload Mac
We should warn you though, that your Google account may not work so well when you need to restore your photos to a Samsung device. The sync feature itself has some inherent security issues and potential for data loss which is why having the Android Data Backup & Restore Toolkit on your desktop is a safer and more efficient method.