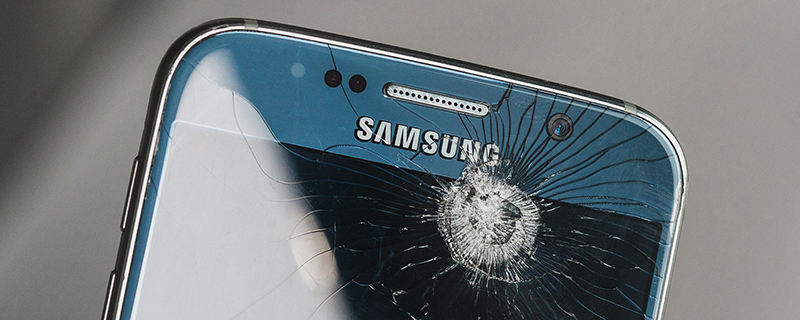
It is a painful experience to have a smartphone (especially an expensive one) with a broken screen. Here the first culprit is the touchscreen. Mind you, this is the most essential component of the device. It is the primary interface through which we interact with the phone. Breakage of the screen renders the phone unusable since it cannot respond to our touch. There is no way they can enter their Passwords and screen patterns. This situation can cause panic amongst most users since they can no longer access their apps and data. All your music, pictures, documents and other important files get trapped within the device. This article therefore aims at helping users backup their data from Android phones despite having a broken screen. If you properly follow the above steps you can safely recover all your data and keep it safely.
The following are two effective methods of achieving this process.
Part 1: Use OTG Cable to Back up Data from Android with Broken Touchscreen
Part 2: Recover Data from Android with Broken Screen Using ADB Interface
OTG is an abbreviation for On The Go. a USB OTG cable is a standard connector that allows a device to read data from a USB connection without the requirement of a PC. It is a relatively new technology that has been around for less than a decade as at the time of writing this article. It works with most versions of Android. But for Android 6 (Marshmallow) and Android 7 (Nougat) you will need to manually enable MTP. one major prerequisite is that your device shouldn’t have a black screen as that would require more advanced recovery methods. For the devices required in the process you will need the following:
I. An OTG adapter
II. A USB mouse
Below are the steps
Step 1. Connect the OTG cable to the device and plug in the USB mouse into the OTG receiver. After this step you should now be able to see a cursor on your screen. If this does not happen, try rebooting the device so that it can get detected. Some phones are a bit slow at detecting a connection.
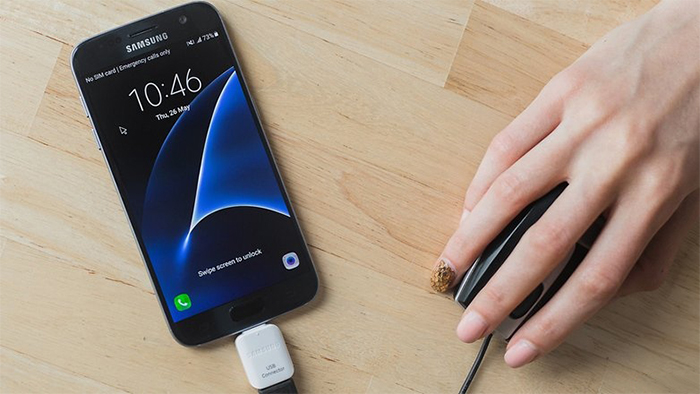
Step 2. Use the mouse to enter your lock screen password or pattern to unlock your phone.
Step 3. In this step, you will need to enable the USB debugging and Media Transfer Protocol (MTP) opiton so that you can access your phone’s internal storage when you plug into PC.
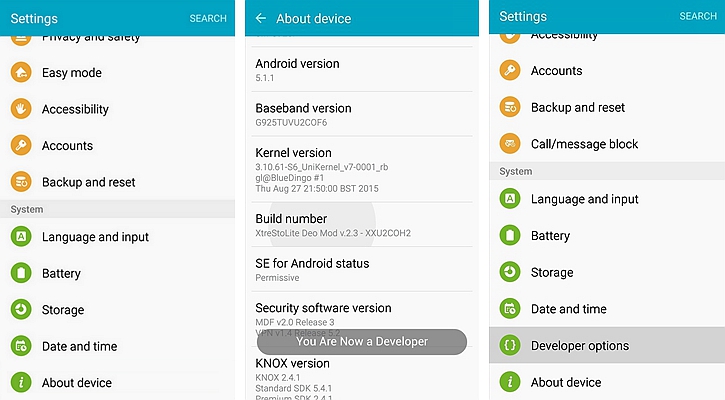
Here we need to access a hidden feature “developer options” first. navigate to settings > About phone > Tap on Build number 7 times. You will get a message that you are now a developer. Go back to settings and you will find a new option called Developer options. Click on it and Scroll down.
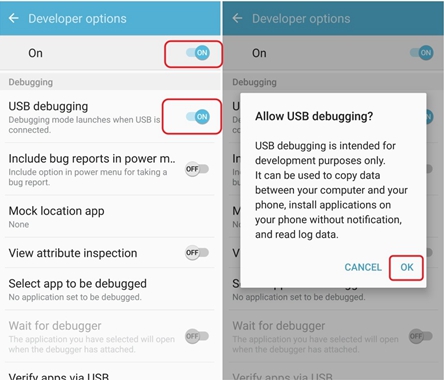
You will encounter an option that says enable USB debugging, enable it.
Next scroll Further down, you will then meet an option called USB configuration. Click on it and choose MTP
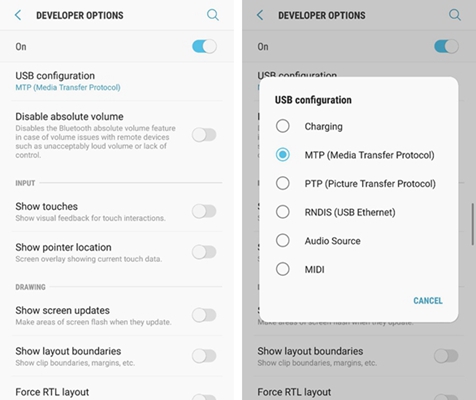
Step 4. Connect your phone to PC with USB cable. Next open Windows Explorer and double-click your Android drive under “Devices with Removable Storage.”
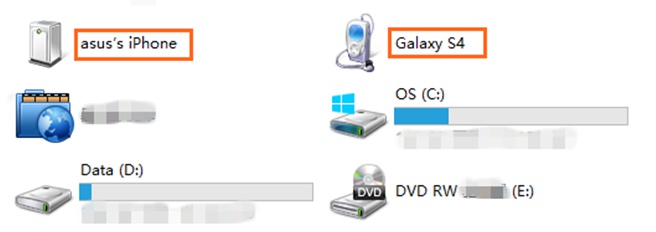
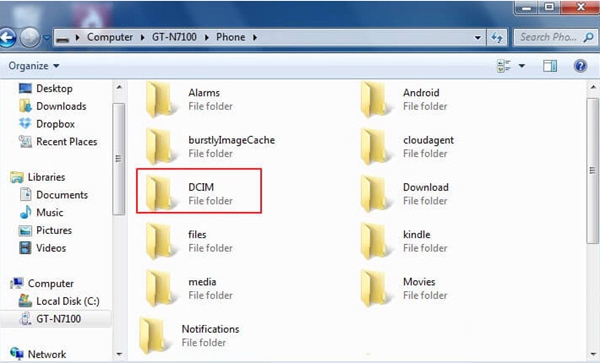
You should now be able to gain access to the phone storage. For example, to view and backup your photos, go to “DCIM” folder.
Most smartphones have proprietary backup software that you can use such as Samsung Smart Switch for Samsung device. But you should have installed it prior to the cracking of the screen.
This is arguably the most advanced method of data recovery on Android. It stands for Android Debug Bridge. It is a command driven tool that allows a user to connect the phone to PC without the use of any software. It is a bit complex and requires some knowledge of programming. It is mostly used by Android developers and enthusiast for various software experiments and sideloading. This program also runs via the windows command prompt (cmd).
See Also:
Recover Data from Android Phone with Broken Screen
Step 1. Enable USB Debugging mode on your phone using the previous method
Step 2. Download and install ADB on your computer. Once done launch the program, preferably right click and select run as administrator.
Step 3. copy paste the below commands in your prompt and hit enter.
Adb shell
echo “persist.service.adb.enable=1” >>/system/build.prop
echo “persist.service.debuggable=1”>>/system/build.prop
echo “persist.sys.usb.config=mass_storage,adb”>>/system/build.prop”
Step 4. Restart the smartphone. At this moment you should now view the device on the screen. Recover all the files from the computer and save them somewhere in a folder.
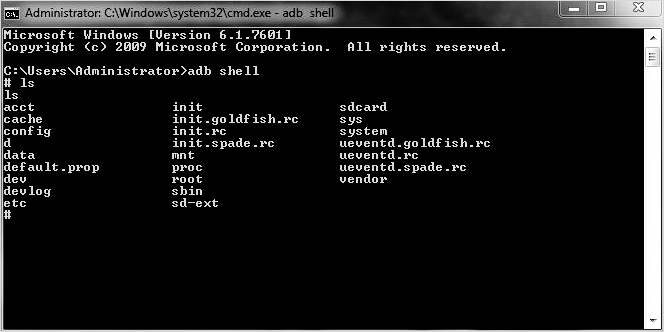
Disclaimer: this method is recommended only for programmers as it has the potential of further messing up your device if not used carefully. You can render your phone as good as a brick.
For repairs, you can take your phone back to the manufacturer or an authorized dealer. Do not attempt to repair the screen by yourself. You run the risk of causing further damage to your smartphone. One thing to remember is that warranties do not cover mechanical damage. Therefore, you will have to dig into your pockets to get your phone repaired. It is also important to keep a backup of important data either on your PC or in the cloud.
Nowadays most devices offer manufacturer software that can backup your data to the cloud. In the event of you losing the phone or damages occurring you can retrieve the backup from the cloud. An additional feature in some smartphone models is the ability to even remotely wipe data in case the phone gets stolen. Finally, it is important to protect the smartphone from physical damage. You can buy a screen protector that will buffer the screen from cracking. A phone case is also handy in preventing dents and cracks in the body. Though these will reduce the visual aesthetics of the phone, they are worth it in the long run.