Part 1: Why Android does not have a Recycle Bin
Part 2: Restore deleted files via Android Data Recovery
Part 3: Use Google Drive to Backup your Important File
Unlike Windows or Mac OS, Android doesn’t have its own recycle bin, but why? Just imagine that if your Android phone has a recycle bin, then there will probably be no room for other more valued data while most of the Android device’s internal storage is only 16GB or even less. What’s worse, the speed of updating different kinds of data is faster than you can imagine, so that a large number of useless files are to be thrown into dustbin every day. Thus, it’s a tough job to set a recycle bin into an Android device with limited storage. Since Android smart phone does not have a built-in trashcan, how can you recover accidentally deleted data as a computer does?
As long as your data haven’t been overwritten, it is still possible for you to recover them with the help of some specialized data recovery software, especially the Android Data Recovery, which supports to restore lost data (photos, messages, WhatsApp messages and attachments, contacts and more) from Samsung Galaxy, LG G, HTC, Sony, Google Nexus, ZET. Believe it or not, you are able to accomplish the retrieval within several steps.
Download WinDownload Mac
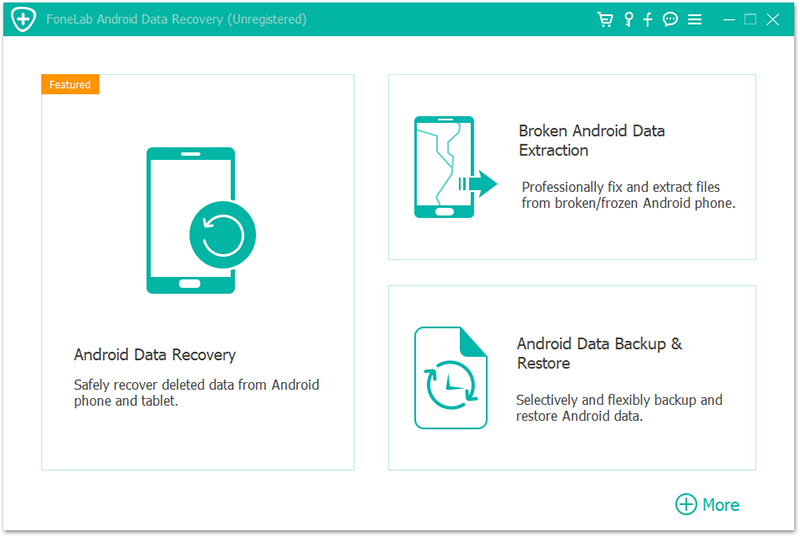
Step 1: Run the Android Recovery Toolkit, select “Android Data Recovery” option and connect your phone to a computer using a USB cable.
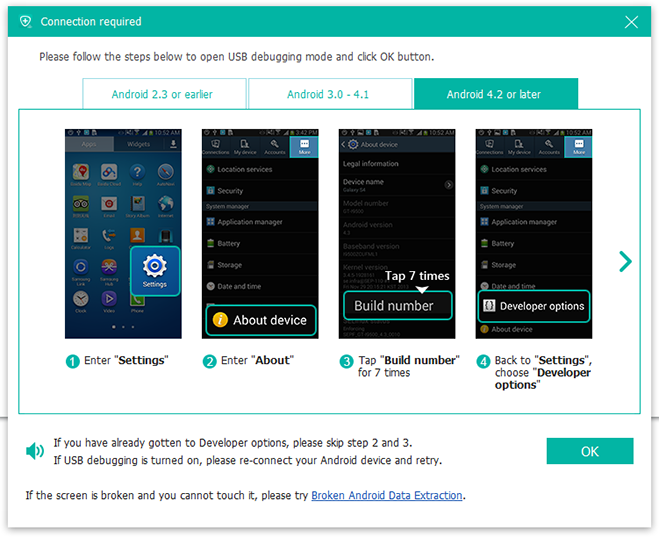
Step 2: Enable USB debugging on your Android device. For Android 6.0 or newer, you need to follow such a process:
1. Go to Settings > About phone.
2. Click the “Software info” option.
3. Tap “Build number” 7 times in rapid succession > “Back”.
4. Go to “Developer options” and then enable “USB debugging”.
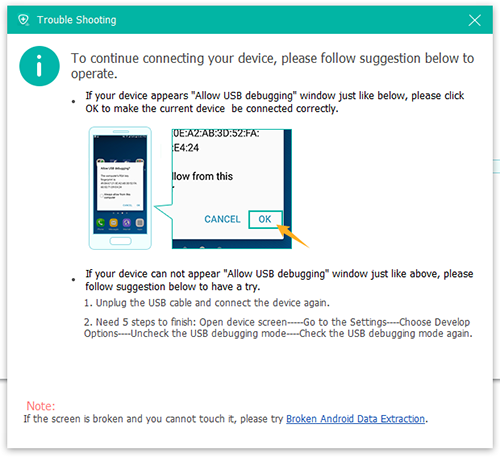
Please tap on “OK” when a pop-up prompt reminds you to allow USB debugging on your Android device.
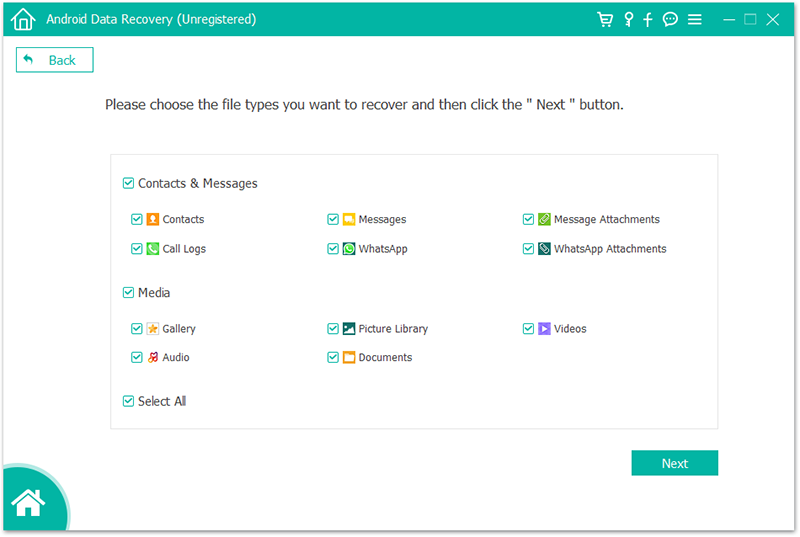
Step 3: By default, all eight types of file are selected by the program, namely Contacts, Messaging, Call History, WhatsApp message & attachment, Gallery, Audio, Video, and documents. However, if you want to save time, you’d better choose the ones you want to be scanned. Click on “Next” button.
Step 4: The scanning process may take a few minutes, then you will get a list of recoverable files. Turn on the “Display deleted files only” switch to look for the lost data you want.
Next click on the “Recover” button to restore them into your PC. Done!
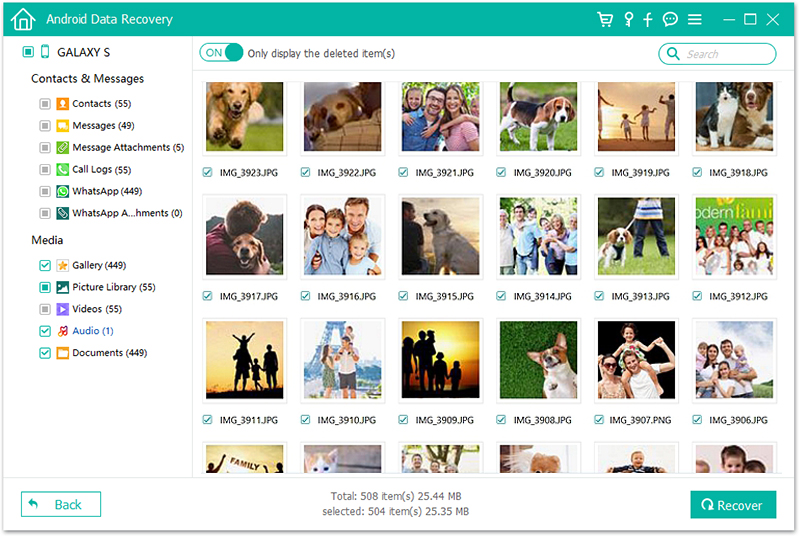
Although there is no recycle bin in Android devices, you can still easily and effectively deal with the issue of deleting data accidentally by using Android Data Recovery. Besides, a variety of cloud storage services is provided, like Dropbox, Google Drive, Apple iCloud, so you can use one of them to backup files with significance beforehand. Next, particularly, we will give a brief introduction of the functions of Google Drive.
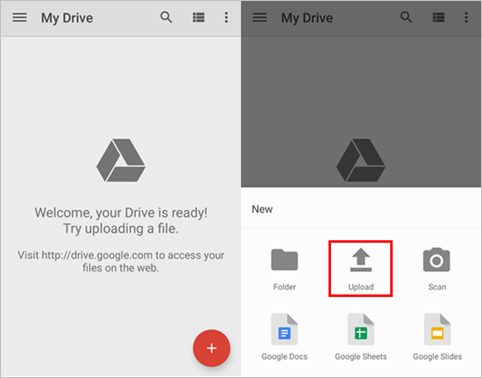
First, you should have a registered Google account, next run the Google Drive app on your device, and log in your account. Find the red plus button at the lower right, hit it and then tap on “Upload” option.
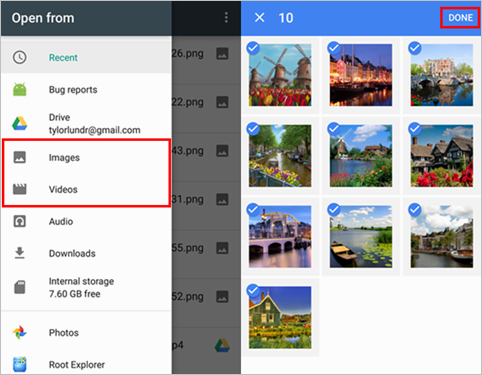
Then you can look through folders from which you can select various types of file to backup, like photos, videos, audios and so on.
Google Drive also has a very powerful function – Trash Bin, where you can revive the deleted files.
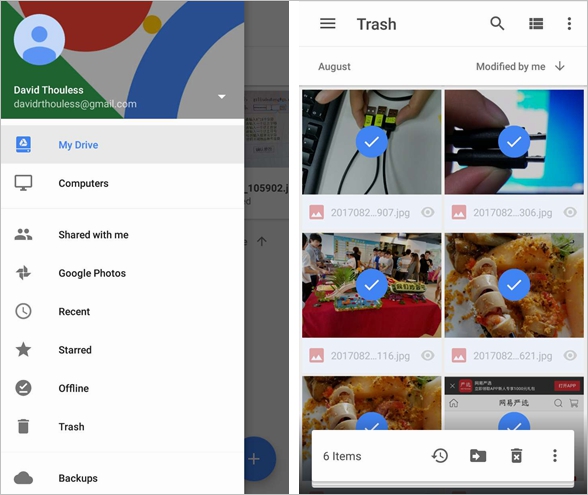
In the Google Drive, you are able to manage the cloud backup photos of Google Photos, which allow you get your deleted photos back from the trash, too.
What do you think about Google Drive after knowing its main functions? Why don’t you have a try? Let’s back up our important but vulnerable Android data before losing it!