Smartphones are essential gadgets that we cannot afford to do without. Their popularity has gained ground far and wide and anyone in possession of these devices can attest to its versatility. Most significantly, smartphones are gradually replacing cameras for the simple fact of taking photos and videos, editing and storing them in at the same time. However, a time comes when, by accident, your vital data including photos and videos get deleted and you feel that you’ve lost a substantial amount of important information. Such situations are common but with the current advancement in technology, you can easily recover lost data when you follow the right procedure.
Formatting the drive, improper handling and file system corruption are some of the major ways you can erase your vital data from the phone. However, you don’t have to worry when you can successfully recover lost data from your backup using recommended recovery tools.
This is possible if you had initially installed Google Photos in your Moto phone, and activated auto sync which can possibly help you recover your deleted photos and videos. If you have no idea on how to go about, then here is a comprehensive guide that you can easily follow.
Retrieve photos and videos that were recently erased using Google photos backup
Recover pictures using Android Data Recovery without a backup
If by any chance you have been associating with Google account using your Moto device, you will have realized that Google Photos was capable to auto sync your pictures by default. Once it is done doing the auto sync, your deleted photos are transferred to “Trash” where most of the deleted files are temporarily kept. But before Trash discards your photos and videos after sixty days, it is advisable that you retrieve them before they get lost forever.
Follow the highlighted steps below to achieve your objective in recovering deleted photos and videos:
Step 1: Access Google and click on the Menu icon located in the corner on the left top side of your screen.
Step 2: Look out for Trash in the Menu and select it by clicking on it.
Step 3: Browse through to view your photos and videos you are looking for. Proceed to click on More Menu icon located at the upper right corner of the screen and then click on Select to choose multiple photos at ago.
Step 4: Reach out to Undo icon that you will see at the top right corner of your screen and tap it.
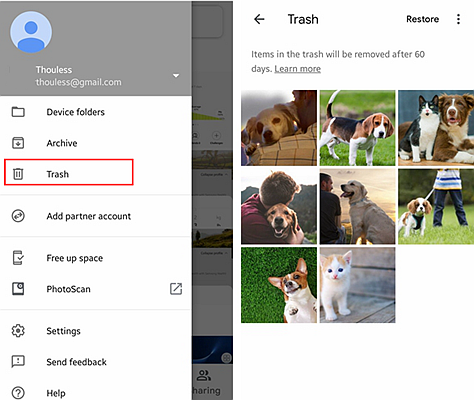
By making simple clicks, you can recover your deleted items without much of a hustle. However, you must keep at the back of your mind that you need to have logged into Google account using your device to enable the auto sync to automatically turn on.
Perhaps you are not aware of the regular backup or simply saying, you don’t have that habit of using the regular backup to help recover lost data.
Android Data Recovery should be your first-hand solution as a safe recovery tool that you will find quite handy. Android Data Recovery is an ideal tool you can use to recover your deleted photos as well as videos among other data. This application will help you to retrieve your contacts, important messages, and other applications directly from Android mobile devices such as the newest Moto G7 series (G7/G7 Plus/G7 Power/G7 Play) or previous G6 series (G6/G6 Plus/G6 Play) and G5 series, etc.
This cutting edge technology will definitely be helpful in its backup and restoration of your important data for your mobile phone. In fact, its stable performance makes it a practical tool to safeguard and retrieve important information that you cannot afford to lose.
Download WinDownload Mac
The following steps will help you recover your deleted pictures and videos to your device:
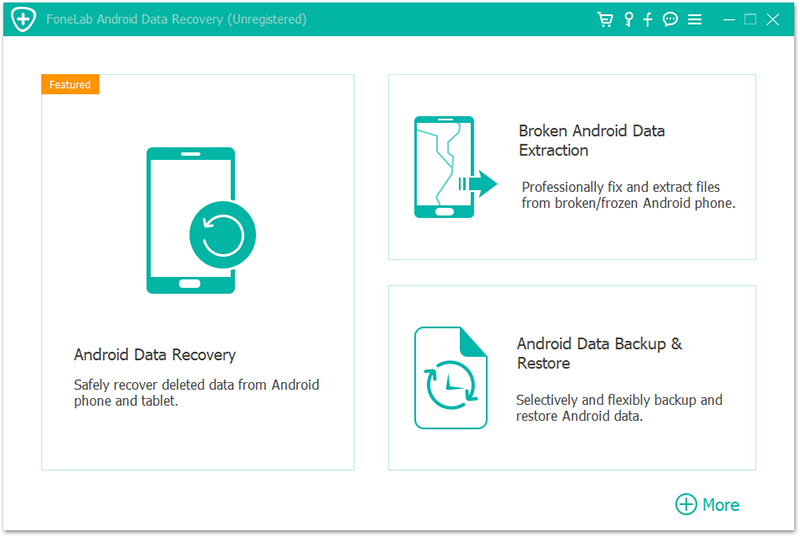
Step 1: First of all, you should connect your Moto G7/G6 to the relevant software.
You can plug your device into the PC using a USB cable. Browse through the menu and click on Choose Recover from the feature section of the menu. Then wait for a little while to enable this toolkit to detect your phone automatically.
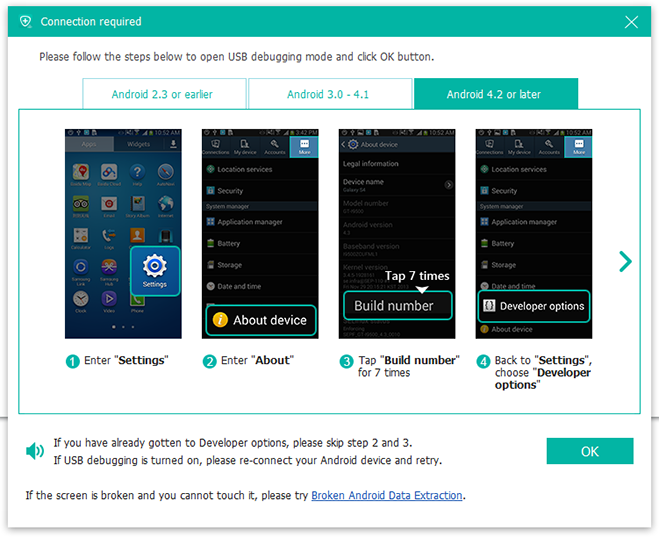
In case your Moto G5/G5 Plus couldn’t be detected, check connections on your phone and enable the USB debugging following the pop-ups.
Step 2: Select photos to scan
Once your device has been detected, choose the file type you want to retrieve. Then tap on Gallery and Videos to scan your photos and videos or any other data that you wish to recover. Click on Next to move to the next step.
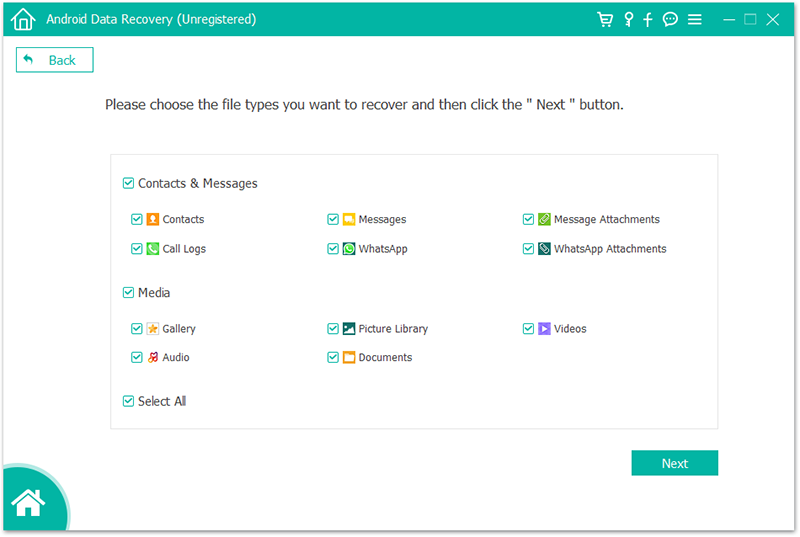
Take a while as scanning goes on and once completed, proceed to the following steps.
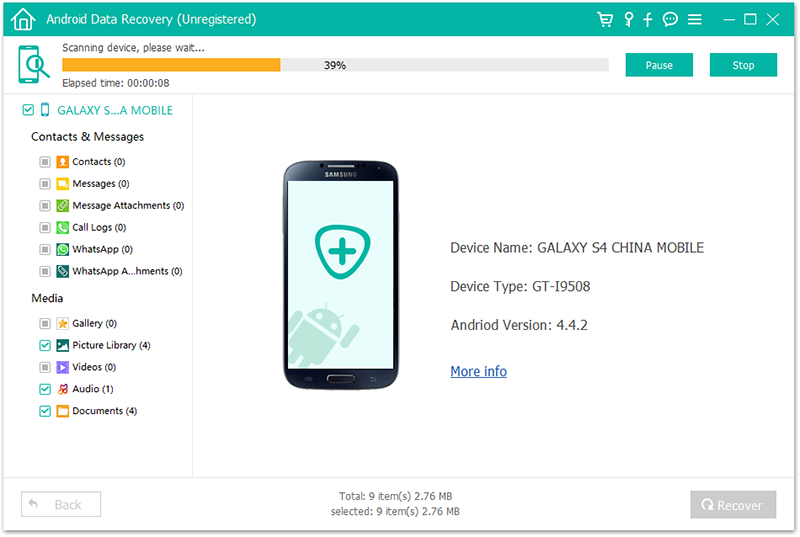
Step 3: Preview and recover your pictures and videos.
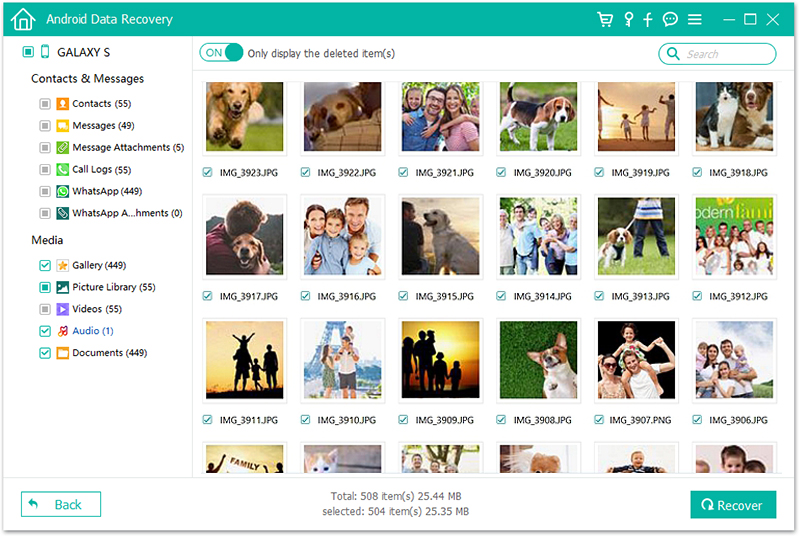
Once scanning is complete, you will see the preview window where you will be required to click the data type on the left side of the screen in order to view contents of your photos and videos.
On the flipside, the recovery toolkit for Android devices does not effectively perform the task of recovering your lost data in a satisfactory manner. As such, you are hereby encouraged to carry out the backup for your photos and videos on a regular basis. If not, you will lose your data and it will be hard to retrieve it.
In a nutshell, you can select your favorite photos and videos by simply checking the checkbox. Afterward, you can click on Recovery to download deleted content to your computer for safe storage.