Apple leaves no stone unturned to add the most amazing of the features to make life a lot easier for its users. Some of the features that Apple introduces are totally based on the feedback of the users.
Well, it was yesterday when I woke up somewhere in the middle of the dead night. I was very sure that I took the phone just to set my alarm and guess what? I ended up spending almost an hour browsing here and there. Most of us have walked down that lane and that road is a tough one. Isn’t it?
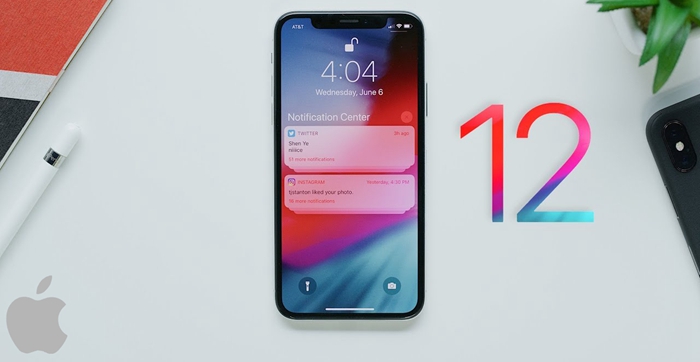
Sometimes, enabling the Do Not Disturb features does you no good. Even if the notifications slide in silently, they crave for attention. To take care of the issue comes into play the bedtime mode which is not the bedtime function but something entirely different. This feature is a brand-new enhancement to Do Not Disturb. The same goes for the Group Notifications. Time to get to know these features a little better.

All about the New Do Not Disturb and Notifications Coming to iPhone
Let’s dive into the features and know them one by one.
How to use Bedtime Mode for Do Not Disturb
How to enable or disable Group Notifications
Now, it gets a lot easier to set Do Not Disturb and that too by using five main options.
1. Bedtime Mode
2. DND for one hour
3. Geofence
4. Do Not Disturb until the next day that knocks in
5. Do Not Disturb with calendar events

If you have set a Do Not Disturb which we generally opt for when we sleep, you get a chance to toggle Bedtime mode for the specific sleeping hours. It is an added feature of the Do Not Disturb.
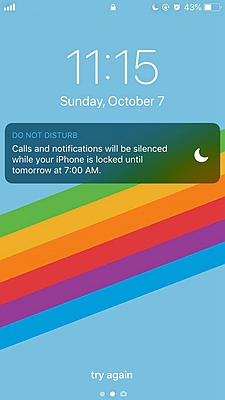
The previous old Do Not Disturb was all about silencing the notifications and calls. The disturbance might not be there but the mobile screen will display all of it.
The advantage with the bedtime mode is that it will dim the lights of display on your mobile screen. Therefore, the next time you pick up your phone in the middle of the night, the bright lights will not pluck your eyes. The second advantage is that the notifications will drop off straight to the notification history. Thus, keeping the lock screen completely blank.
As soon as you unlock your phone, the screen will come back to its normal brightness. All you need to do is a swipe to get the notifications that you have been missing on while your phone was on bedtime mode Do Not Disturb.
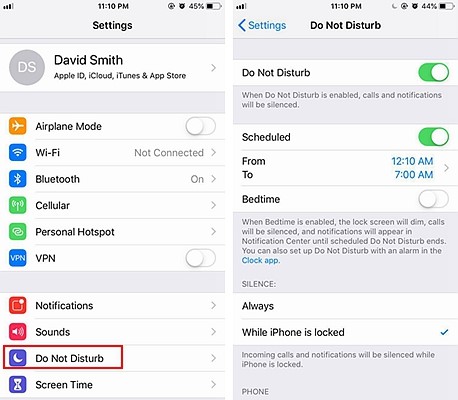
It is quite easy to do the bedtime setting on your iPhone.
1. Go to settings. Click on Do Not Disturb.
2. Set your time for Do Not Disturb if you haven’t already.
3. After you are done scheduling, the new toggle will appear saying Bedtime. All you need to do is turn it on.

After you are done with the time scheduling and your Do Not Disturb is active, your phone will automatically know its bedtime for you. Hence, will go its zone.
This is easy and convenient. No more hassles during the night time. Sleep freely and stay distracted.
Craving to peek on all the very recent alerts from your favourite application? Go for the Group Notification feature to do it in a better way.
Accessing the most recent alerts stays no more of a trouble using the Group Notification feature. Along with that, it also helps in keep mess far away from the notification place. The newest version of iOS does the needful and spontaneously organises the contents from any of your application in different groups.
Apart from offering quick alerts from the specified applications, it also helps with keeping the notification tray clean. Not a fan of automatic separation? Then this feature is the one for you.
Time to know the formula behind the recipe.
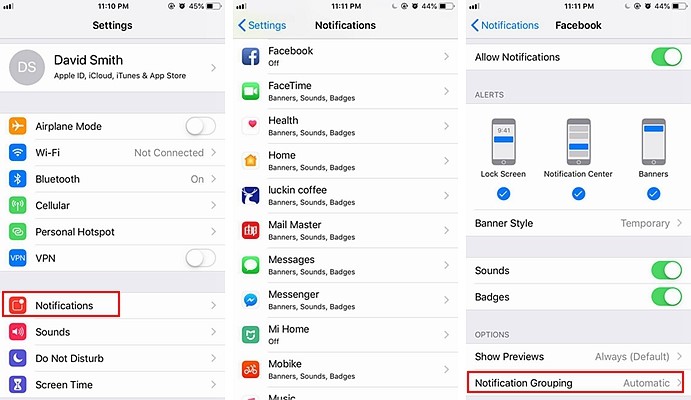
1. Go to settings option on your device. Click on Notifications.
2. Further, choose your all-time favourite application. Click on the app and scroll down. Hit the Notification Grouping option.
3. Finally, choose the option By App.

You are all set to use the feature. All the alerts from the app that you chose will now go and get assembled in one place.
However, one thing to consider here is that, you need to repeat the above-mentioned steps for any application that you are using. Go through the steps all over to set up Group Notifications for different apps.
Also, if you are done trying the feature, you can always move back to the old automatic grouping feature. All you need to do this time is go for the option Automatic.
The interest and requirement of a specific thing vary and the same applies to phones and their features. The Group Notifications feature sure is one of the best options but you might eventually want to switch. So, you can always disable it if it’s not helping you in any way.
An additional note that you must remember is, you have to disable the feature one by one for every application. You can’t do it a once for all the applications.
1. Go to the Setting option on your device. Click on Notifications.
2. Choose the application for which you want to disable the alerts and want the grouping. Go down and hit the Notification Grouping option.
3. Click on Off.
You have successfully disabled the group notifications feature for the application you wanted. Repeat the process to apply on the other apps.
I tried both the features on my iPhone to understand and see if they are up to any good. Honestly speaking, I think the bedtime mode is a cherry on the top to the Do Not Disturb feature.
I had spent lots of sleepless nights and I can’t be thankful enough to the bedtime mode feature for its implications. Overall, I had a great experience with the bedtime mode.
For the group notification feature, it was a good and impactful feature too. Streamlining the notification centre gets a lot easier now and I, for one, had honestly been missing out on this. How about you?
Well, you must try out both the features to know their utilities in a better manner. Accordingly, you can also figure out which one works best for you.