Sometimes we may lose our head due to the broken iPhone, along with all the important data. Have you experienced such a moment that you dropped your iPhone by your carelessness or something unfortunate such as being hit by someone, slipping from your hand, dropping out from pocket when running and so on? How to deal with the ensuing crashed screen, broken screen, blank screen, and irresponsive touching? And you might be upset by the broken iPhone, distressed by the fixing fees, more important the losing data, like photos, videos, WhatsApp messages, iMessages contacts, notes and more other types of files.

What should be first to do with your dropping phone and the important data in it? Here I am going to answer you with several parts.
Part 1: What to Do after Dropping Your iPhone
Part 2: Recover Data from Your Broken iPhone Directly
Part 3: Extract Data from iCloud or iTunes Backup File if Your iPhone Won’t Turn On
There is something you should do before you throw your broken iPhone or send it to repair.
Step 1: Assess the damage of your dropped iPhone.
Situation could go differently from just a little damage of small minor scuff to smashed screen. In addition, check other features like camera, speaker and battery charging etc to evaluate the damage condition.
Step 2: To alleviate your loss, you had better contact with your carrier for help.
Take out any insurance or warranty regarding your iPhone if you have bought, such as the drop insurance or guarantee or Changing or Refunding.
Step 3: What to do if there are not any refunding and changing?
The answer is to research the fixing costs for your broken iPhone, according with the concrete components. You may check on Apple official outlets or inquire in a local creditable repair shop.

However, if you did not do any backup of iCloud or iTunes previously, what can you do then?
Here comes a helpful professional tool iPhone Data Recovery to address the problem. Such an iPhone Data Recovery supports you to recover data from broken iPhone directly without backup from iCloud or iTunes. With iPhone Data Recovery you can recover the deleted data and the existing data from the device, you can even select any partial data of iTunes/iCloud backup fileou expect to recover. It means that you don’t need to copy all data including the unnecessary or redundant ones.
It works perfectly with all iOS devices: iPhone 13, iPhone 13 mini, iPhone 13 Pro, iPhone 13 Pro Max, iPhone 12, iPhone 11, iPhone X/XS/XR, iPhone 8//7/6/5 and iPad, iPad Pro and previous models.
Download WinDownload Mac
Follow these 3 steps:
Step 1: Install and launch the iPhone Data Recovery.
Choose the “Recover from iOS Device” from the main menu. Next you will be reminded to connect your iPhone to computer with USB cable.
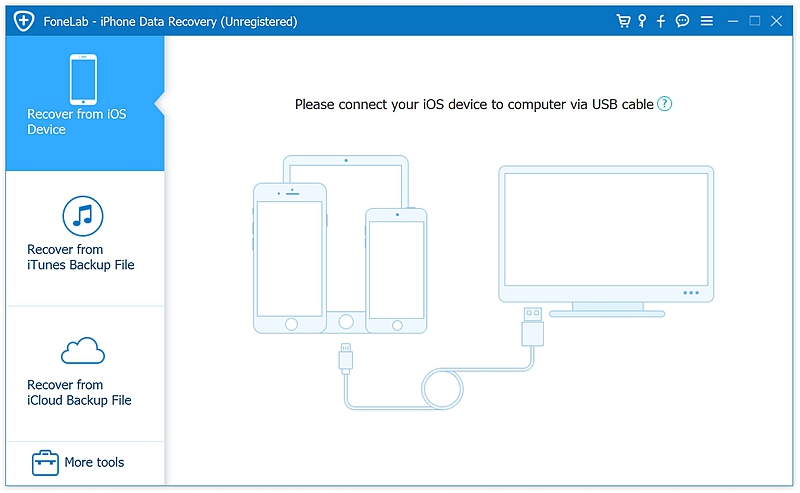
Note that you may need to click “Trust” on your phone for the first time connection.
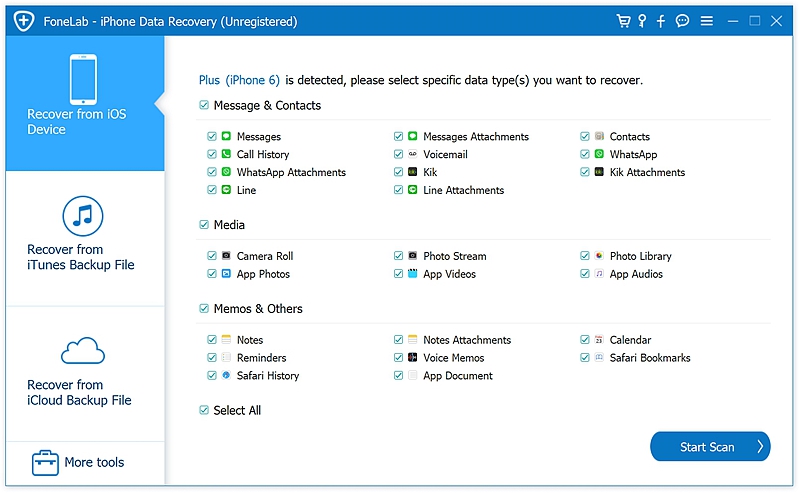
Step 2: You can select all the data deleted or existing or just select some specific data types of your iPhone.
And click button “Start” to start scanning your chosen data. If you don’t need all the data from iPhone, you may selectively recover data as the above display to save your time.
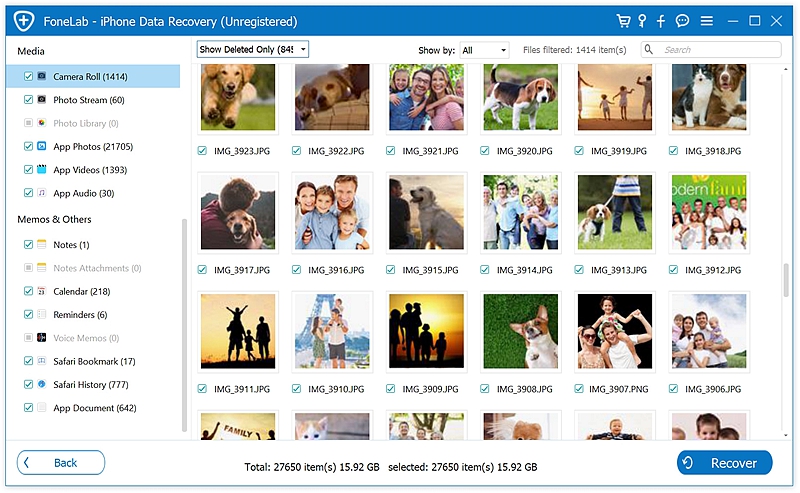
Step 3: Once the iPhone Data Recovery has finished scanning your iPhone, you can preview the recovered data by ticking the file types in the left.
Select all or part of the data types you prefer to recover by ticking the box beside the file types. For example, we chose photos, app photos, messages, contacts from the data type options and select some specific JPG and PNG files in photos preview. Click the bottom button “Recover to Computer” and wait a few minutes for the software to recover your chosen data types.
In this situation I recommend you the iPhone Data Recovery which allows you to preview and choose the specific files you want to recover from iCloud or iTunes backup easily, and you don’t have to connect your iPhone to the software.
Download WinDownload Mac
Here are some steps for you to follow to extract data from iCloud backup files:
Step 1: Run the iPhone Data Recovery and choose the “Recover” feature in the interface.
Next click on “Recover from iCloud Backup File” to move on.
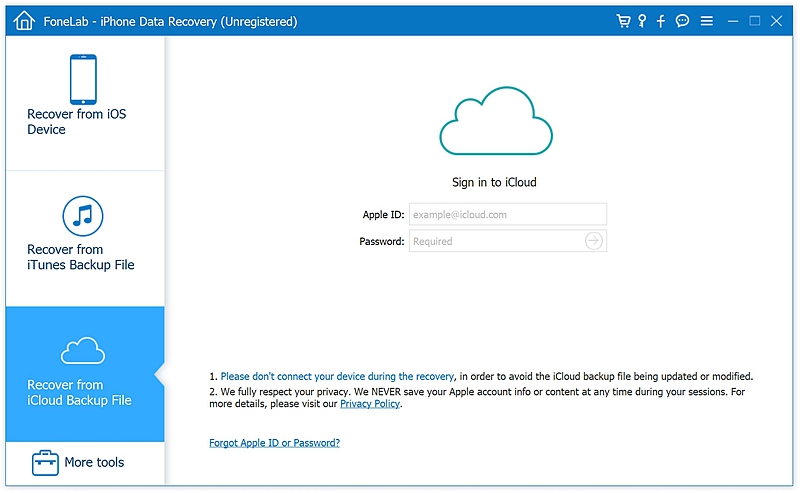
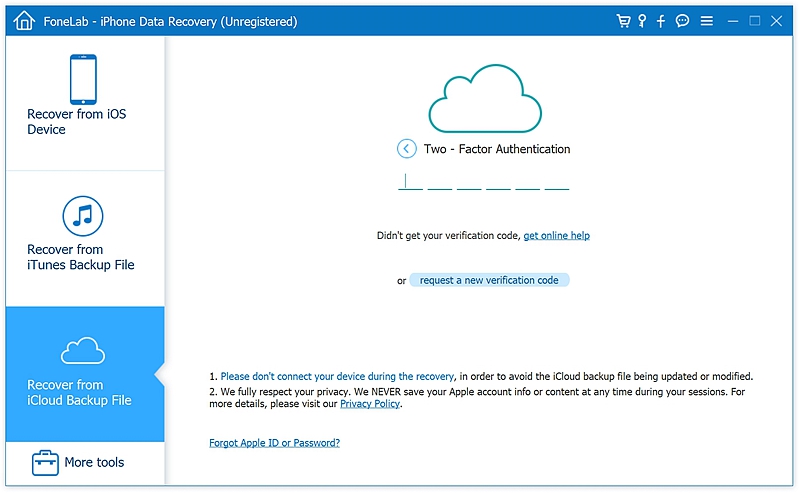
Step2: Sign in your iCloud account.
Find verification code display on your iPhone and input to the software.
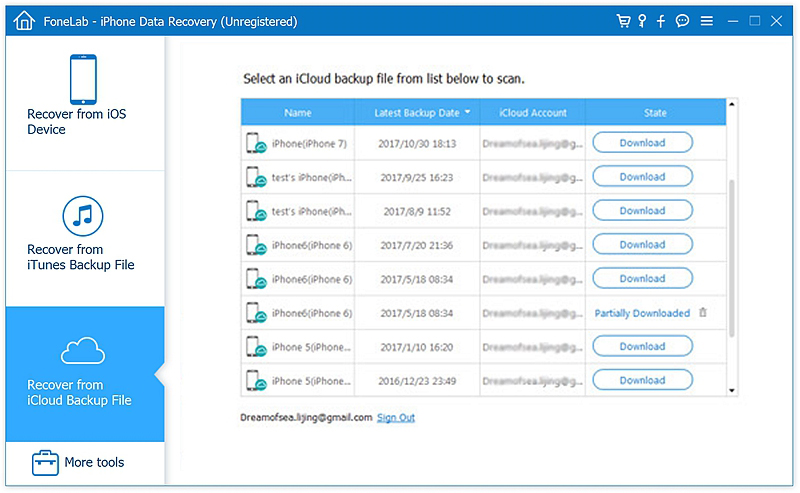
After logging your iCloud, iPhone Data Recovery will scan and download all the iCloud backup files. You are suggested to choose the latest backup in optional bar for obtaining the entire new data.
Then select all or part of the data you want by ticking their choose box and click on the “Next” to download the data contents from iCloud.
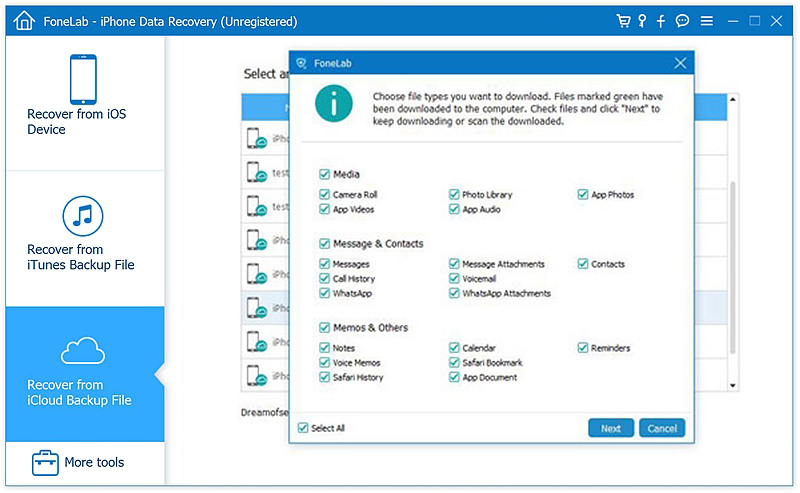
Step3: After downloading, you can preview the recovered data by ticking the file types in the left tab. As you can access, you can selectively recover your preferred data, whatever the lost data or the existing data.
Finally click “Recover” to extract data from iCloud backup files.
If you have made a backup with iTunes recently, recommend you recover data from iTunes while iTunes backup file has all of your phone data include App data and multimedia files, which are not sync to iCloud backup.
Here are steps for you to follow to extract data from iTunes backup files:
Download WinDownload Mac
Step 1: Run iPhone Data Recovery after installing it and choose “Recover” feature on the dashboard.
Next click on “Recover from iTunes Backup File” option.
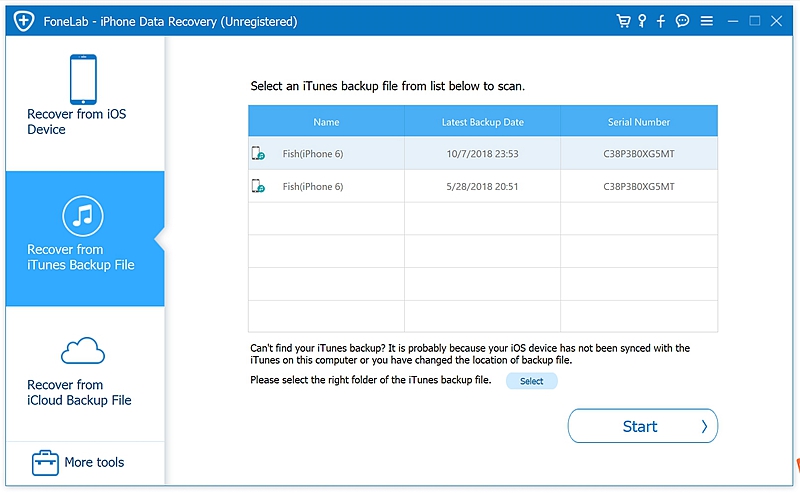
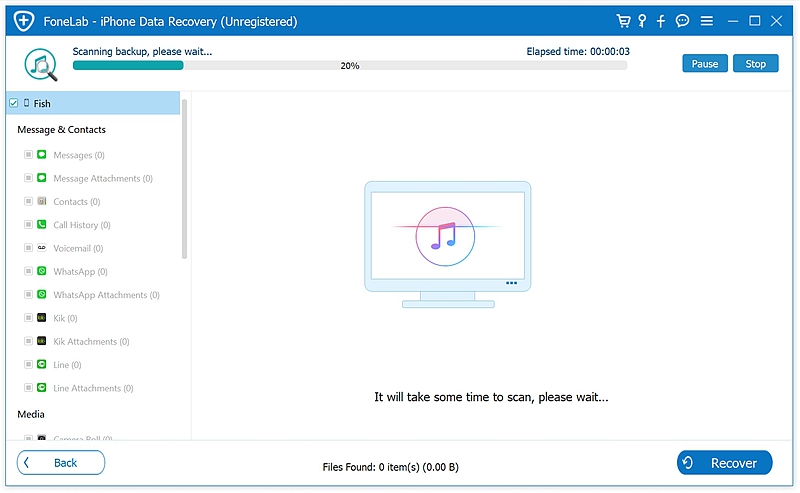
Step 2: Select the “Recover from iTunes Backup File” from the left window. Wait for a while and you will see the available iTunes backup files display on the window.
Choose one backup record and click button “Start” to let iPhone Data Recovery scan and extract the data from iTunes backup
Step3: Once the scan complete, you will see the previewed contents and what you need to do is to tick what you expect to extract.
Also we can select data types and reply data as you can preview. For example here I choose photos, messages, contacts to extract. The data I extract can also be selective.
The last work is to click on “Recover”.