Losing your personal data can be devastating. This can happen to anyone, sometimes during an accident like updating your software, or just simple malfunctioning of your phone that results in loss of data or any other unfortunate situation that leads to loosing of highly sensitive data which is now trapped in the recently deleted folder or iCloud or iTunes of your iPhone. Although the situation was out of your control, you can still gain access to this data on your iPhone. A third party software (iPhone Data Recovery toolkit) can also be used to recover contacts, messages, photos, videos, WhatsApp chat history and files from your iPhone.
1. Recover iPhone data directly without backup
2. Restore data from iCloud backup
– 2.1 The official way to restore iPhone from backup
– 2.2 Download and recover data from iCloud Backup
3. Restore data from iTunes backup
– 3.1 Official way to restore iPhone from backup
– 3.2 Extract and recover data from iTunes backup
This method requires a third party software – iPhone Data Recovery toolkit which narrows down the recovery process allowing you to access any data that you’ve lost by doing an in-depth scan of your phone. Its ability to go through files most efficiently and as quickly as possible allows it to hunt down the file and make them available for recovery.
iPhone data recovery toolkit has the highest success rate in the market and it supports all the iPhone model include the newest iPhone 13 series, iPhone 12 series, iPhone 11 series, iPhone X and XS series and iPhone 8/7/6/5/4 with the latest iOS 15 also. By using this easy to use the tool, you can retrieve your deleted data with a preview from your iPhone without backup, or preview and restore your data selectively from iCloud and iTunes backup file.
Pre Setup instructions: Before you begin the recovery process download or update iTunes to the latest version. Do not turn on the two software iTunes and iPhone Data Recovery toolkit at the same time; we suggest you disable this option as a precaution. This can be done by following this directory:
iTunes > Preference > devices >”Prevent iPads, iPods, iPhones from automatic syncing” (check this)
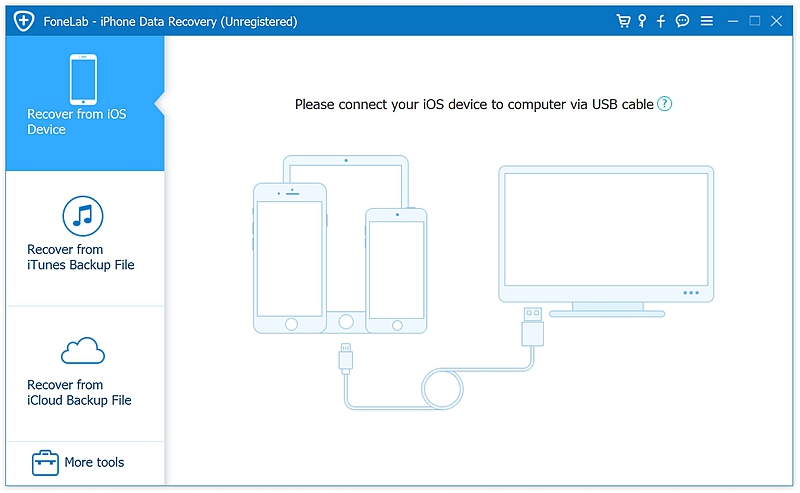
Step 1. First launch “iPhone Data Recovery” application and select ‘Recover from iOS Device’.
Connect your iOS device via USB cable to your computer
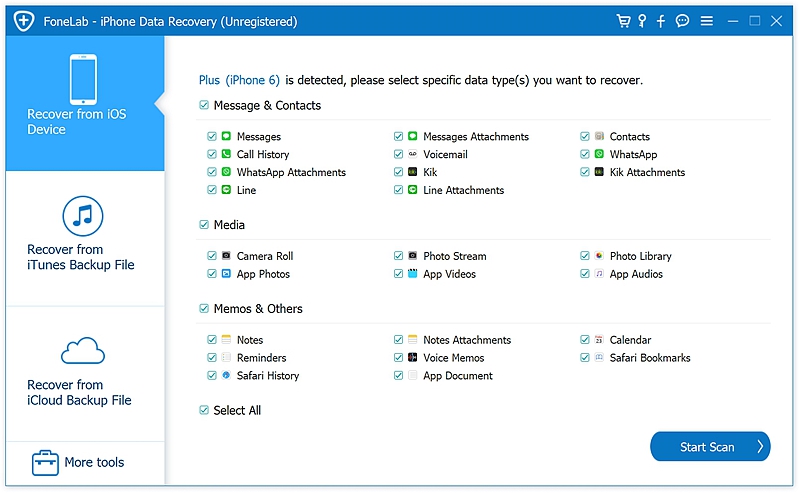
Step 2. Once it discovers your phone, choose the the file types you want to scan and click “start scan” to begin the scanning process of your iPhone.
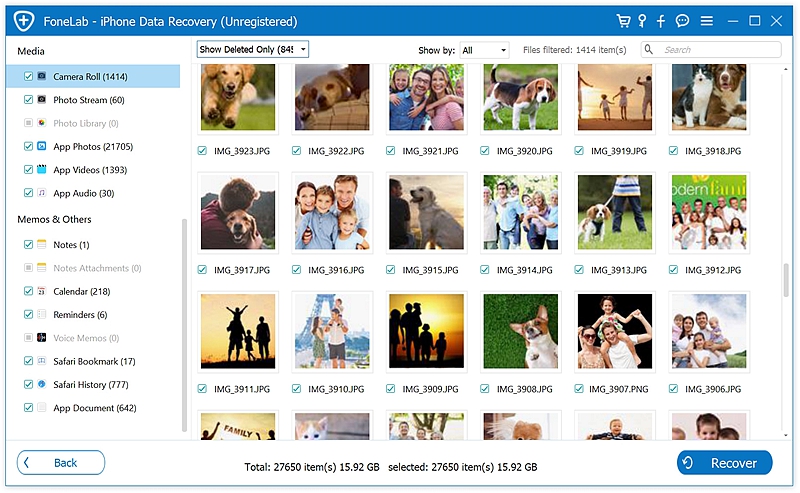
Step 3. Once you spot the data you are looking for, press “pause” to immediately stop the scanning process.
Step 4. Once the scanning process is complete filter out the deleted data you are looking to recover by clicking on the switch “display deleted items”. Now you can press “recover” and choose the location to save the recovered files.
This method has further two ways of restoring. You can check if your phone is automatically backing up or not by following this directory on your iPhone:
iPhone settings > your name profile > iCloud > iCloud backup > backup now
There are further two options for you to choose on how to backup whether to restore to a new iPhone using iCloud backup or simply restore from iCloud backup on your current iPhone.
The following steps need to be followed if restoring to a new iPhone from iCloud backup.
1. Switch on your new iPhone device and follow the instructions as you swipe along.
2. On the screen where it asks you whether you want to set your phone as a new phone or an old phone select the option “restore for iCloud backup.”
3. Type in your apple login id and password followed by selecting the backup file you want to restore from.
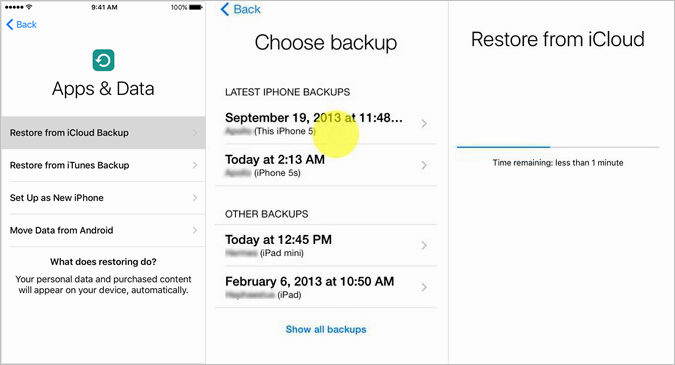
Below is the walkthrough tutorial to restore your current iPhone using iCloud backup:
This is only possible if you perform a factory reset. So, before you do, make sure you perform a complete backup of your iPhone, so you don’t lose your entire data.
1. Open settings app and go to general > reset > Erase all Content and Settings.
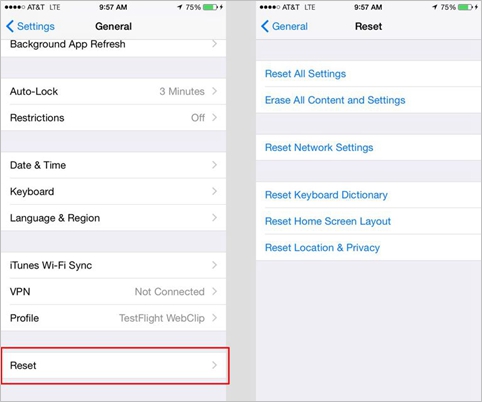
2. Wait for the iPhone to power off and power on again. Follow the onscreen instructions and set up the device just like steps 2 and 3 of “restoring to a new phone.”
Some people may feel insecure resetting their device to restore a small amount of data they’ve accidentally lost. iPhone Data Recovery toolkit is designed to help such user get in touch with just a section of data that they have lost.
Step 1. Run the software and choose the option “Restore” followed by “Restore from iCloud backup.”
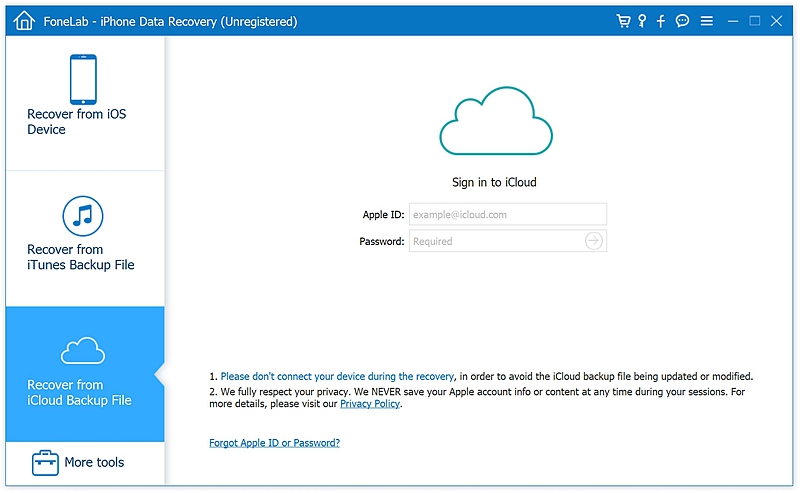
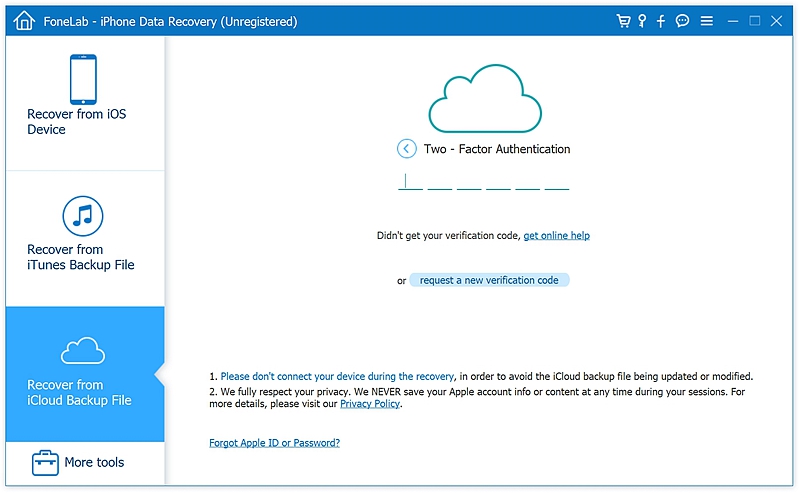
Step 2. Sign in to your iCloud account and enter your verification code if you have been using two-factor authentication.
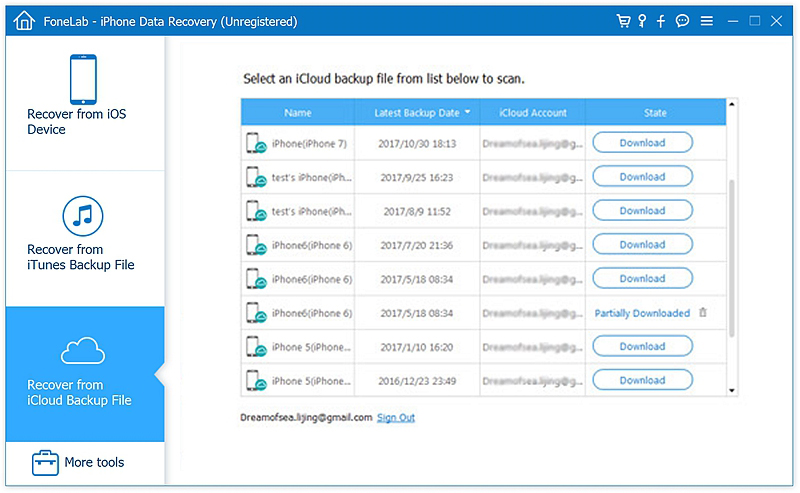
Step 3. The software will display all the backups stored on your iCloud account. Choose the backup that dates back when you had the section data and click “download.”
Step 4. All the files stored in the backup will be displayed. Choose the ones you want to recover and press “recover.”
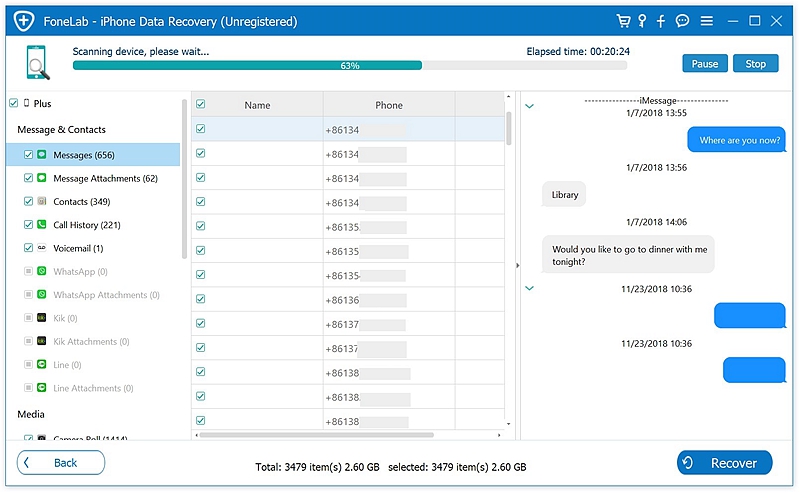
Note: Contact, messages, photos, etc. can be restored to your computer via USB cables.
Before performing this recovery technique, you should know that restoring from iTunes backup may result in overwriting of your phones current data. If you still wish to follow this procedure, there are further two options available.
• iCloud
• iTunes
However, we recommend using iTunes as it not only provides you with more storage for the data but supports offline mode too.
Step 1. Connect your device via USB cable to your computer and launch iTunes.
Step 2. Click on the phone icon from the top menu bar and select “Restore from Backup.” For Mac OS users the menu is on the top left corner.
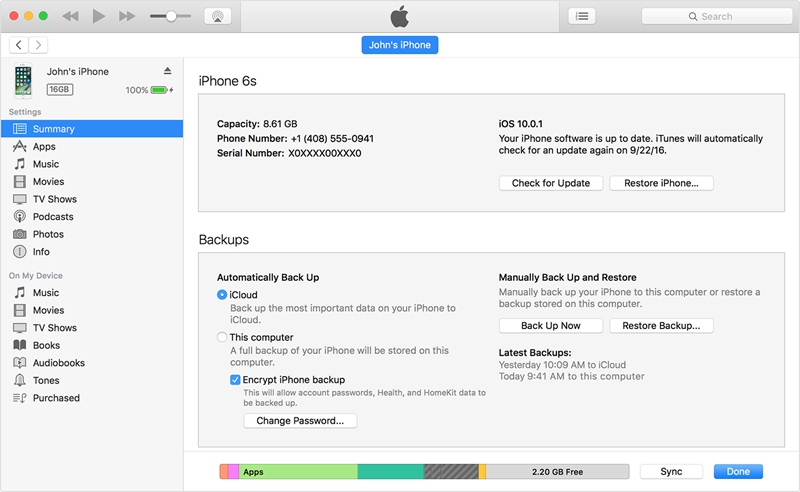
Step 3. Select the back up of your choice from the list.
Step 4. Press restore and let the procedure complete on its own. Upon completion, the device restarts and automatically begins to sync with the computer.
For a smoother experience update your iTunes to avoid any compatibility issues.
The official way to recover data on an iPhone may fail at times, and so an alternative technique (using iPhone Data Recovery toolkit) can be used by following the below steps:
Step 1. Select “Restore from iTunes Backup” from the main window after launching the software. You don’t need to connect your iPhone to computer.
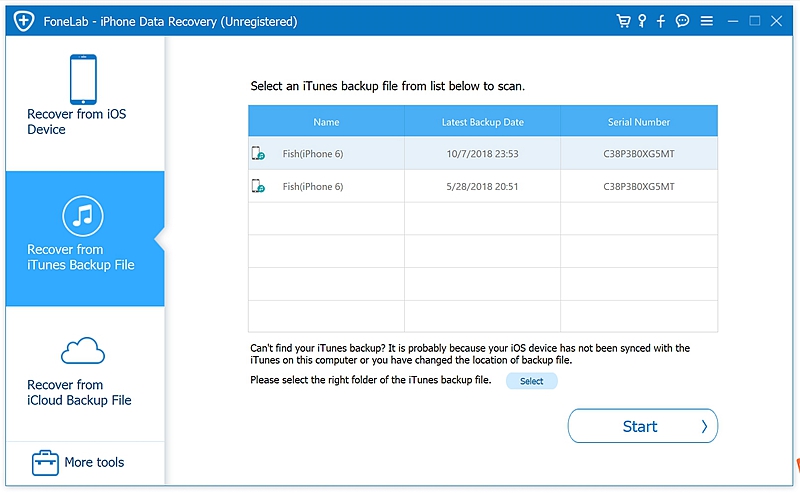
Step 3. A list of backup is made available to you. Select the backup of your choice and press “start” and let the scan complete.

Step 4. You can preview the files that it has filtered out and select the ones you want to recover and save directly to your device.
Performing restore using iPhone Data Recovery toolkit allows you to recover data and add these files to your device without overwriting of existing data.