iPhones are the modern-day version of the video camera. It truly is fabulous technology when all you have to do is turn your mobile phone on, tap the camera app and start filming those great moments. You can get everything from one simple device. You no longer have to miss getting that fantastic memory on video. Never miss your baby’s first steps, that epic celebration, event or vacation. However, there is just one problem. What do you do when you delete those videos by accident. Yep! You did not save them to your computer or to the iCloud and you deleted them by accident. What do you do to get them back? Don’t panic. If you delete your videos from your iPhone by mistake you can get the videos back. In this article we will show you three methods you can use to get your videos back.
Method 1 – Access The iPhone Recently Deleted Folder
Method 2 – Recover Deleted Videos Using ‘iPhone Data Recovery’ Toolkit
Method 3 – Using iCloud or iTunes to Restore
Your Videos Are Back – How Do You Save Them?
One of the nicest things about the iPhone is the fact that Apple goes the extra mile to keep data secure and give users the best backup options. Most users do not realize that the iPhone has a “Recently Deleted” folder. The phone keeps everything that a user deletes here for 30 days. The bad news is that once that 30-day mark is reached, the phone will permanently delete the data.
To get your deleted videos back from the “Recently Deleted Folder” turn on your iPhone and:
1. Tap the Photos icon on the phone. Select “Albums” and then “Recently Deleted.” (Note: If you are using iOS 12 there is an additional category called “Other Albums”. Tap on this section)
2. Once you open the “Deleted Album,” you can view the videos you have deleted.
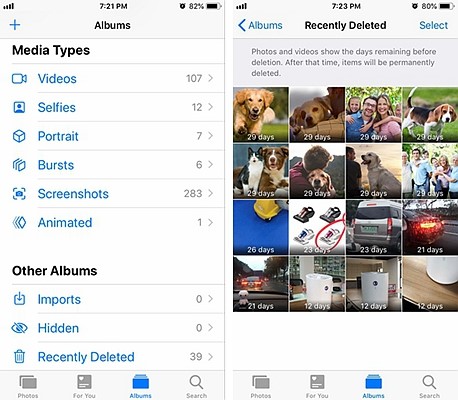
3. Tap the Select option at the top of the screen then tap on the videos you want to select.
4. Tap the “Recover” option. Your videos will restore to your main album.
If for some reason, your videos are no longer in the “Recently Deleted” folder there is another way to recover them. Use a reliable data recovery software program. ‘iPhone Data Recovery‘ is one of the better data recovery software programs on the market. It has an easy to use interface. You don’t need to be tech savvy to recover your deleted videos.
The software works on all iPhones and iPads: iPhone 13, iPhone 13 mini, iPhone 13 pro, iPhone 12, iPhone 11, iPhone X, iPhone XS, iPhone XR and previous models.
This is how the program works.
1. Download and install the softwre on your desktop PC or Mac.
2. Once installed, open the program and select “Recover from iOS device” in the left blue sidebar.
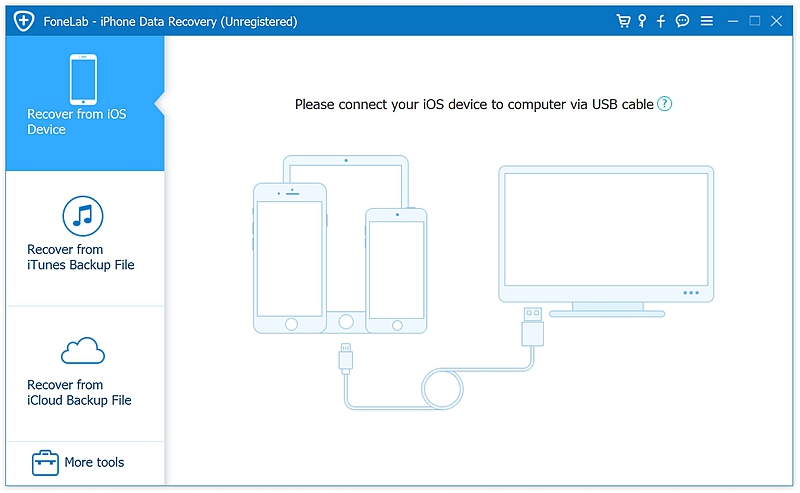
3. Connect the iPhone to the computer via the USB port on the computer. (Use your charging cable.)
4. Select the video option you want to recover and click “Start Scan”. The program will scan the iPhone for videos and show all the videos you can recover.
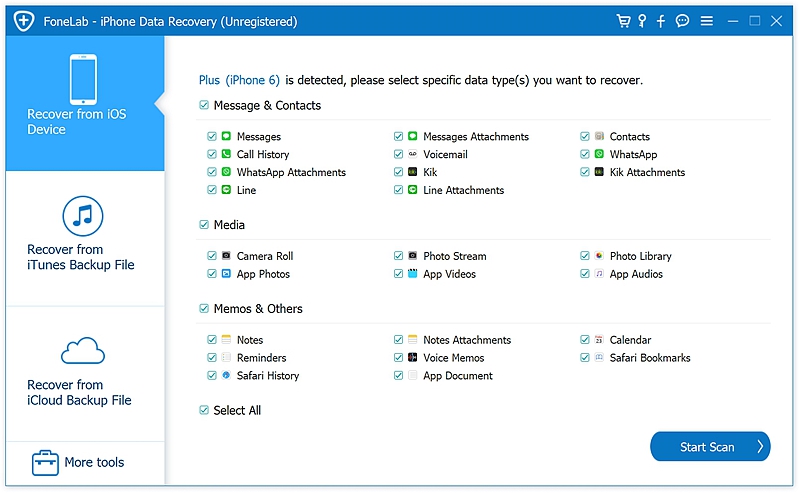
5. Select the videos you inadvertently deleted and click “Recover.”
Your videos should be recovered.
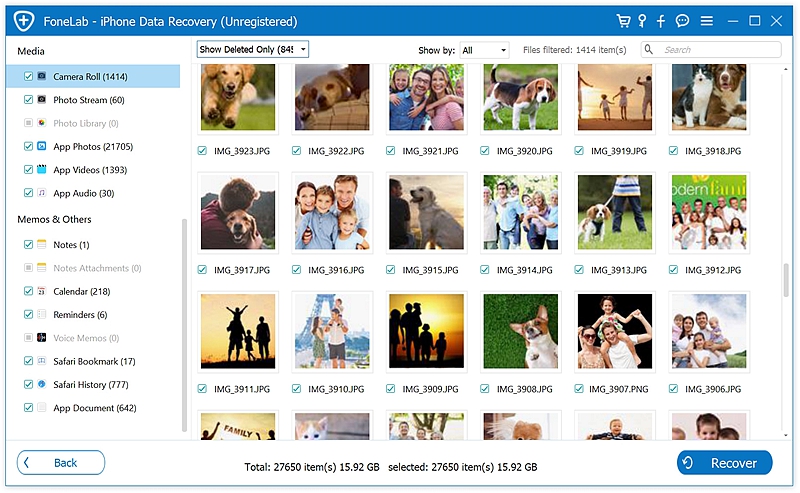
Oh no! It is not there! Now what?
If the iPhone Data Recovery toolkit could not recover the videos from your iPhone directly, they may be in an old iTunes backup. You can use the software to sort through the iTunes backup and help you to restore the videos without having to do a full restore (the full restore contains all phone data including photos, contacts, messages etc.)
1. Open the software and select the option that says “Recover from iTunes Backup” in the blue left sidebar.
You don’t need to connect your iPhone to computer.
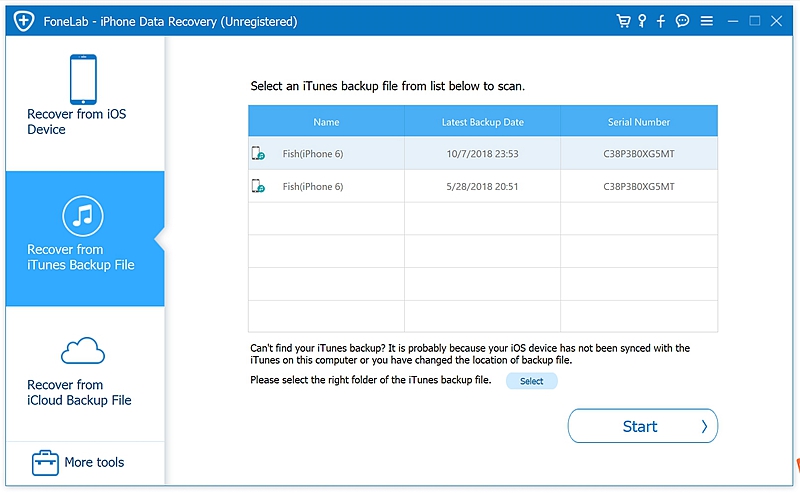 2. Select the iTunes backup you want. Click Next and select the type of video you want to restore.
3. Once it scans the iTunes backup file, the program will give you a preview of the file categories in the iTunes backup. Click the “Photo and Video” option.

4. Select the video files you want and click “Recover.”
Why do it this way instead of restoring your iPhone through iTunes?
When you use ‘iPhone Data Recovery’ software you can selectively restore what you want. And when you restore your iPhone through iTunes, you have to take all of your old data back. You can’t just select the videos you want. iTunes restores everything from your last backup: your old contacts, photos, videos, messages and more. You will have to go through the deletion process again to get rid of the stuff you don’t want.
Another Advantage to Using ‘iPhone Data Recovery’ toolkit
You can use the software to restore the specific videos you want from your iCloud as well, providing you have made an iCloud backup. The process is the same as the above-listed instructions of iTunes, but instead of choosing iTunes you want to choose iCloud.
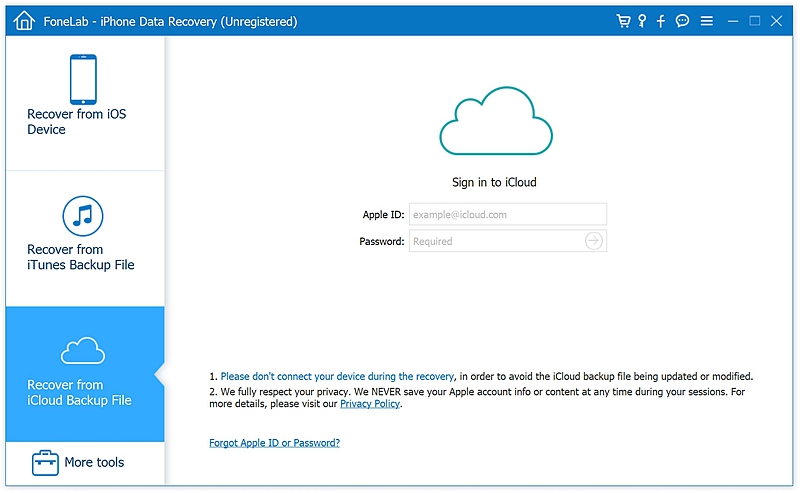
You can also choose to restore your data directly from iCloud or iTunes. However, you should know that both of these methods will restore all the phone’s data. So any photos, videos or contacts you have added since your last backup you made will be lost. Added to this, your phone will take much longer to restore, and any photos or videos you really did delete because you no longer want them will also restore.
To restore from iTunes:
1. Connect your device to your computer
2. Open iTunes and select “Restore Backup.”
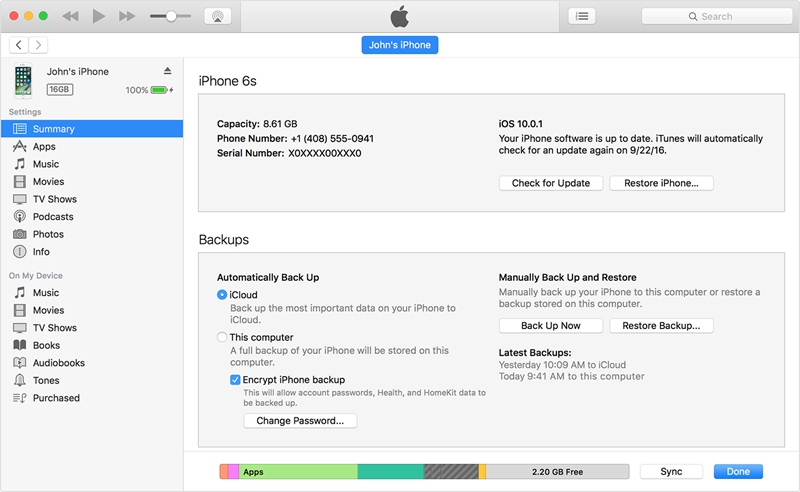
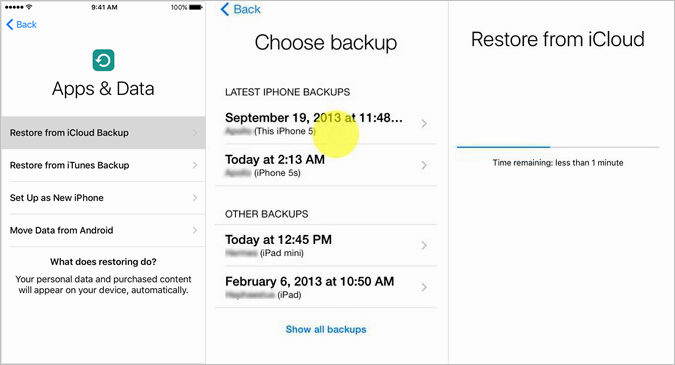
To Restore from iCloud:
1. On the iPhone go to Settings, tap General
2. Tap Reset and then tap “Erase All Content and Settings.” (Make sure you actually have an iCloud backup to restore, otherwise, you will erase all your data)
3. When your iPhone startup, Go to the Apps and Data screen and tap Restore from iCloud Backup and sign in to your iCloud
Once you restore your videos you want to store them on your computer to free up space on your iPhone. These instructions will help you transfer your videos to a folder on your computer.
1. Connect your iPhone to the PC via the USB cable.
2. Tap “Allow” on the iPhone device to allow the computer access to the iPhone files.
3. On your computer, go to “My Computer.”
Click the iPhone device icon that you see in the bottom list of connected devices.
4. Click the iOS folders and browse for the videos you want to copy over. Select the video and with the right mouse button or trackpad button select Copy.
5. Open the folder where you want to save the videos on the computer. Right click and paste the video there.
If you are transferring the videos to your Mac computer the Photos app appears automatically when you connect the iPhone to the computer via the USB cable. If it does not open, click on the Photos app at the bottom of the screen. To import certain videos, click the ones you want and click “Import Selected.”