Sometimes you can accidentally delete important messages because you pressed the wrong button or maybe you lost all your messages after an Android upgrade failure, rooting, factory resting or even unexpected system crash. Well, you are not out of luck because you can still retrieve the deleted messages or old text messages as long as they are not overwritten by new data.
In here, we will show you how you can recover your deleted text messages from your Samsung galaxy.
1. Recover deleted text messages from Samsung Galaxy with software
2. How to back-up messages for Samsung Galaxy
2.1 Samsung Smart Switch
2.2 SMS Backup & Restore and SMS Backup + App
The most used and trusted way of recovering deleted text messages from Samsung galaxy is by the use of an Android Data Recovery software. Android Data Recovery software helps in recovery of deleted SMS, videos, pictures and contacts from Samsung devices. FoneLab is the world’s first Android data recovery software, hence it is completely safe and reliable. This software can retrieve back your data whether your Android device is damaged, virus attacked, or busted, as long as it can be detected by FoneLab for Android.
Advantages of FoneLab Data Recovery software
Recovery of deleted text messages from Samsung Galaxy step by step
STEP 1: Connect Computer with your Samsung Device
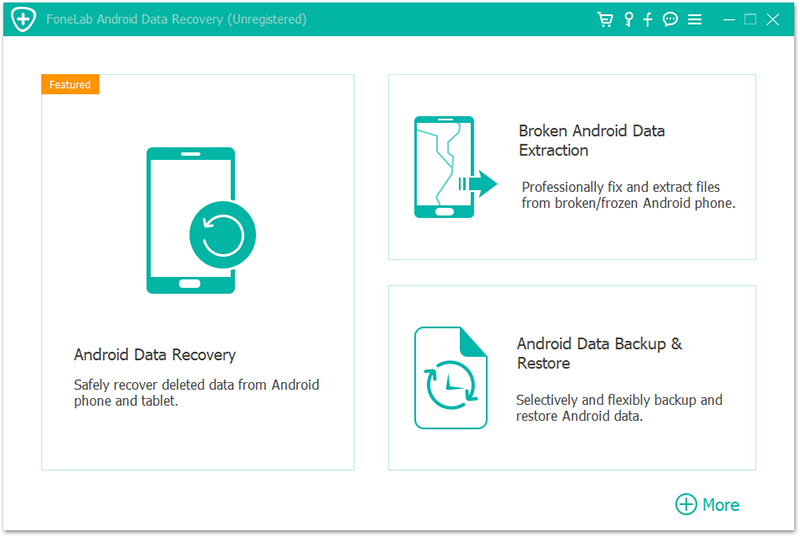
First, download, install and run the program. Pick “Android Data Recovery” option and then connect your Samsung phone to PC via USB.
STEP 2: Enable USB debugging on our Samsung Galaxy
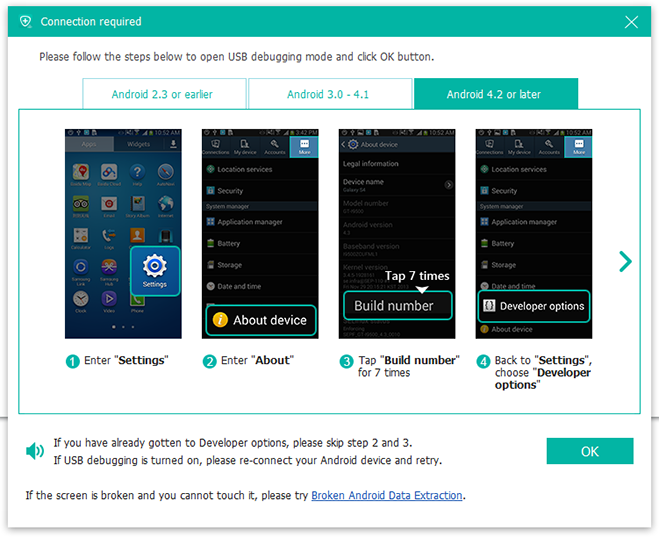
If you haven’t opened the USB debugging option, the program will request you to do the following. Follow the process below;
STEP 3: Examine and Scan your Samsung Galaxy for lost text messages
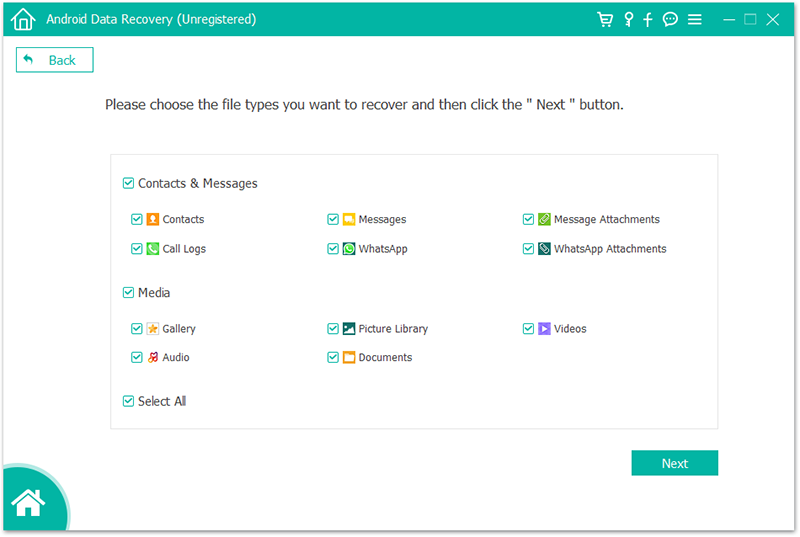
The program now needs to analyze your device before scanning it. To begin it you can select the file type “Messages” and then click “Next” on the window.
When you get the next window, move to your phone and tap on “Allow” to enable then Superuser Request, and then click “Start” on the program’s window to begin the scanning process for your Samsung Galaxy.
STEP 4: Preview and restore deleted Samsung messages
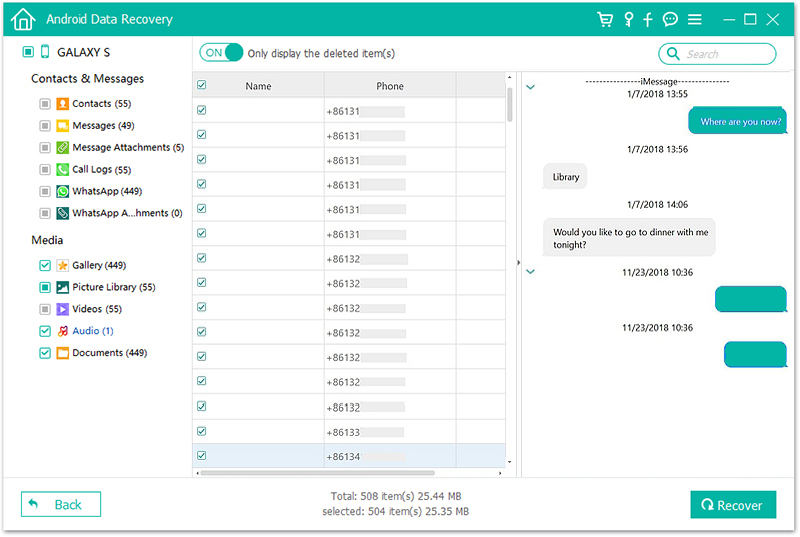
When the scan is complete, you can now preview the whole message contents in the scan result as a list. You can go through them one by one and select those you want to recover and click “Recover” button to save them as HTML file on your computer.
Apart from messages, you can preview and restore photos, contacts, and videos. Contacts can be saved as HTML or CSV on your computer.
Samsung Switch software is available for both Mac and Windows. It can be downloaded for free from the Samsung Switch website.
The software is engineered for transferring to a new device, but it can be used to create backups. Additionally, you won’t be able to actually read your backed text messages until they are restored the device. To be able to read your backed-up text messages follow the instructions below.
STEP 1: Install the Smart Switch application
Run the downloaded installer and follow the prompts to install Smart Switch. Many users usually leave the installation settings at their default.
STEP 2: Connect your Samsung device to your computer
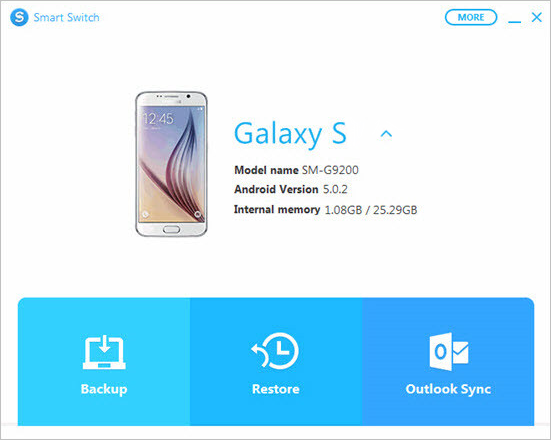
Once you have connected your Samsung device, ensure it is visible in the Smart Switch window.
STEP 3: Back-up
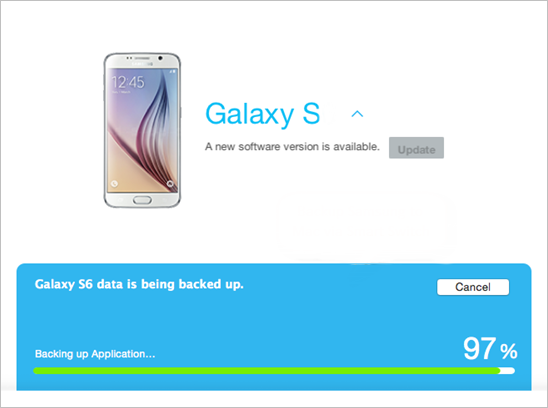
Once you have clicked the “back-up” button, Smart Switch will begin backing up your devices, including your text messages. The back-up files will be stored in your “Documents” folders by default. To change this, click the “More” button and select your preferred location.
STEP 4: Restore your backup
When you need to restore your back-up messages, you can use the Smart Switch app. Just click the “Restore” button and choose the backup file you want to restore from.
SMS Backup & Restore and SMS Backup + are the two most popular apps that allow you to create backups of your text messages that can be read on your computer. Both apps are available for free.
SMS Backup + will create a folder in your Gmail account with all your SMS conversations, while SMS Backup and Restore will create an XML file that can be open in your browser.
STEP 1: Connect your Gmail account (SMS Backup +)
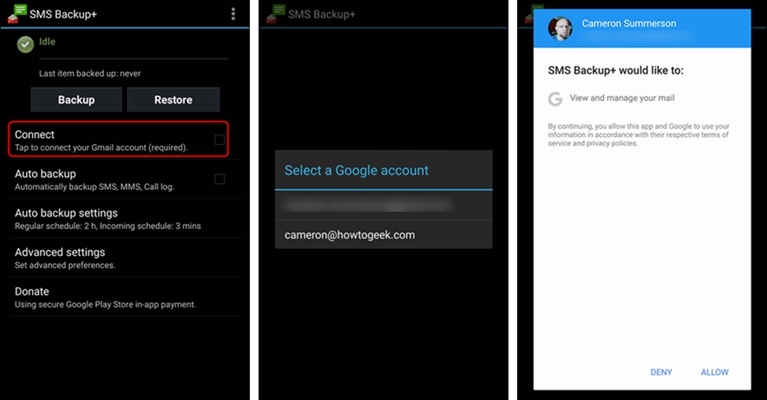
By deciding to use SMS Backup +, you will need to connect your Gmail account so that the messages can be backed up. This can be achieved by tapping the” Connect” option on the main menu. You will be instructed to log into your google account.
In order for this app to work, you will need to enable IMAP on your Gmail Account. You can do this from then “Setting menu” of your Gmail inbox, in the “Forwarding and POP/IMAP’ section.
STEP 2: Start the backup process
After configuring the app, you can start the backup process. It will be a bit different depending on the app you are using.
SMS Backup & Restore: Tap the “Backup” button and choose your backup options. If you choose to include MMS messages the backup file will become larger. This app allows you to upload the backup file directly to the cloud storage account, which can make transferring it to your computer much easier.
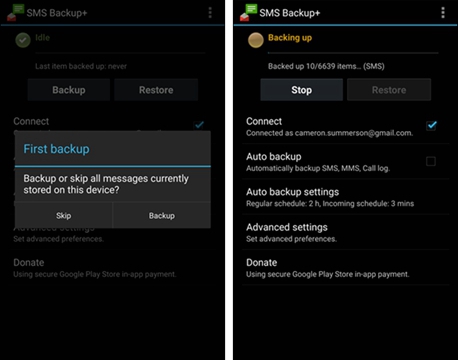
SMS Backup +: Tap the “Backup” button and wait while your texts messages are sent to your Gmail account. It can take a while if you have a lot of messages to backup. If it is the first time backing up, you’ll be prompt to back all the messages in your device. MMS messages are always backup by default.
STEP 3: Transfer the backup file to your computer (SMS Backup & Restore)
If you use SMS Backup & Restore app, it will take an extra step to back up your files onto your computer. If your backup file is in a Cloud storage service, simply download it using the web browser on your computer.
If your backup file is saved in your Samsung Galaxy device, you will need to transfer it to your computer by connecting your device to your computer and then browse for it. The backup folder will be named as “SMSBackupRestore” and the XML file will be labeled with the date it was created.
STEP 4: View your backed-up SMS files
Reading your backed-up text messages will be different depending on what app you used.
SMS Backup & Restore: Open the XML file that you transferred to your computer in a text editor like Notepad, to view all the text messages it contains.
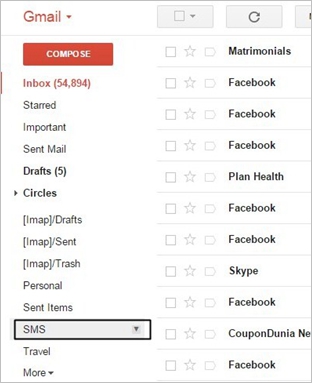
SMS Backup +: Find a label in Gmail called “SMS” and open it. It will contain all of your SMS conversations organized by contact. You can view them as you view your emails.