For transferring photos from Samsung Galaxy S/Note to iPhone/iPad, there are two general ways of photos’ backup and transfer, which are through local storage and through the cloud, and each has its advantages and disadvantages. For a simple idea, the cloud needs an Internet connection to upload, sync, and download any file while local storage doesn’t require any network. Moreover, you can access your file anywhere from any device if you make use of the cloud while you can only view your file on the specific device. In fact, there are more comparisons between these two ways, such as the amount of the storage space, security and privacy, and so on, we will explain further in the ensuing paragraphs.
Method 1: Manually Move Photos from Samsung to iPhone/iPad Through iTunes
Method 2: Move Photos from Samsung to iPhone/iPad Through Google Photos
Method 3: Transfer Photos from Samsung to iPhone/iPad Through Phone Transfer
The method introduced here is simple, but comparatively time-consuming because a copy-paste will do while connecting your Samsung phone to the PC via USB. The great thing about this method is that next time you connect your iPhone/iPad to sync with iTunes, the program will scan the designated folder and if you’ve added more pictures in there, they will be synced at once.
Step 1: Connect your Samsung Phone to your computer through USB cable and copy the files manually over to your PC.
– On a Windows, it will likely be found under This PC > Phone name > Internal Storage > DCIM > Camera.
– On the Mac, go to Android File Transfer > DCIM > Camera. Also, check the Pictures folder.
Step 2: After you have the latest version of iTunes installed on your computer, then, plug your iPhone/iPad into the PC correctly. Launch the computer program, iTunes and click the button “photos” at the top menu of the homepage.
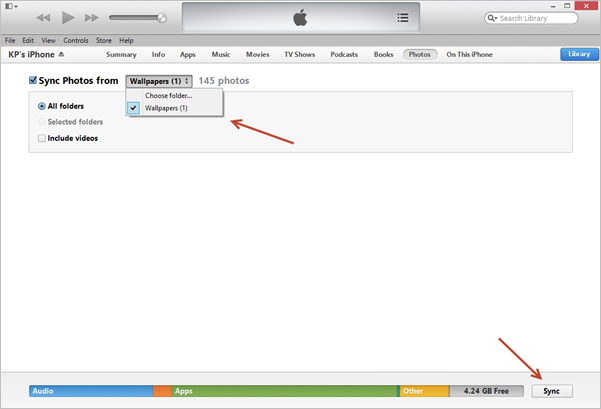
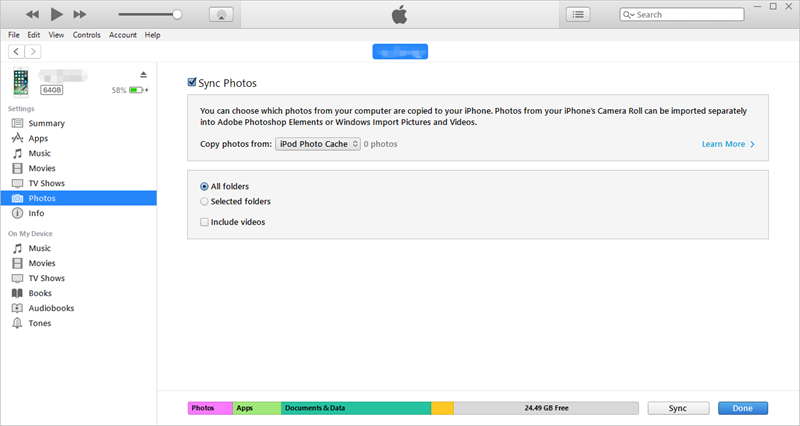 Step 3: Seek out the option that says “Sync Photos from”, besides which you’ll find a drop down menu, choose the folder includes all photos from your Samsung phone. Finally, click the button “Sync” in the bottom right corner and after that, you can see all your photos have been transferred to a new album of your iPhone/iPad.
Google Photos is a photo sharing and storage service developed by Google and it is available as a free download in the iTunes App Store. You need to sign into a Google account to get started, and you can easily switch among multiple accounts. Let’s have a look at operating instructions of this method!
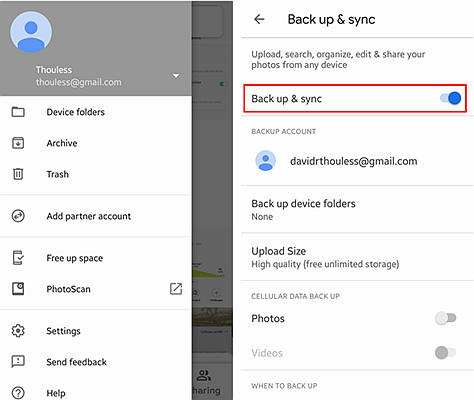
Step 1: Run Google Photos on your Samsung phone, tap Menu icon at the top left corner of the homepage, hit Settings > Back up & Sync , then on the next page, you need to turn on the option “Back up & Sync” and “Photos” manually so that all photos on your Samsung phone will sync automatically.
Step 2: After the installment of the app – Google Photo from App Store on your iPhone, sign the same Google account that you logged on your Samsung phone, and then you can view all your photos there.
Step 3: To download photos in Google Photo, there are three alternative ways:
– Go to site Google Page, after choosing several photos that you want to download by ticking the upper-left box, click the Menu button at the top right corner of the page.
– In the mobile version of Google Photo, you can only download cloud backup photos which can’t found in local storage. Moreover, you can only download one image at one time. Tap the photo you want, and hit the Menu button to choose the option “download” (in the version of iOS)/ “Save to device” (in the version of Android).
– Start the mobile version of Google Drive, and choose Google Photo. After selecting photos that you hope to download, tap the Menu button, then click “make available offline” (in the version of iOS)/ “download” (in the version of Android).
Phone Transfer is a tool for file transmission between two mobile devices and it is well-designed to exchange high-quality data. So transferring photos from Samsung Galaxy S8/S7/S6, Note 7/5/4 to iPhone 7 or iPad Air/Mini and at the same time, keeping the quality of the original images, is very simple if you choose to make use of it. Maybe it’s better to mention that your computer should have iTunes installed before we begin the transfer of photos. Next, I will show you the operational process by using Samsung phone and iPhone as an example.
Download WinDownload Mac
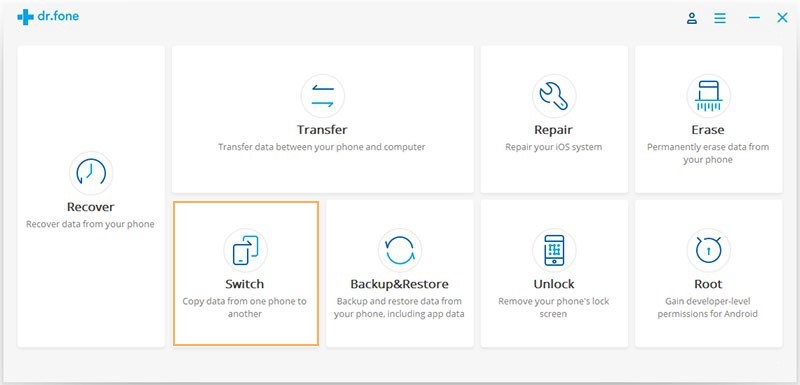
Step 1: After launching the computer software Phone Transfer, click on “Switch”.
 Step 2: Connect both of your two phones to the PC. Connect your Samsung device first then your iPhone, so that the former device can be detected automatically by the program as the source phone. There is a button “Filp”, whose function is to exchange the positions of source device and destination device.
Note: Take no notice of the option “Clear data before copy” because the data on your iPhone will be possibly covered by accident if you tick it.
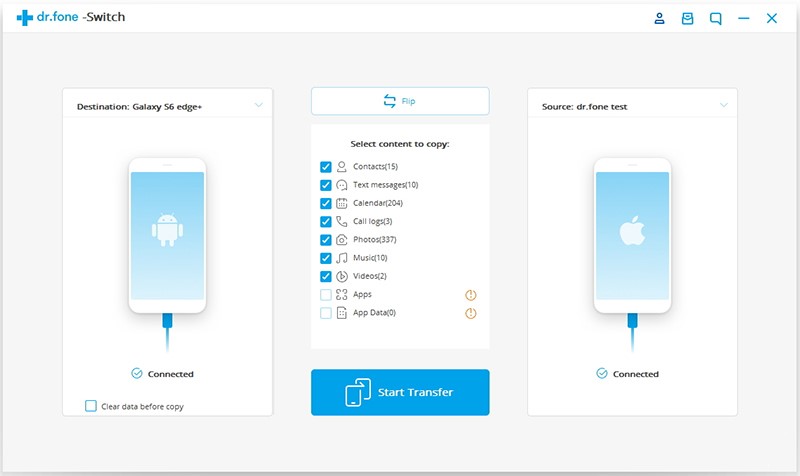
Step 3: Select “Photos” as the content to copy by ticking the small square box before it, and click the blue button “Start Transfer”. When a pop-up window appears to inform you that the transfer process is complete, then you can view your previous photos on your iPhone.
Frankly speaking, these three solutions are all proved to be practical, but the powerful tool Phone Transfer is a competitive way, because it offers a comparatively large space of computer local backup, and furthermore, it enables users to transfer not only photos, but also contacts, messages, apps, videos and so on by just one click. After introducing three practical solutions of transferring pictures from Samsung to iPhone/iPad, did you finally solve your problem through one of those? Do share your thoughts in the comments below if you encounter any problem, I will respond to each and every one of them.